
Account Management
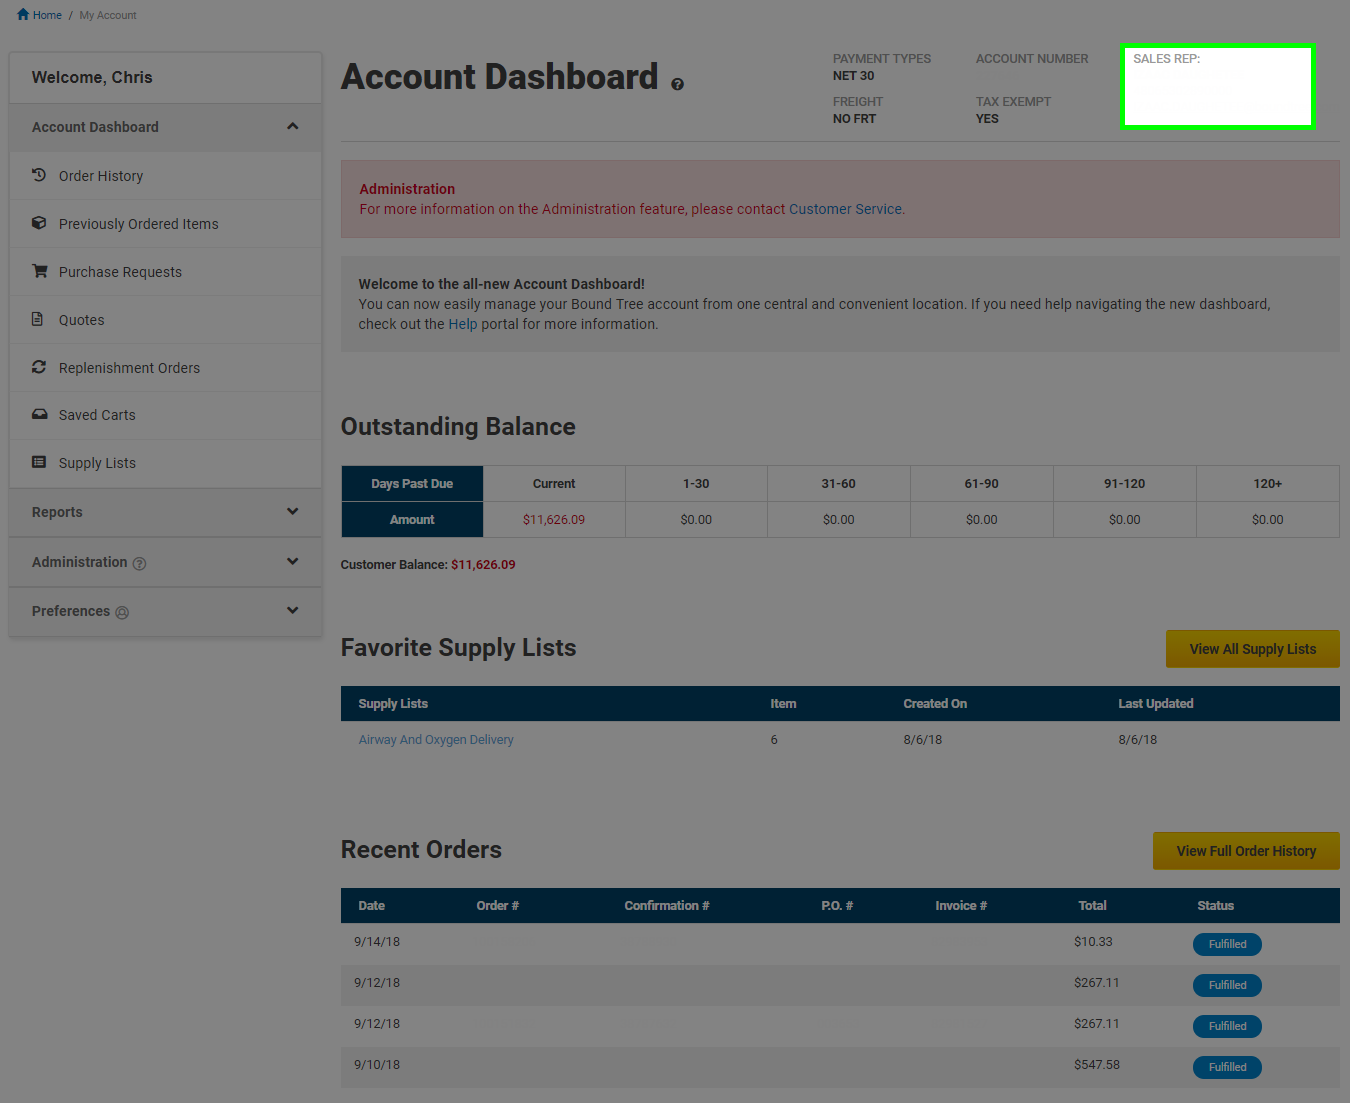
Manage your Bound Tree account from one central and convenient location. The Account Dashboard allows you to see your account details, view your Order History, manage Saved Carts, view and share Supply Lists with other users on your account, and run various Reports.
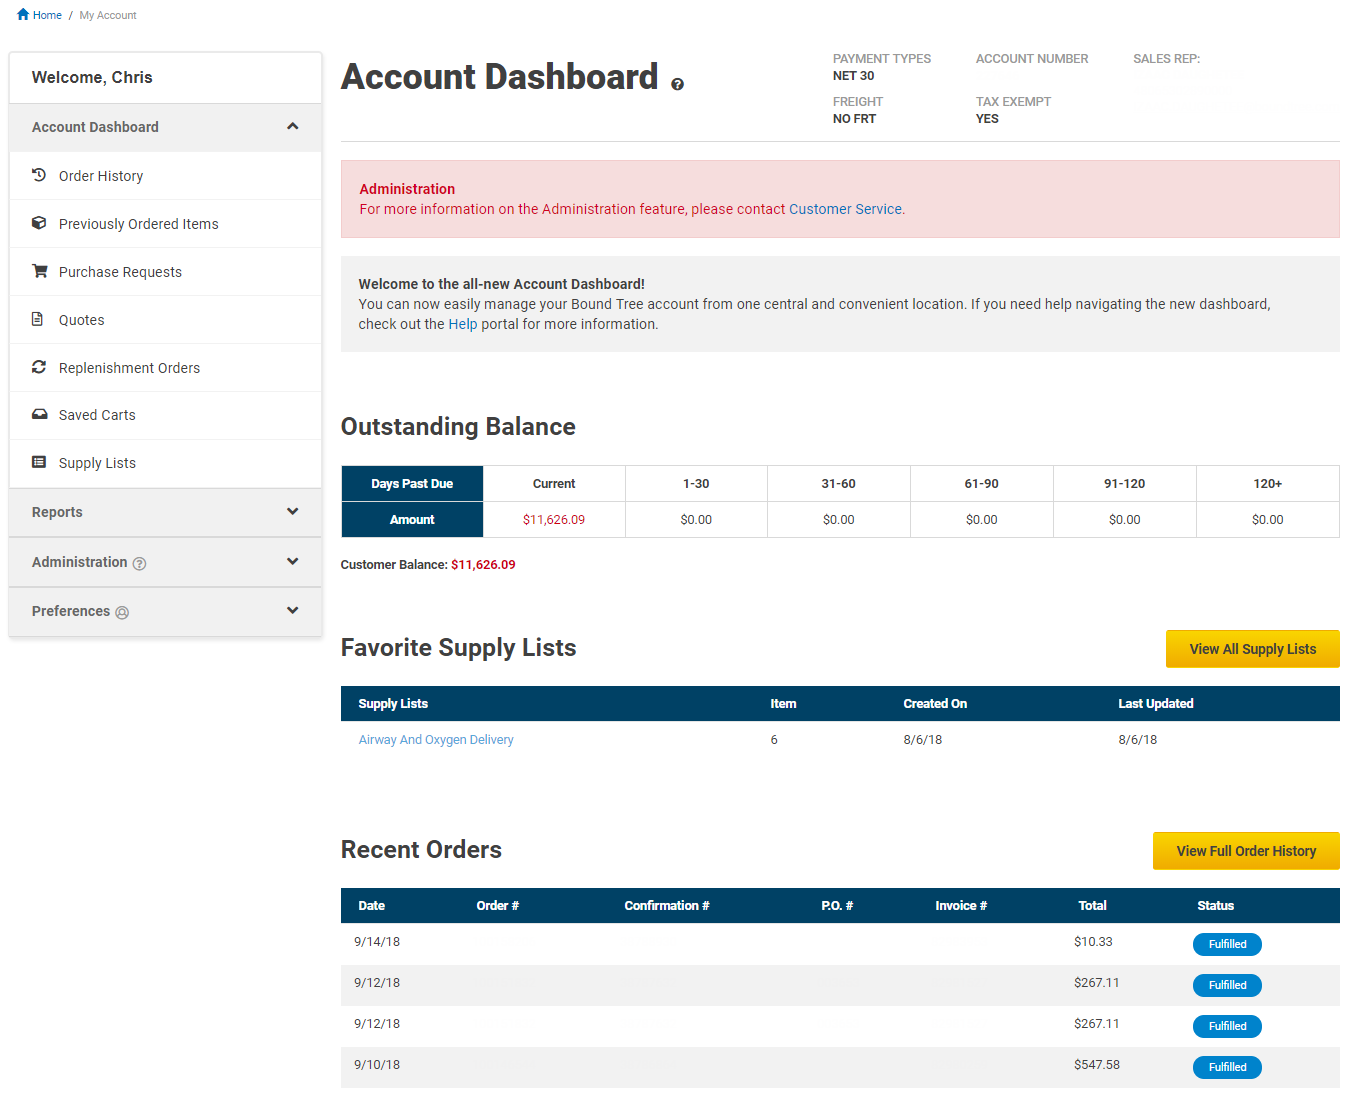
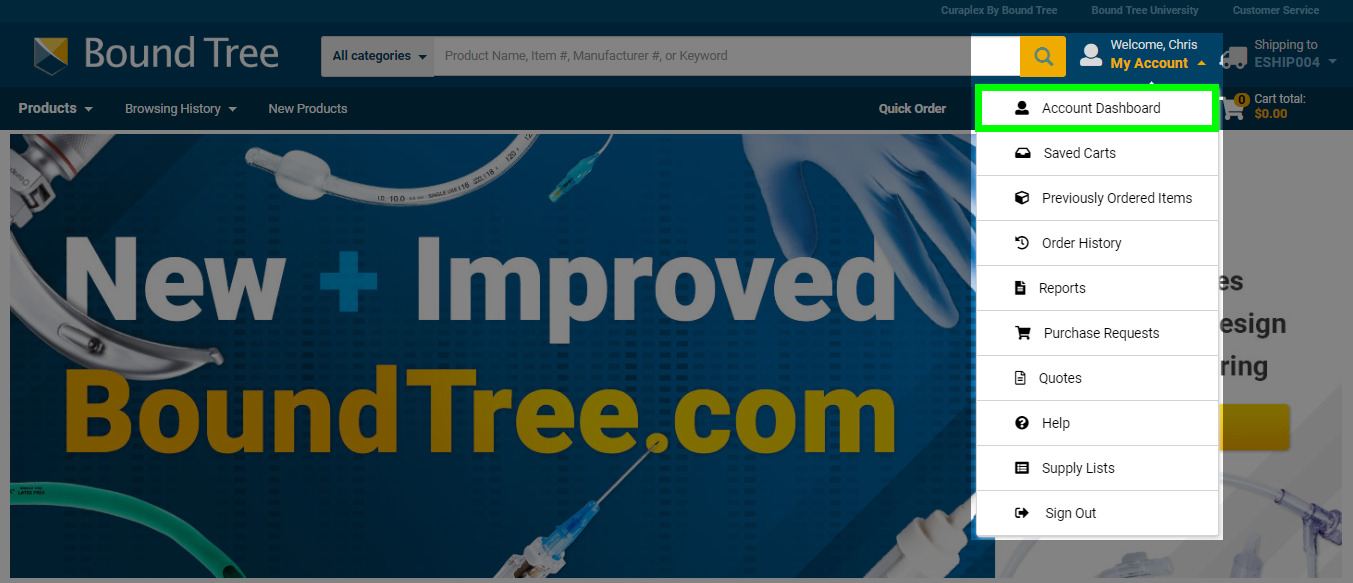
To access your Account Dashboard click on the My Account drop down at the top of the page when signed in and select it from the list.

Add or remove users to your account, change permissions, and enable or disable your account registration access to prevent new users from linking to your organizations account. The Users section of the Account Dashboard gives you control over your account. This functionality is only available to users with the "Admin" user group on the account.
To start, click on the My Account drop down at the top of the page when signed in and select the "Account Dashboard" link.
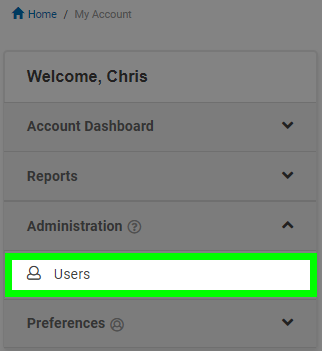
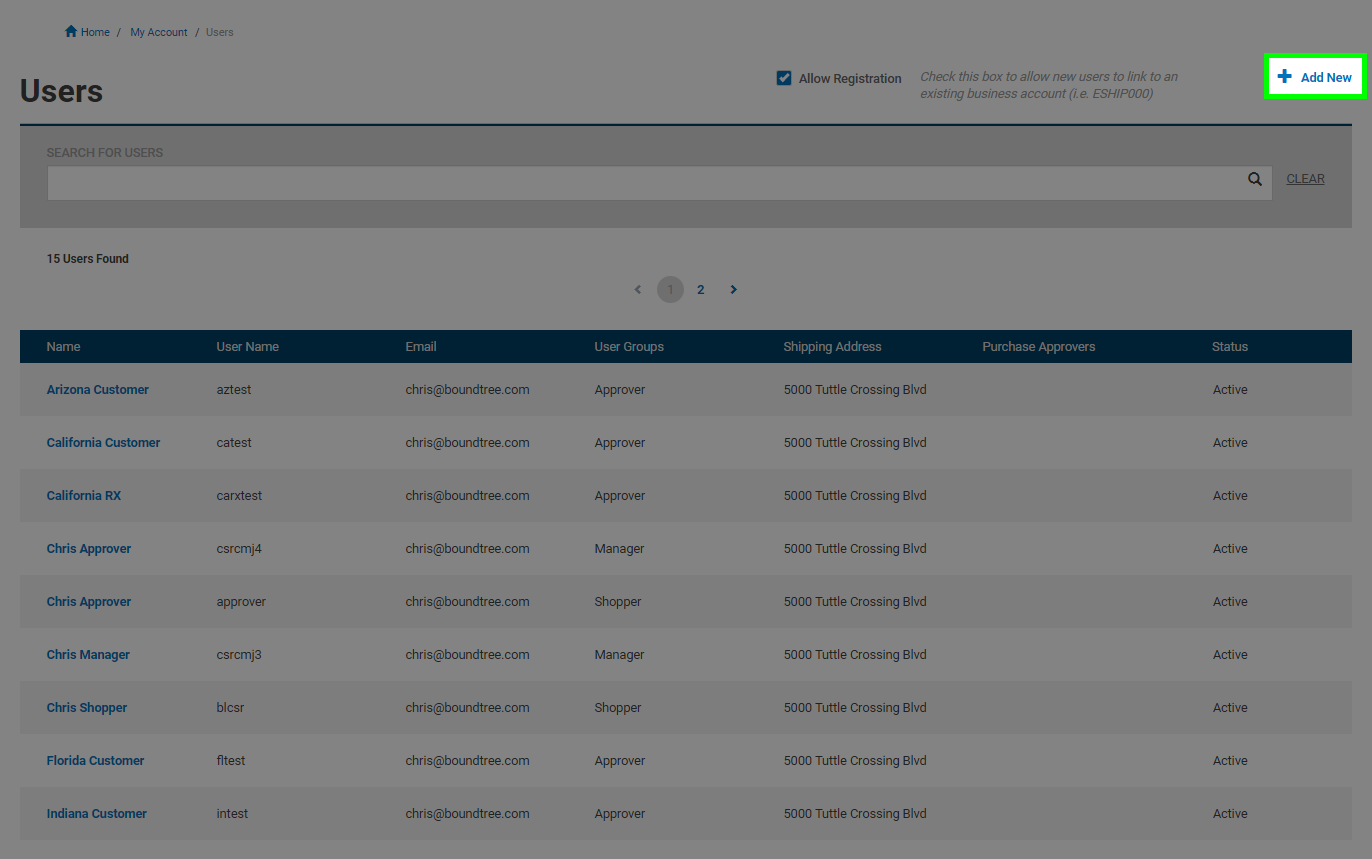
Select the "Users " link from the menu on the left under Administration.
Uncheck the "Allow Registration" check box to prevent new users from linking to your account during the new account registration process. This is enabled by default so that new users can link to your account by typing in the account number and billing zip code.
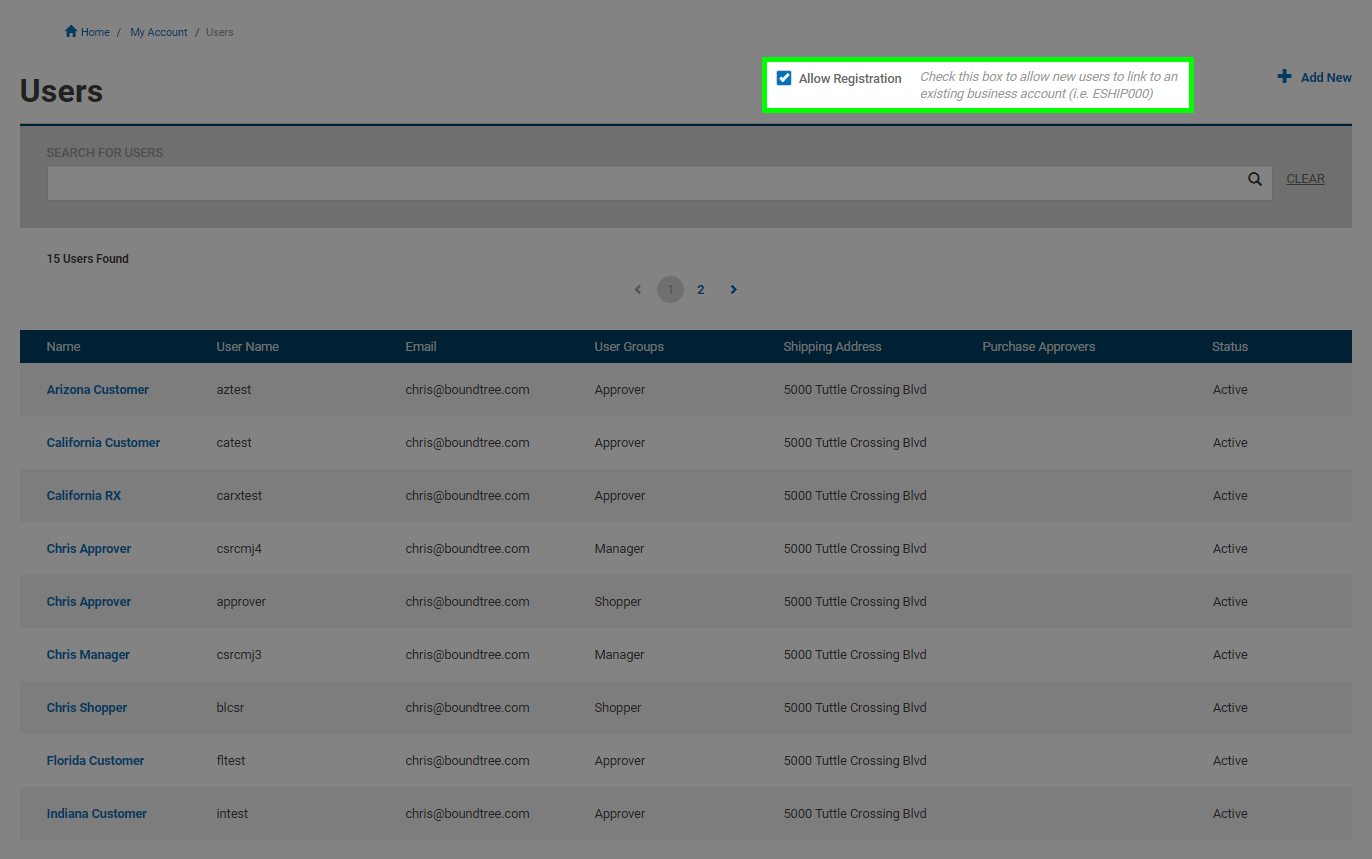
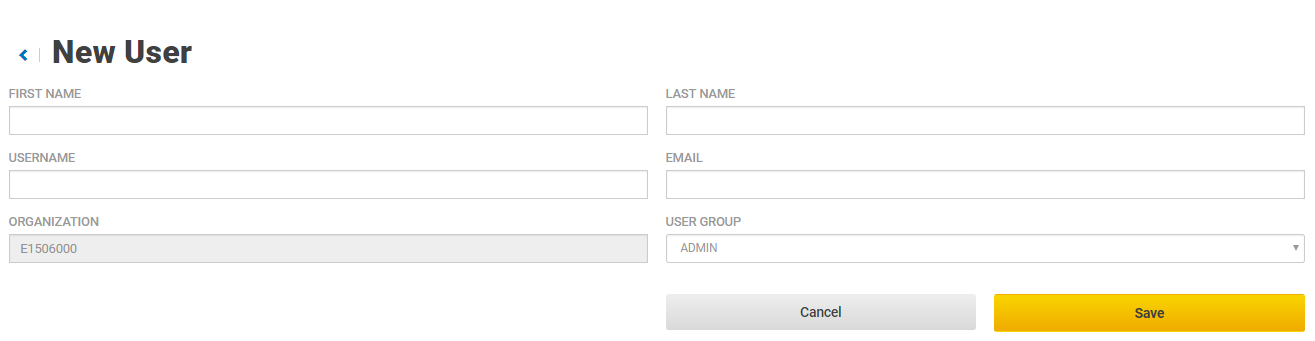
Click the "Add New" link on the page and fill out the form on the New User page. Enter a name, username, and email address for the new user. Then choose a User Group to make them a member of:
- The "Admin" user group can place orders, be set up as an approver for Purchase Requests, and has access to the Users section of the "Account Dashboard"
- Users with the "Purchase Approvers" user group can place orders and be set as approvers for Purchase Requests, but can't do any user management
- Finally, the "Shopper" user group has their checkout ability removed and must submit Purchase Requests to an approver
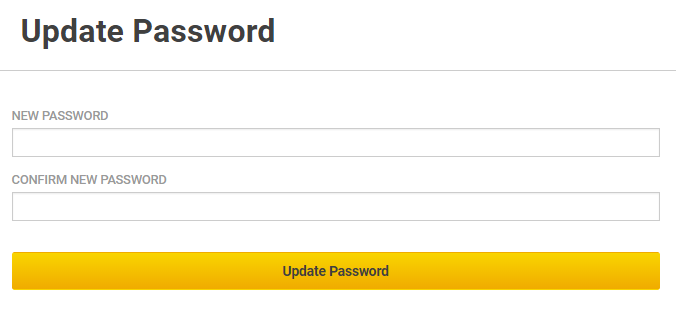
Next click on the username you created and click the "Reset Password" link to set up the initial password for the user. We recommend having that user change their password after they first sign in.
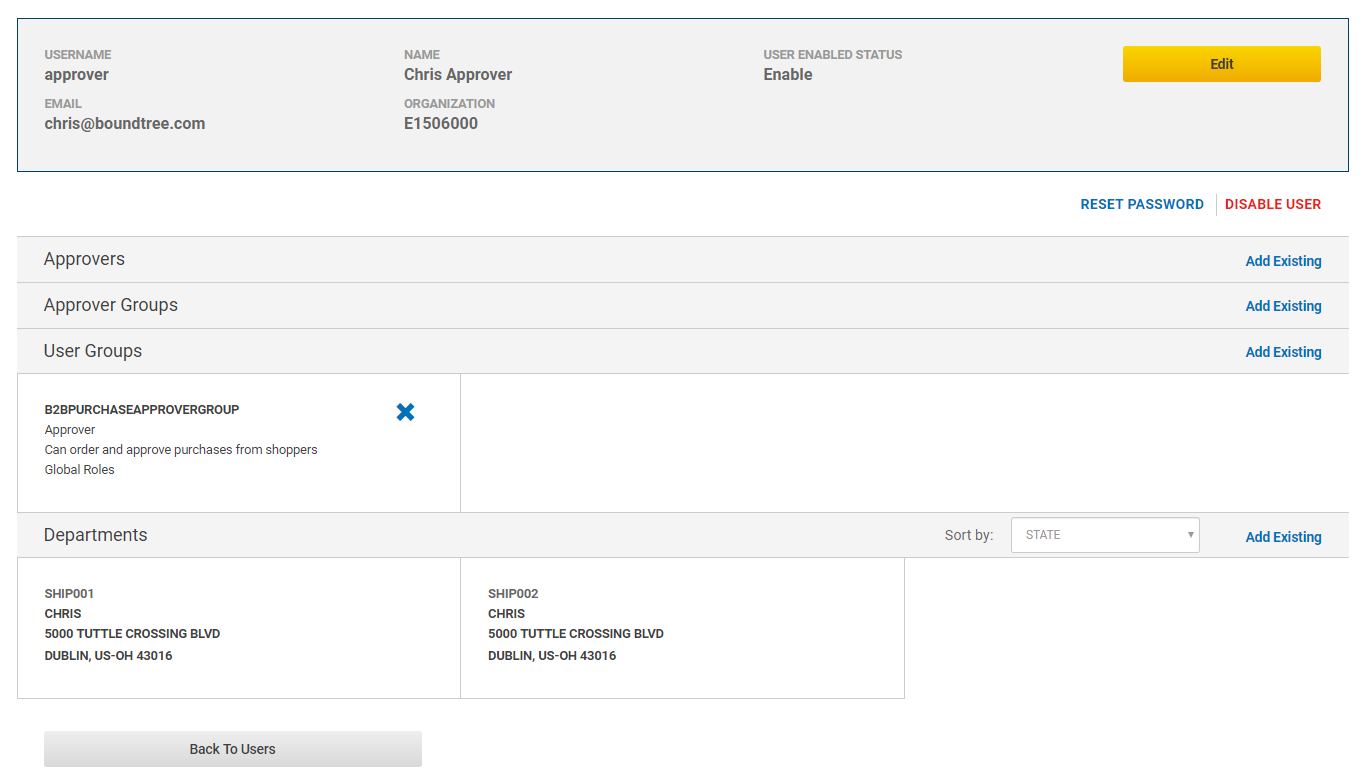
You can manage the user group a user is set up with on this main page by clicking the "Add Existing" option on the User Groups section. You can also choose which Shipping Addresses they have access to. If the user is no longer needed, click the "Disable User" link to prevent the user from signing in.
If you need any assistance with managing your users, please contact Customer Service and one of our representatives can assist you.
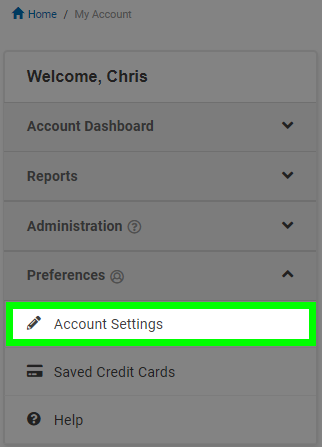
Edit your personal information, manage email opt-ins, or change your password in the Account Settings section of the Account Dashboard. To start, click on the My Account drop down at the top of the page when signed in and select the "Account Dashboard" link.
Next select the "Account Settings" link from the menu on the left under Preferences.
The "Edit Personal Information" section allows you to change your name, title, phone number, and to set your Bound Tree homepage. You can also send a copy of your order confirmation email to others by entering their email address(es) separated by commas in this section.
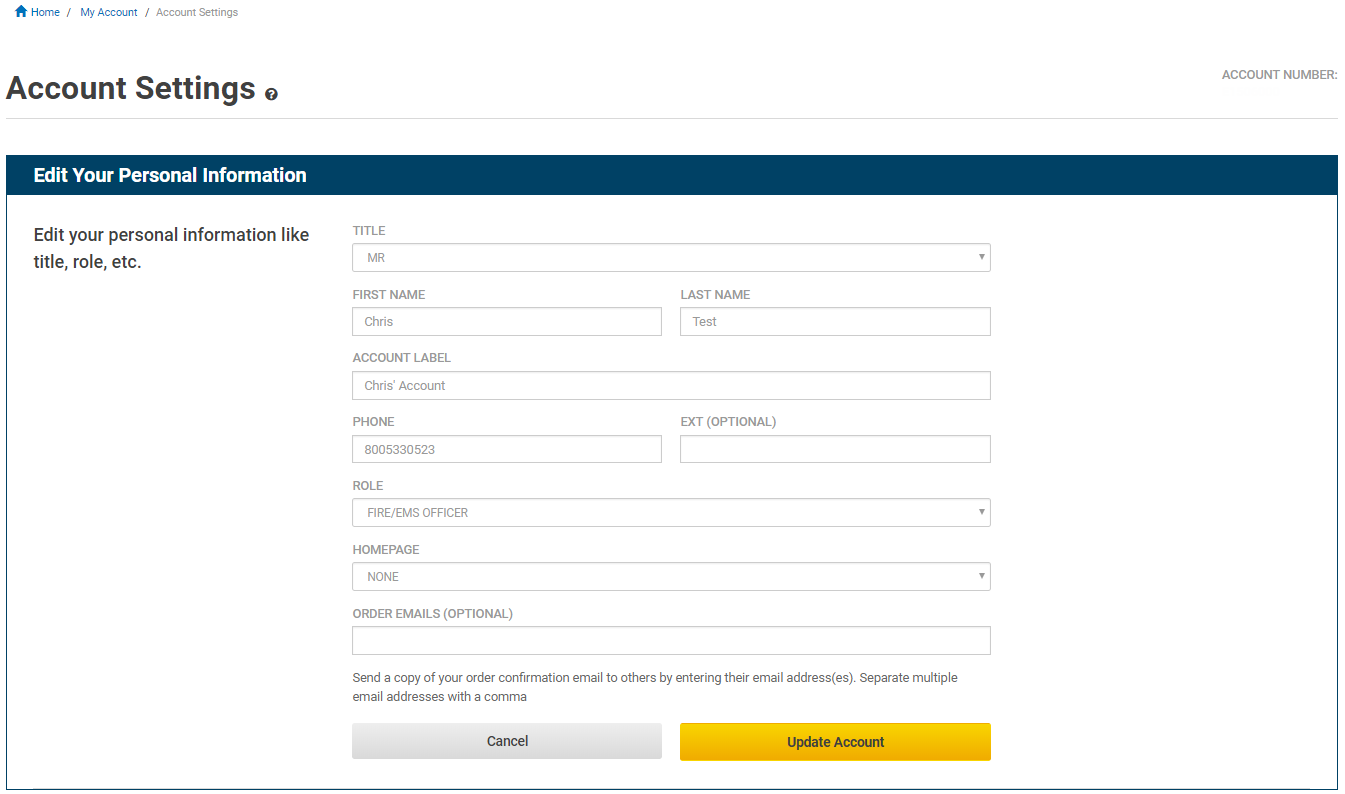
The "Edit Account Information" section gives you the ability to change your email address, account password, and see your tax exempt status. If your order(s) will be claiming state sales tax exemption you must provide a copy of the state issued sales tax exempt certificate after the first order has been submitted. Please email a PDF copy of the state sales tax exempt certificate along with the account number and order number in the body to Credit@BoundTree.com and they will work with you to update your account. You can also fax it to 866.284.7504, but please be sure to include the account number and order number.

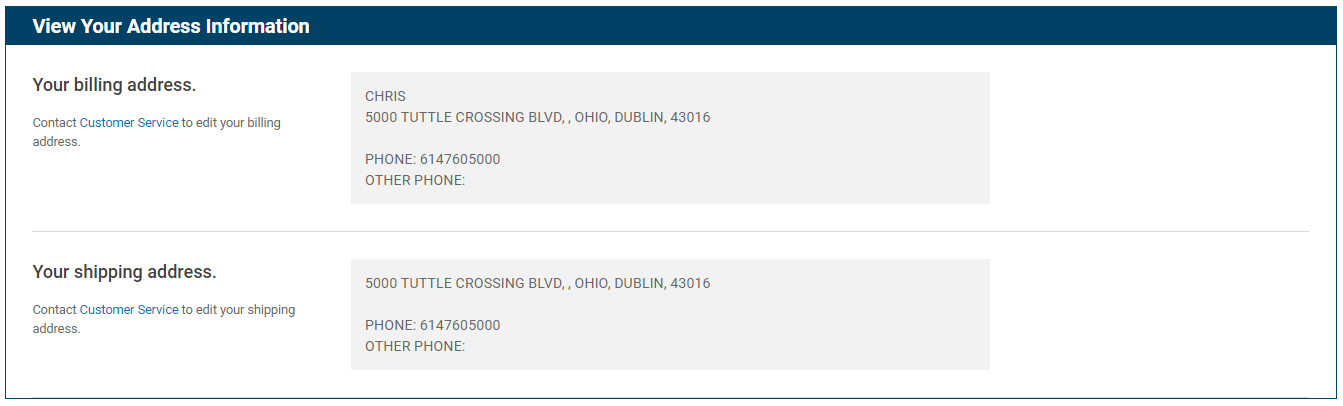
Use the "View Your Address Information" section to check on your billing and shipping addresses. If you need to edit your addresses, please contact Customer Service at 800.533.0523 and one of our dedicated Customer Service representatives will assist you.
View and search order invoices from the Order History.
Sign in and click on the "Order History" drop down at the top of the page and then the "View full order history" link that appears. You can also access it through your Account Dashboard.
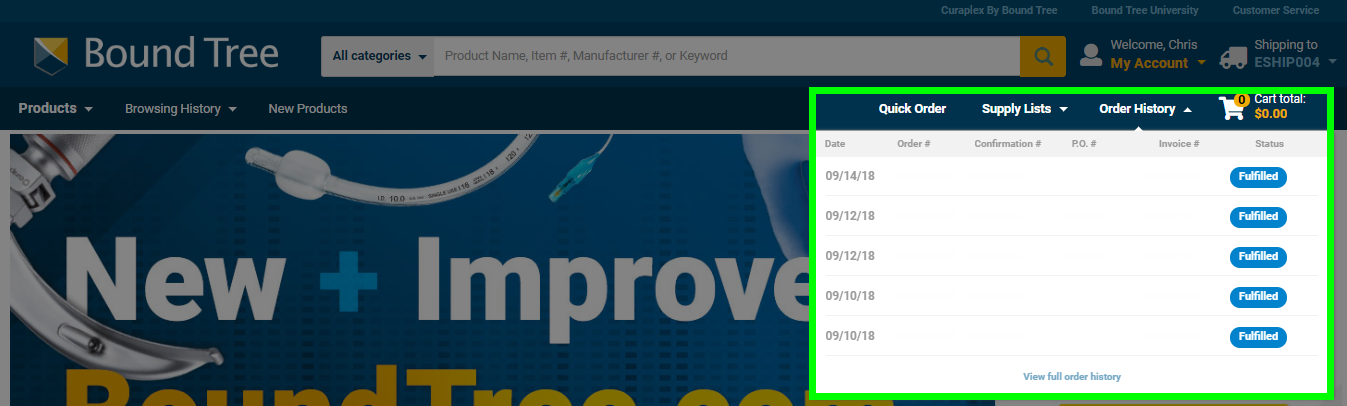
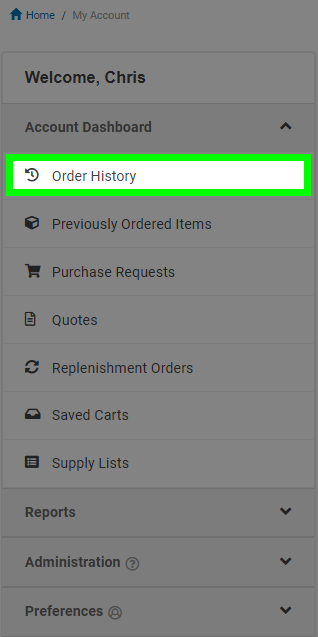
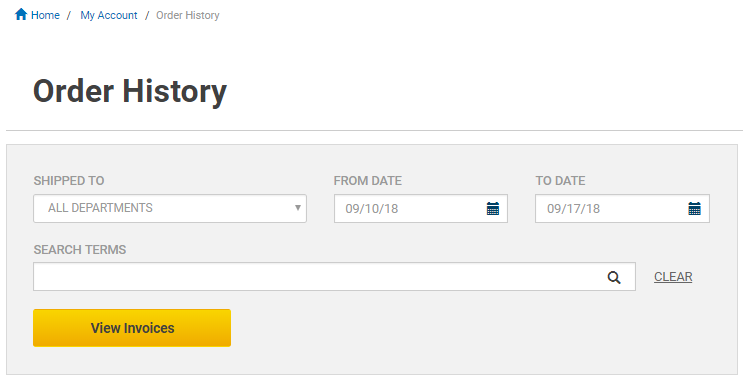
Your recent Order History will appear in a table on this page. To search for a specific order, select a shipping address from the Shipped To drop down of addresses or leave it on All Departments. Next, select the date range you want to search. You can also search for specific terms such as order, conformation, invoice, or purchase order number by typing the number in the Search Terms field. When you are finished push the "View Invoices" button to generate a list of orders fitting the criteria you selected.
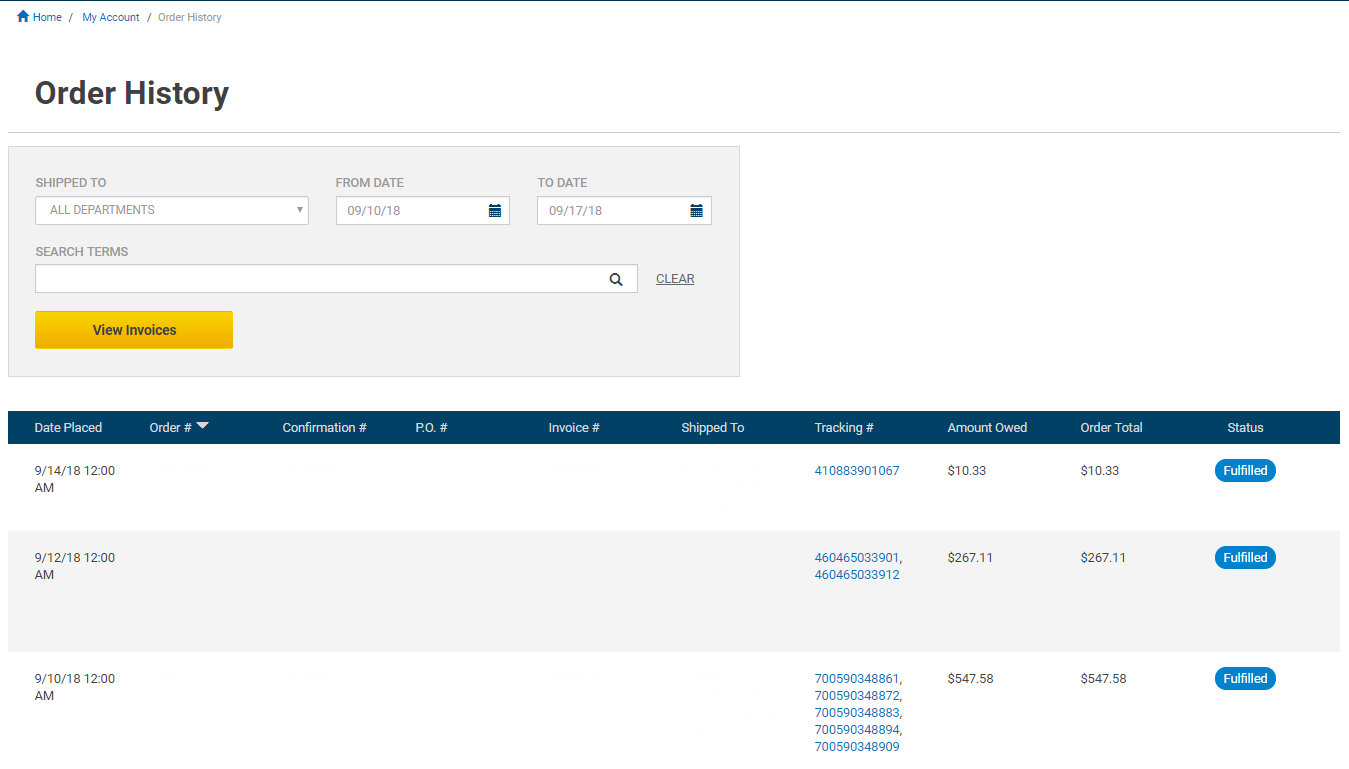
Sort your results list by date placed, order number, confirmation number, P.O. number, invoice number, shipped to address, tracking number, amount owed, order total, or status.
Click on an invoice number to open the Order Details page. Here you can see the specifics of the order and even place it again by pressing the "Reorder" button.
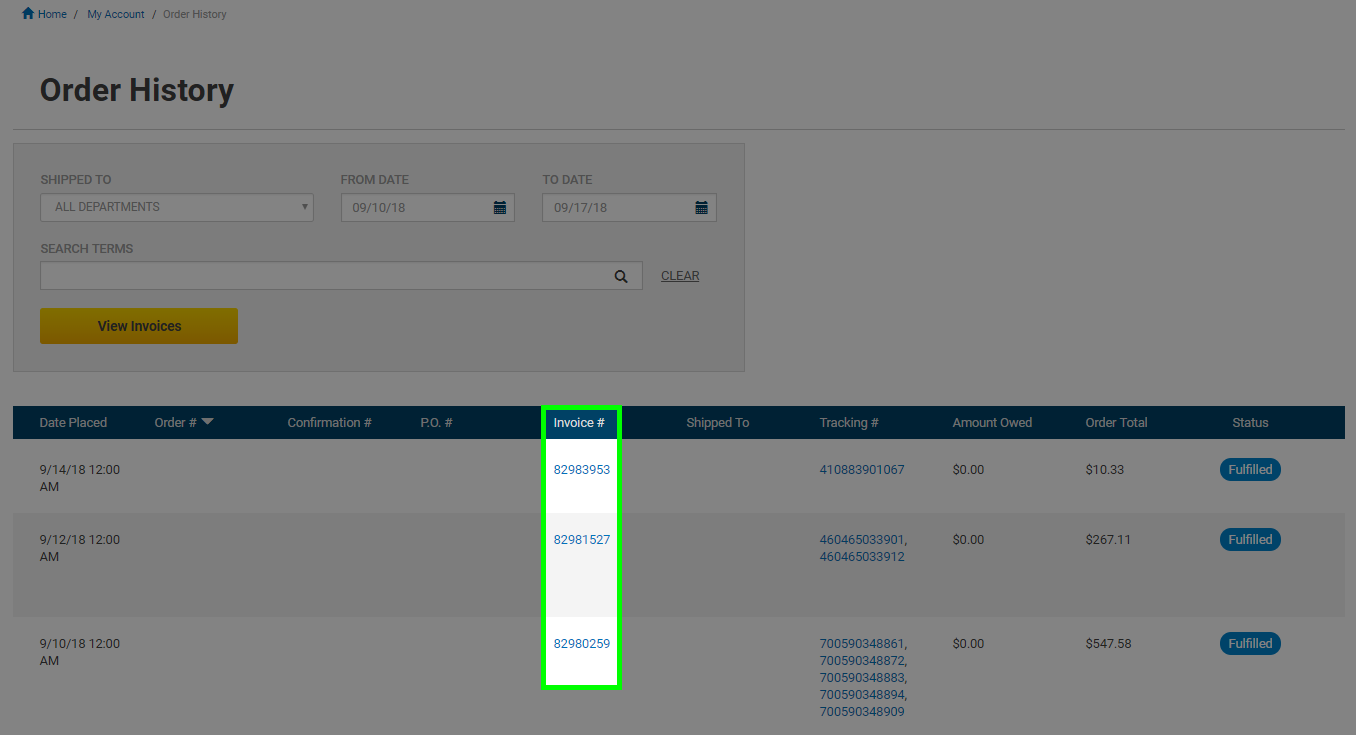
If you click the "Reorder" button you will be taken to the checkout page with the items from the previous order in your cart. Complete the secure checkout like normal, selecting your shipping address, shipping method, and payment type.
You can now save your credit card to your account to avoid having to retype your information during checkout.
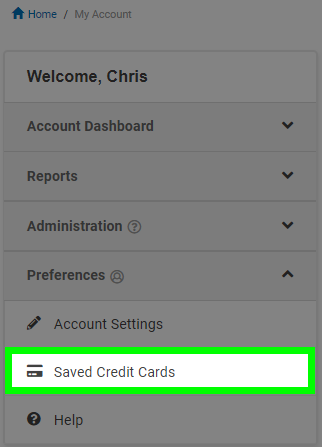
Your Saved Credit Cards can be viewed through the Account Dashboard. To start, click on the My Account drop down at the top of the page when signed in and select the "Account Dashboard" link.
Select the "Saved Credit Cards" link from the menu on the left under Preferences.
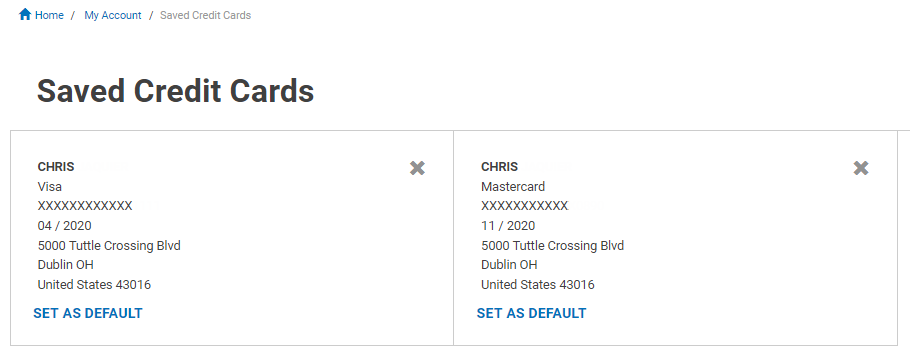
Any Saved Credit Cards on your account will be listed here. You can set one as the default or remove it from your account.
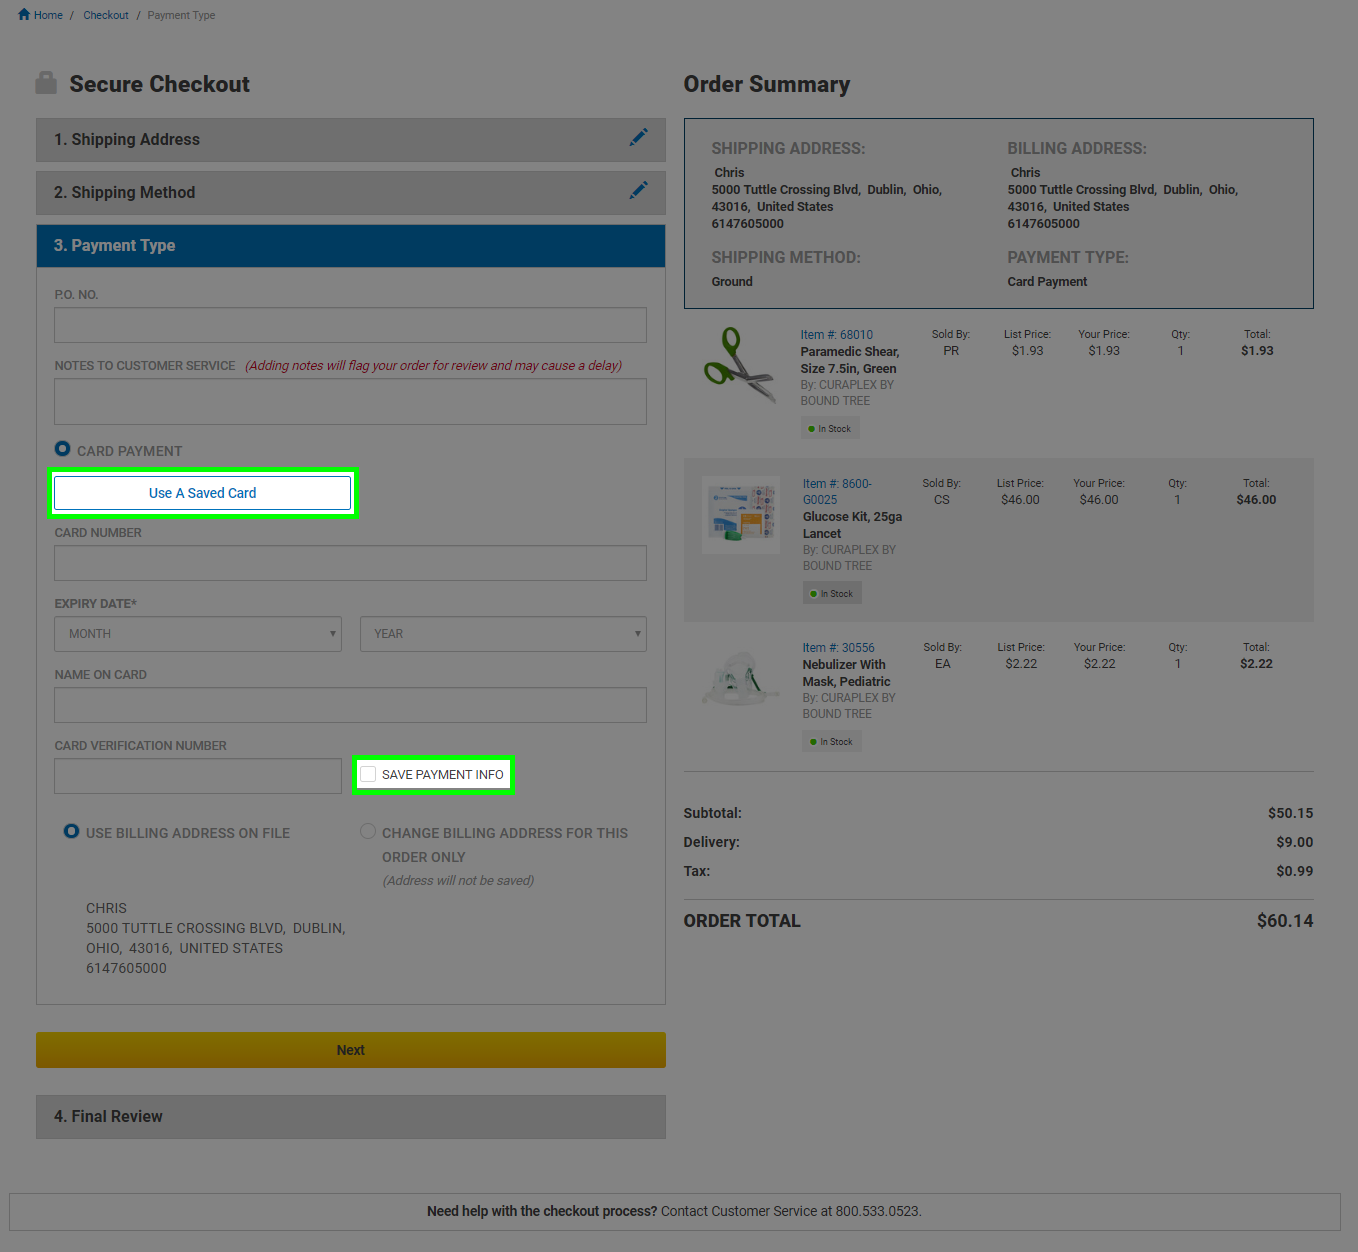
To save a new credit card, check the box next to "Save Payment Info" during the checkout process. If you already have a card saved, you can select it by pushing the "Use a Saved Card" button and and typing the verification number on the back of the card.
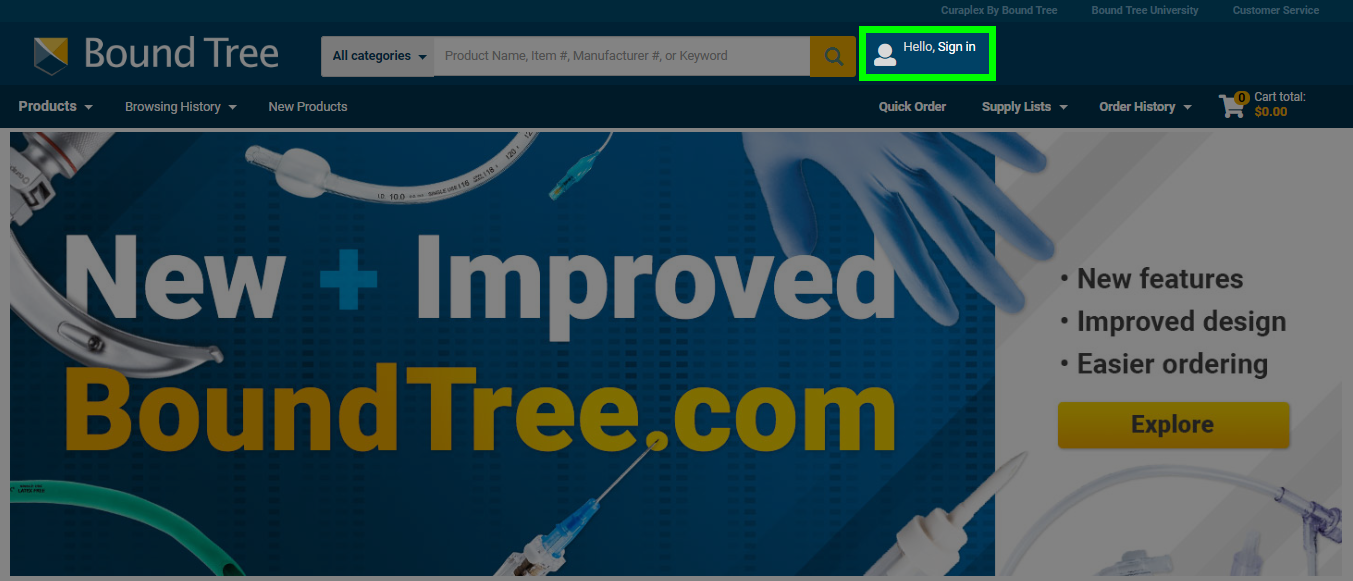
Items added to your Shopping Cart will be available from any computer that has been signed in to your account. If your Shopping Cart is empty or items are missing from it, it is likely that you are not logged in to your account. To sign in, click on the "Hello, Sign in" button next to the search bar at the top of the page.
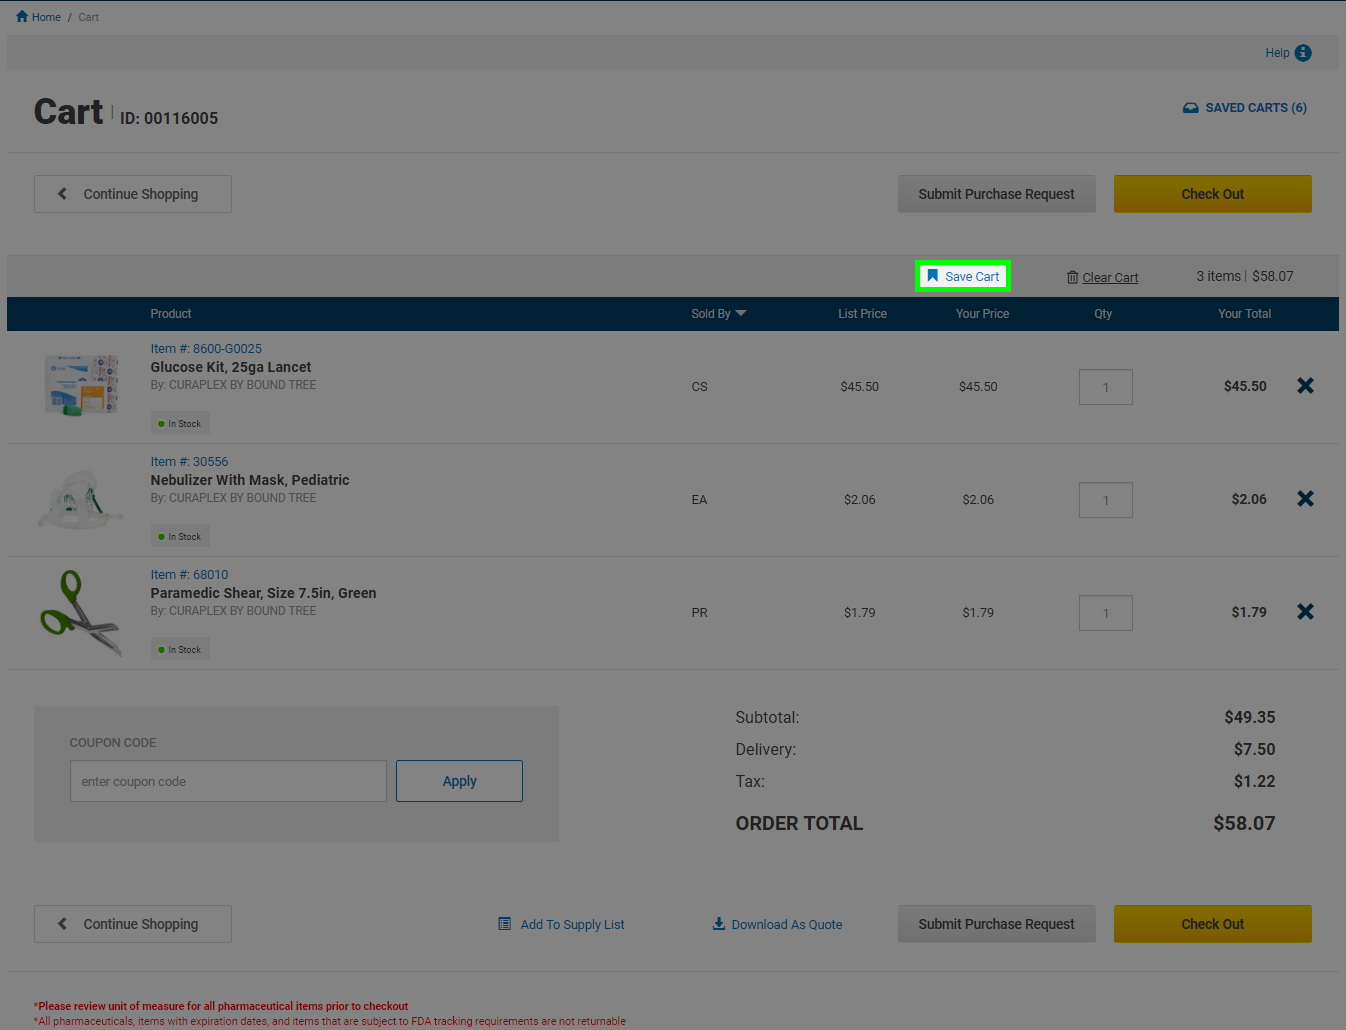
While signed in, save your Shopping Cart for future processing during the Check Out process. Click the Saved Cart icon from the Shopping Cart page to move your items to a Saved Cart list.
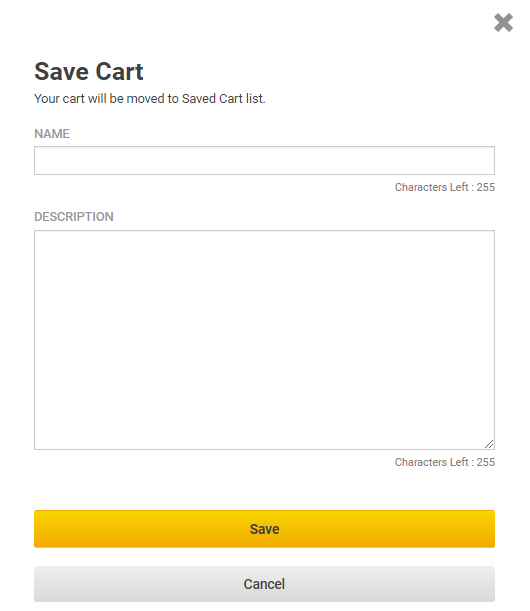
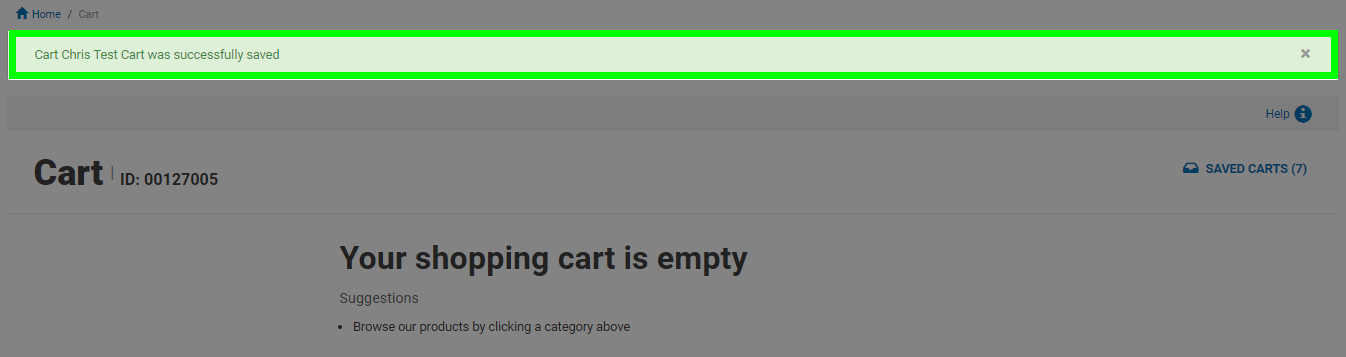
A pop up window will appear for you to give the Saved Cart a name and description (optional) to identify it later. Type in the name you want and push the "Save" button at the bottom of the form. Items in your current cart will be removed and placed in this Saved Cart instead. You will receive a message at the top of the page that your cart was successfully saved.
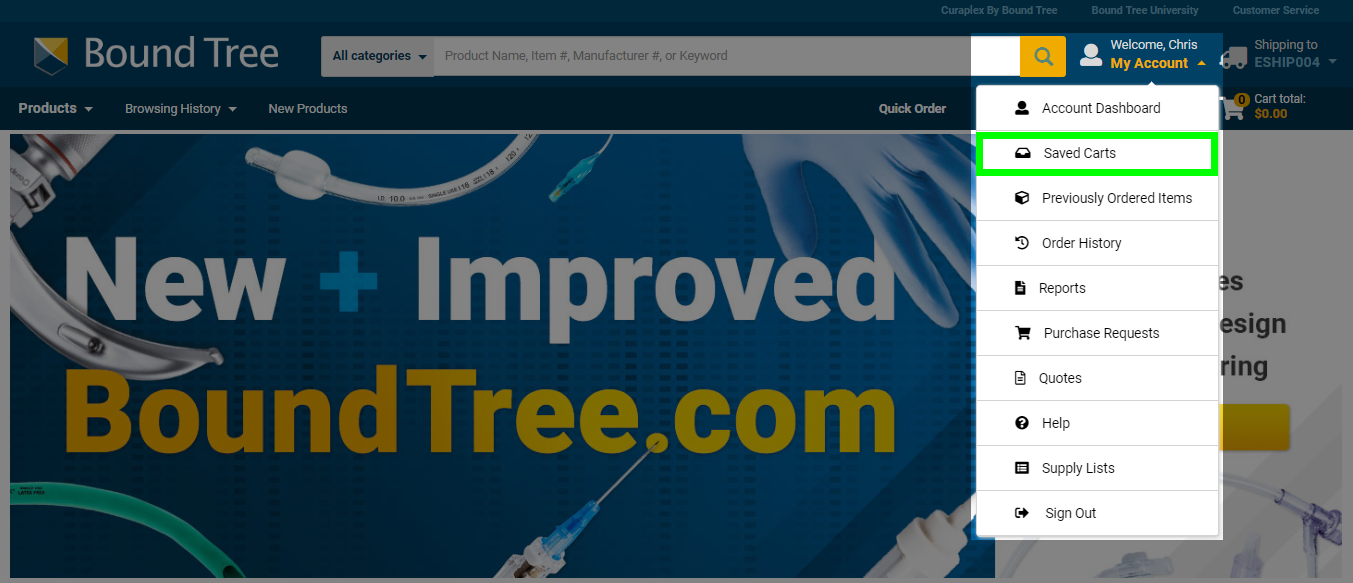
To view your Saved Carts, click on the My Account drop down at the top of the page and select it from the list. You can also access it through your Account Dashboard.
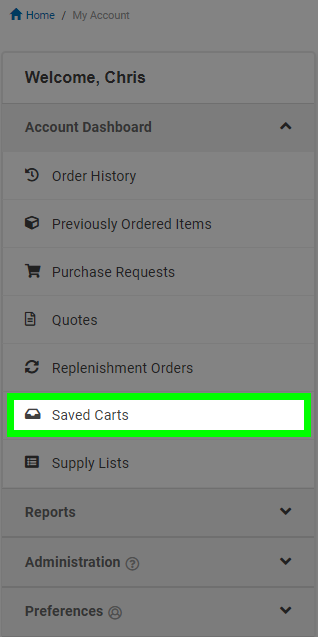
All of your Saved Carts will appear on this page for you to review. You can restore your Saved Cart to place the items into your current Shopping Cart or delete it if you no longer need them.

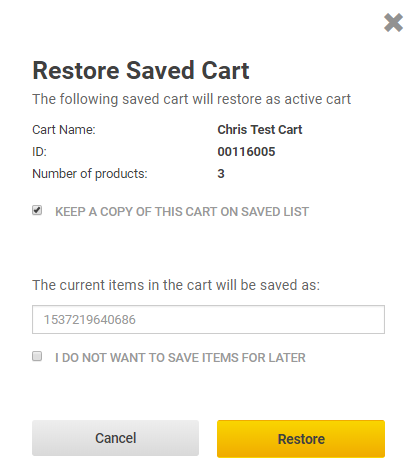
Choosing to restore a cart will give you the option of creating a copy that remains in your Saved Carts page for future use. The products in that Saved Cart will be moved to your cart. Any items already in your cart will be moved to a new Saved Cart or can be discarded by checking the "I do not want to save items for later" check box.
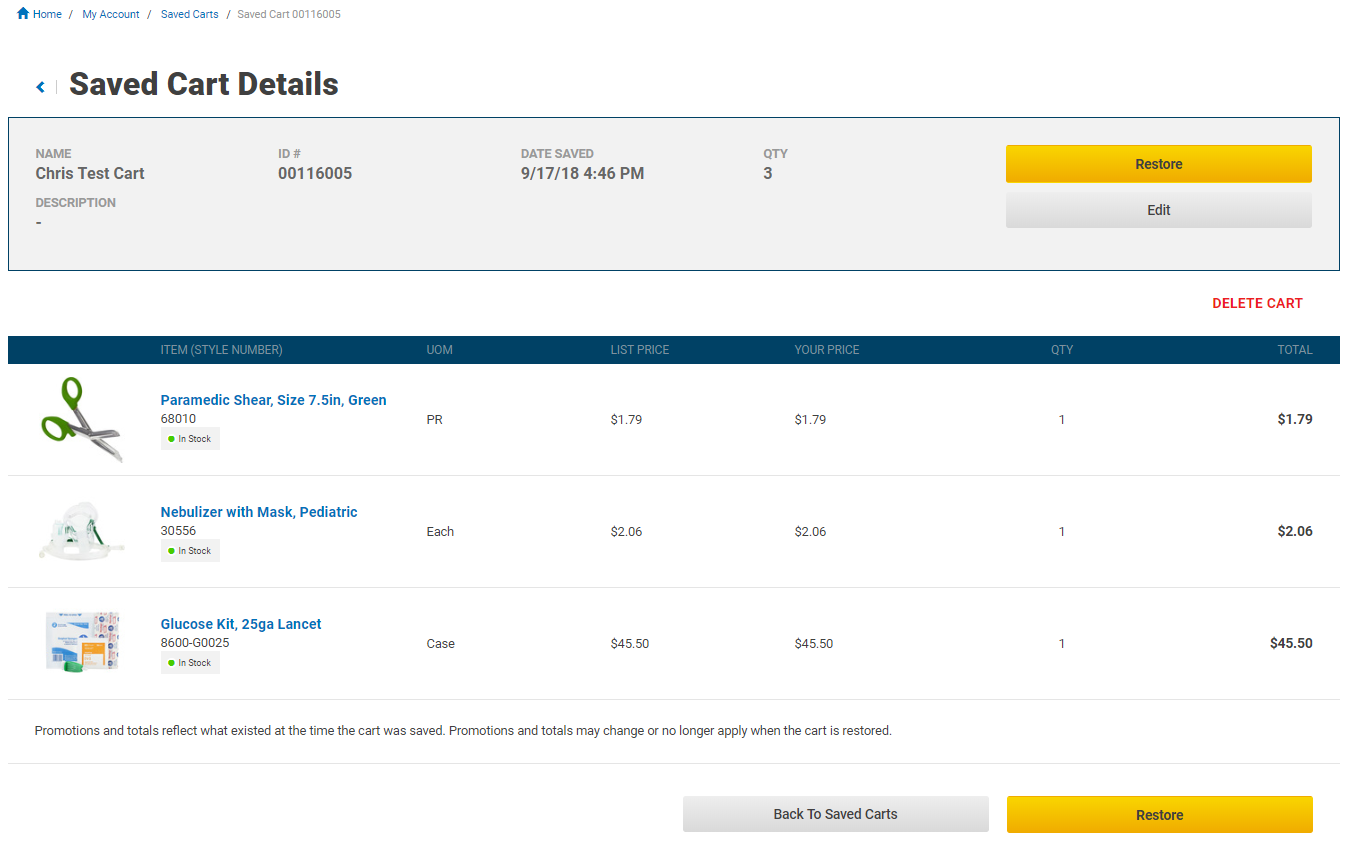
Clicking on the name of the Saved Cart will show you the details of the cart. In addition to the options to restore or delete a Saved Cart, you can also edit the name or description from this page.
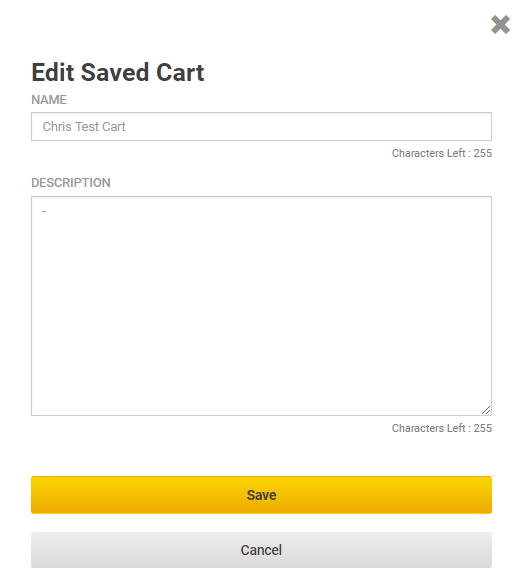
To edit the contents of the cart or add additional items, restore the cart and make any changes necessary. You can then save the cart again for later use if needed.
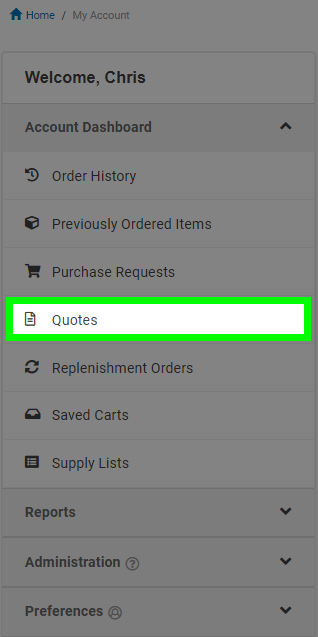
View available product Quotes from your Account Dashboard or by clicking the "Quotes" link in the My Account drop down at the top of the page.
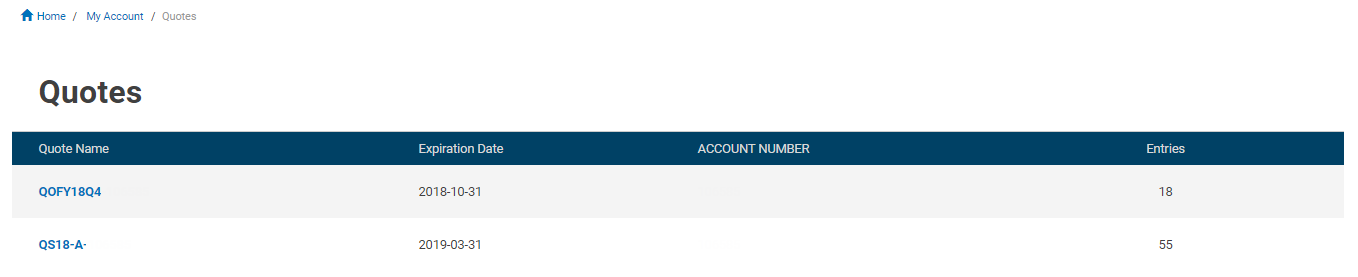
The Quotes page will show you a list of all available quotes with their expiration date and the amount of products on the quote. All quotes expire at 11:59 p.m. eastern standard time on the related expiration date.
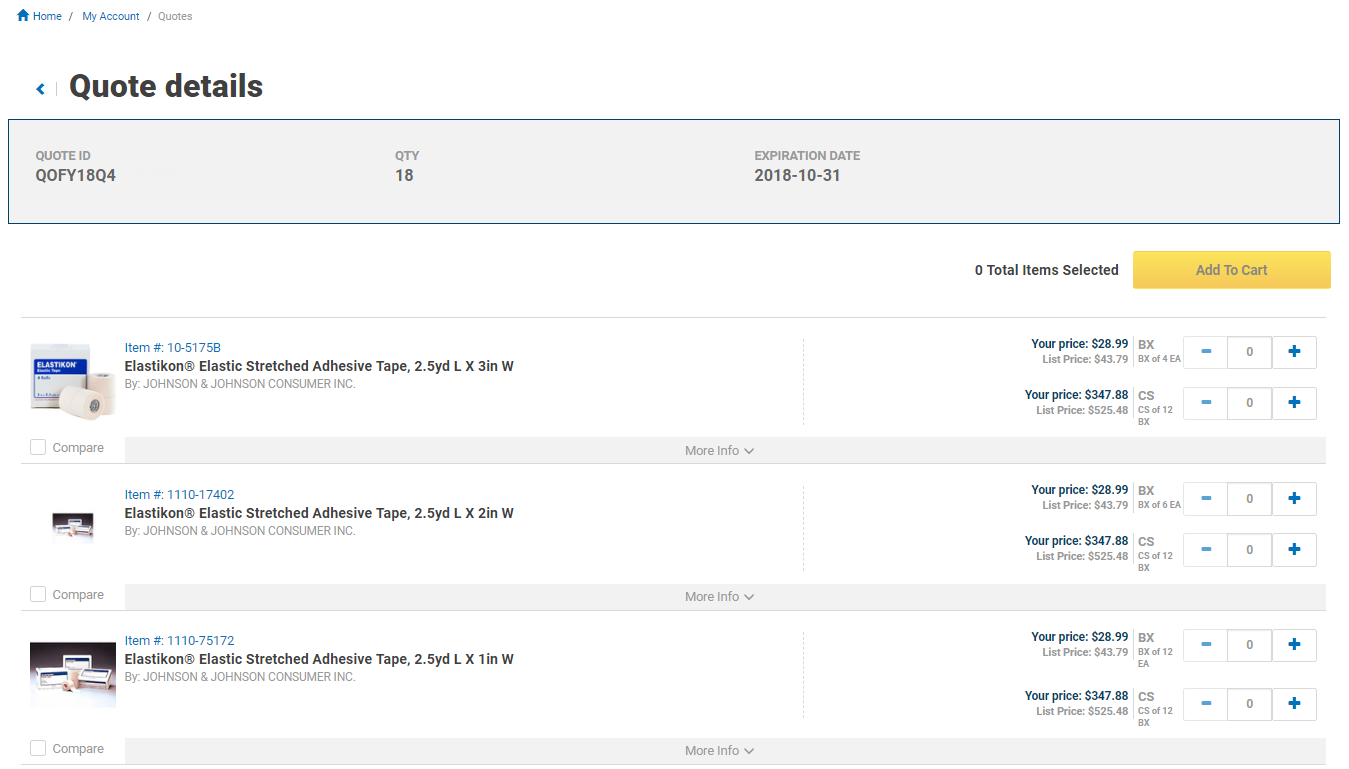
Click the quote name to enter the Quote Details page, see the items quoted, and add products to your cart. Enter a quantity and select the "Add to Cart" button.
Please contact your dedicated Bound Tree Account Manager for more information on quotes.
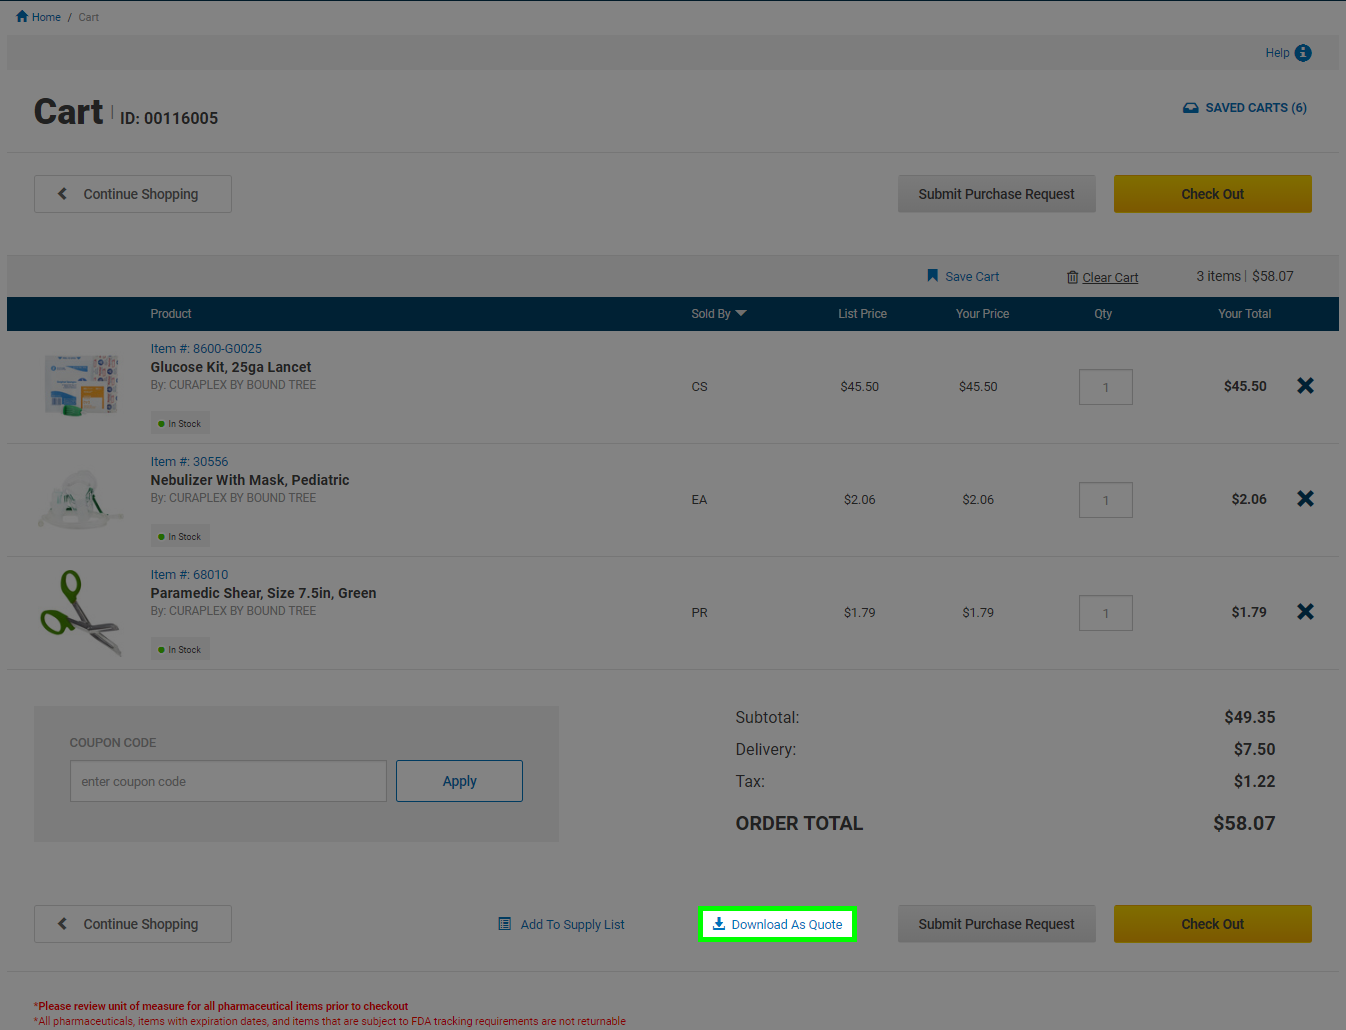
You can now download the items in your cart as a quote to send to your dedicated Bound Tree Account Manager or to your purchasing department/manager for approval.
Click the " Download As Quote" link at the bottom of your Shopping Cart.
A .xlxs file will be downloaded to your computer with your account information and the items that you had in your cart. Files of this type may be opened with programs such as Microsoft Excel.
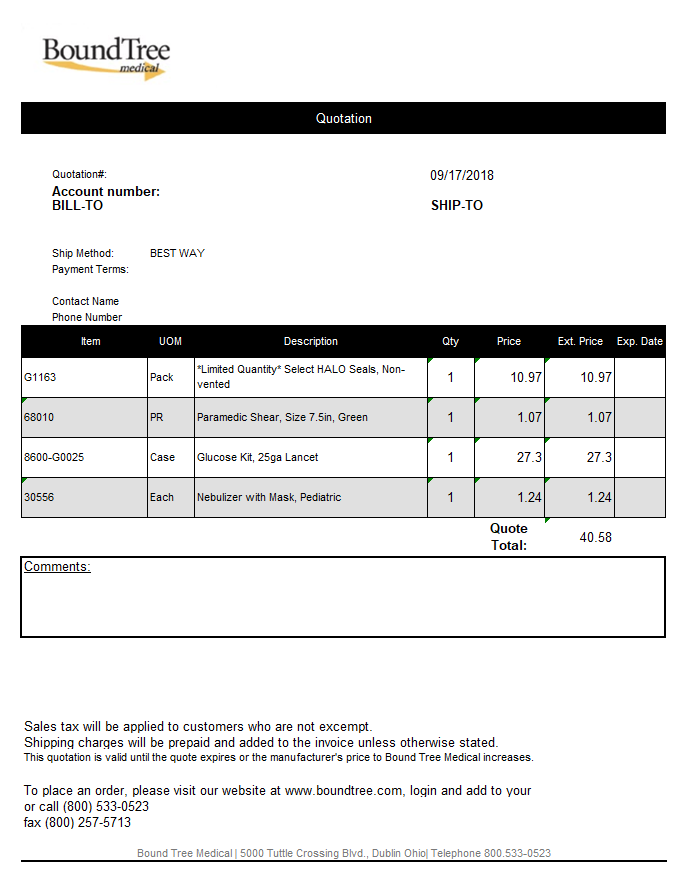
Your dedicated Bound Tree Account Manager's email address will be listed under your "Account Dashboard". Send them an email with the Excel file to request a quote on the order.
Alternatively, you can send the Excel file to your purchasing department or manager for approval to place the order.
If you don't have a Bound Tree Account Manager on your account, fill out the Account Manager Request Form to be paired with a dedicated Bound Tree Account Manager.
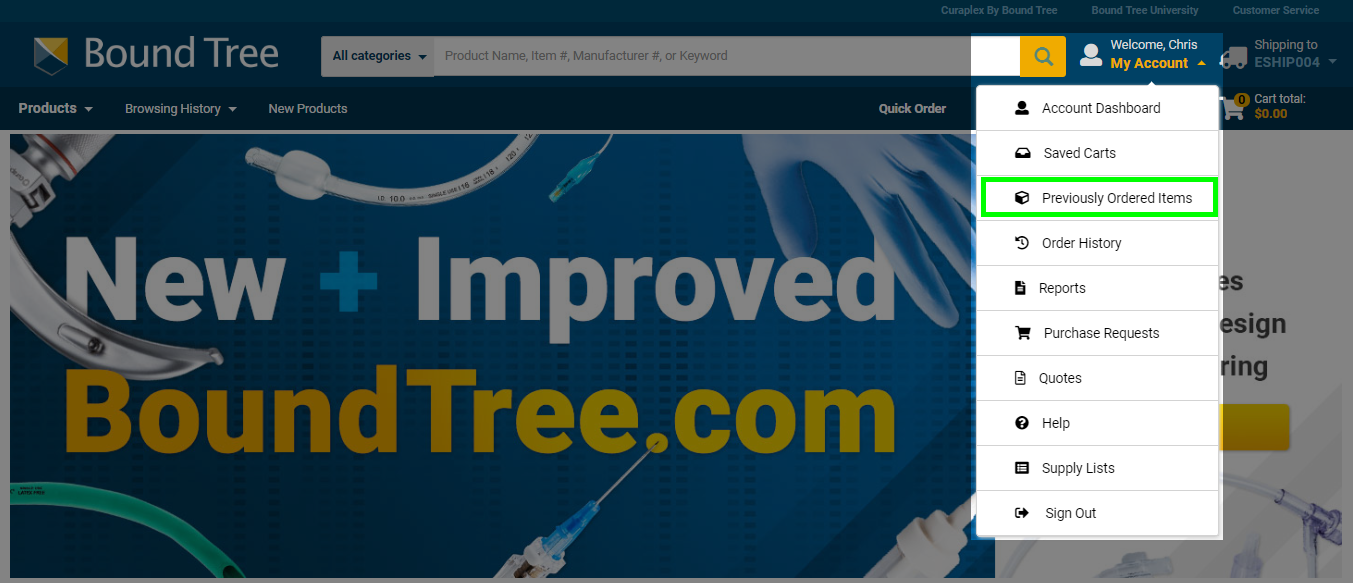
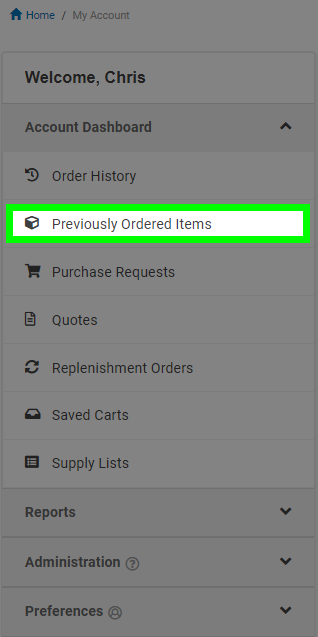
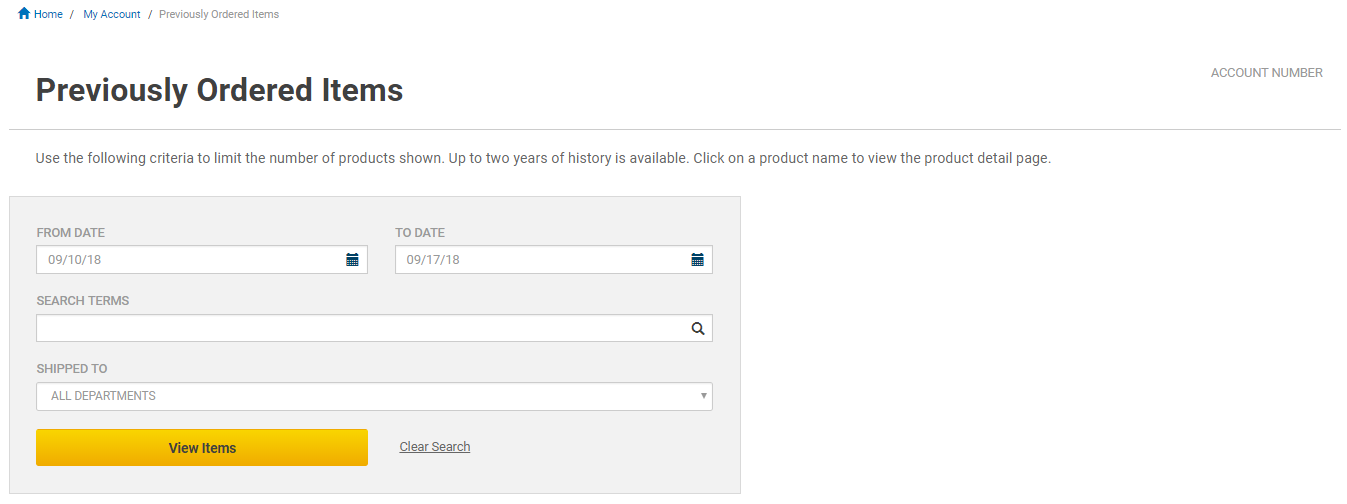
View, search, or add Previously Ordered Items directly to your Shopping Cart or Supply List. Select the "Previously Ordered Items" link from the My Account drop down or click on the link in your Account Dashboard .
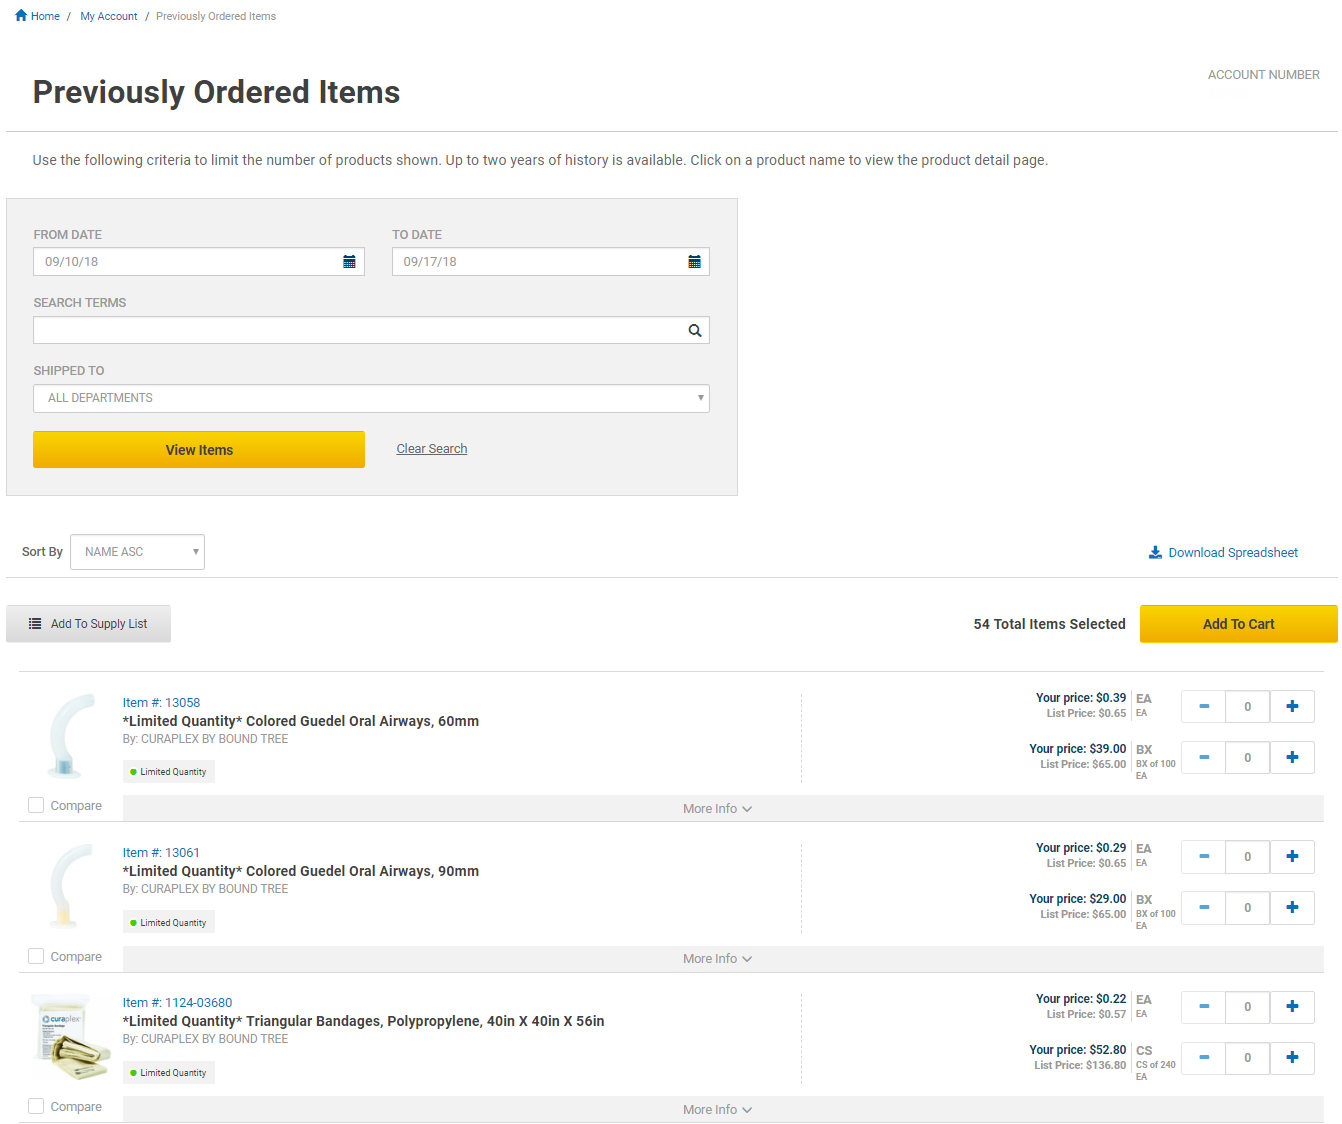
On the Previously Ordered Items page, select the date range you want to search. You can search for specific products by typing the product number in the Search Terms field. Finally, select a shipping address from the Shipped To list of addresses or leave it on All Departments, and then push the "View Items" button.
Add items from this list to a Supply List by entering a quantity and clicking the "Add to Supply List" button or to your Shopping Cart by clicking the "Add to Cart" button. You can also download the results as a .xlsx file for future use, easier filtering and sorting. Files of this type may be opened with programs such as Microsoft Excel.
Look at the tracking information on your orders so that you know when to expect them to arrive.
To start, click on the "Order History" drop down at the top of the page and then the "View full order history" link that appears. You can also access it through your Account Dashboard.
Select a shipping address from the Shipped To list of addresses or leave it on All Departments. Next, select the date range you want to search. You can also search for specific products by typing the product number in the Search Terms field. When you are finished push the "View Invoices" button to generate a list of orders fitting the criteria you selected.
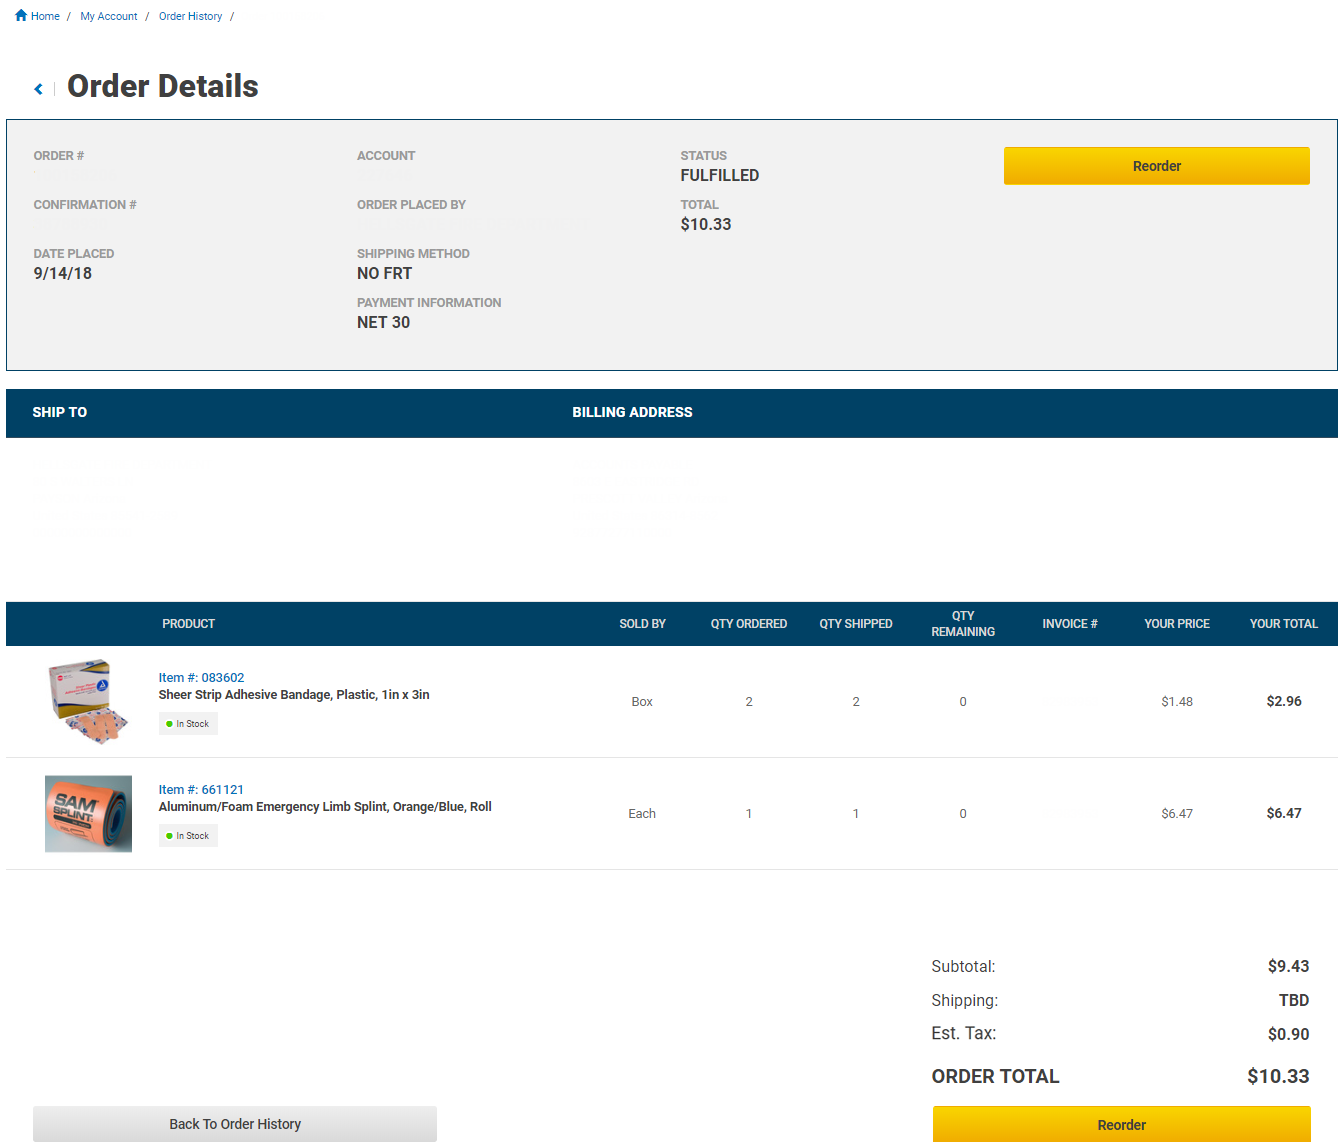
Look for the order number you want the tracking information for and click on the tracking number listed. Tracking information is updated every night to reflect the orders that have been shipped that business day. The link will take you to the shipping vendors website with details about your package(s).
If your order(s) will be claiming state sales tax exemption you must provide a copy of the state issued sales tax exempt certificate after the first order has been submitted. Please email a PDF copy of the state sales tax exempt certificate along with the account number and order number in the body to Credit@BoundTree.com. You can also fax it to 866.284.7504, but please be sure to include the account number and order number.
Once the correct documentation is received the sales tax will be removed from your order before the credit card is charged. If your order requires licensing or state sales tax exemption you cannot use guest checkout.
Bound Tree Medical strives to uphold federal standards by complying with regulatory guidelines pertaining to pharmaceuticals. Several of Bound Tree’s Distribution Centers have received VAWD (Verified-Accredited Wholesale Distributors) accreditation from the National Association of Boards of Pharmacy (NABP), demonstrating compliance with state and federal laws and safe and secure prescription drug distribution. Bound Tree requires Medical Director or Pharmacist-in-Charge authorization for any purchases of prescription drugs or medical devices be on file including a copy of the appropriate and current state licensing.
Bound Tree would like to make the purchasing process as simple as possible. Submit your Medical Director and/or Pharmacist-in-Charge authorization for approval to purchase prescription drugs, controlled substances and/or medical devices. To help ensure fast, dependable service, please download and complete the Bound Tree License Authorization (LAF) form. You may fax completed forms to 800.257.5713. If you have any questions or need assistance completing any of the forms, please contact Customer Service at 800.533.0523 or your dedicated Account Manager. If your order requires licensing or state sales tax exemption you cannot use guest checkout.
The Controlled Substance Ordering System (CSOS) was developed by the Drug Enforcement Administration (DEA) for the electronic transmission of Class II controlled substances orders. It is the only allowance for electronic ordering of Class II controlled substances. CSOS eliminates the paper order forms (DEA Form 222) which are often seen as a major inconvenience. Errors and incomplete forms create major delays in the processing of those orders; CSOS will allow orders to be processed more quickly.
Visit our CSOS page for more information, access to the forms required, and request more information. If you have any questions or need assistance completing any of the forms, please email Customer Service and one of our dedicated Customer Service Representatives will be glad to assist.