Supply Lists
Supply Lists allow users to quickly access the products they need to order with only a few clicks. When signed in, Supply Lists can be created easily from the Supply Lists page, a product detail page, the Quick Order form, or the Shopping Cart.
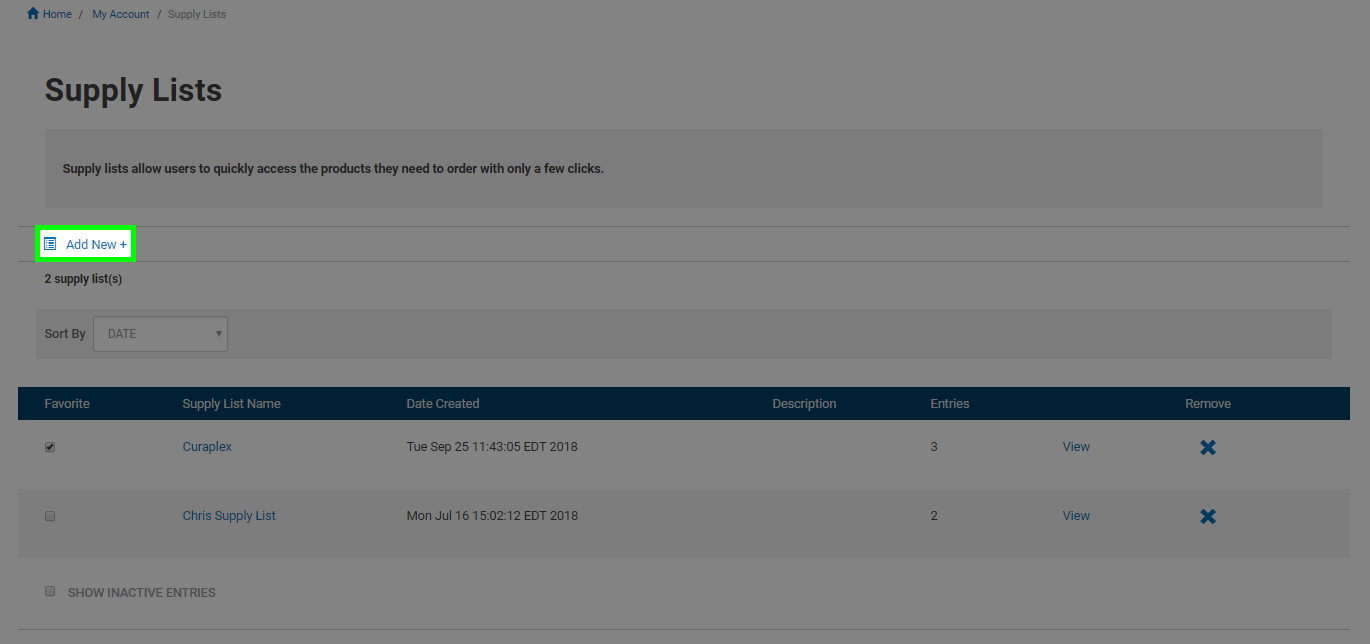
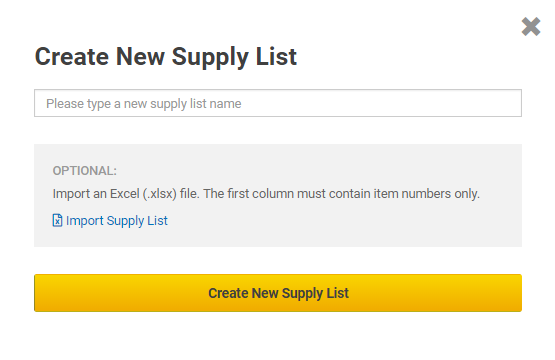
From the Supply Lists page, click the "Add New +" link. Type in a name for the Supply List and then click the "Create New Supply List" button. You can also import an existing list of products if you have it in an Excel file (.xlsx format). The first column must contain item numbers only.
From a product detail page, set the quantity on the items you want in your Supply List and choose the "Add To Supply List" button instead of the "Add To Cart" button.

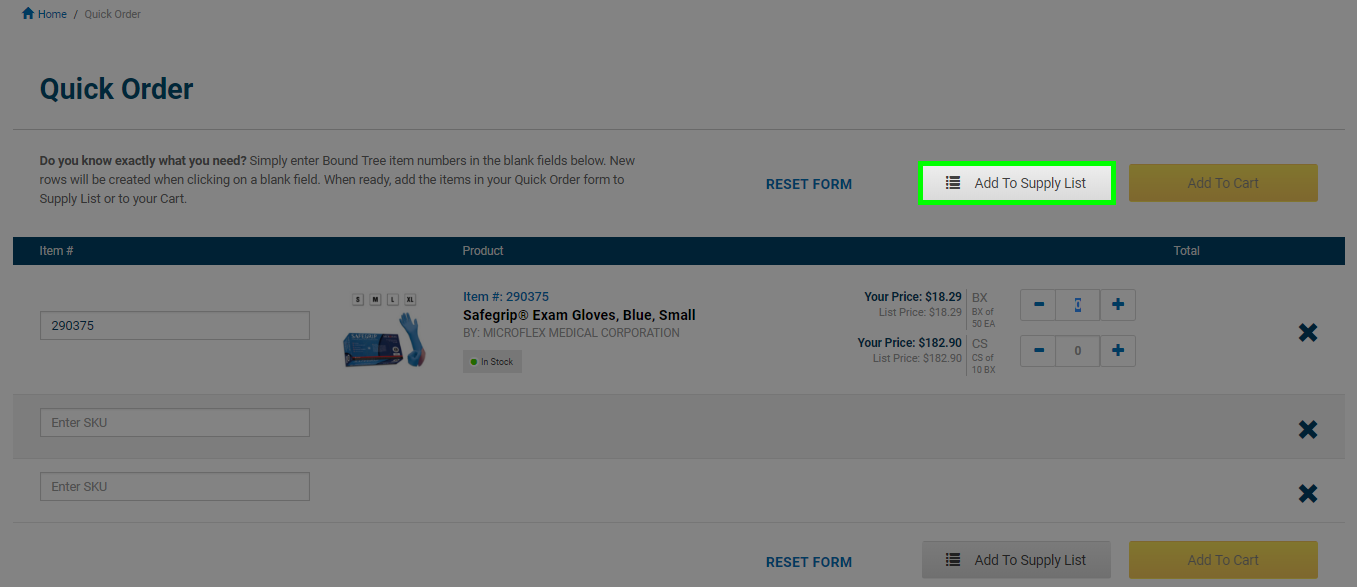
To add products to a Supply List from the Quick Order form, enter the item numbers, set the quantity and click the "Add To Supply List" button.
You can also move the items in your Shopping Cart into a Supply List instead of checking out. This will remove the items from your cart. Click the "Add To Supply List" button from the Shopping Cart page.

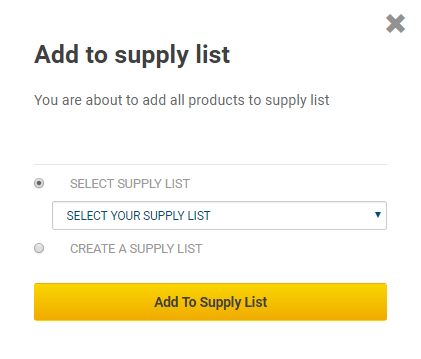
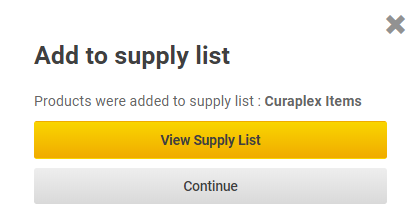
Once you click on the button to add items to your Supply List using one of the above methods, a pop up will appear allowing you to select an existing Supply List or create a new one. Choose the option you would prefer and press the "Add To Supply List" button. You can then view your Supply List or continue shopping.
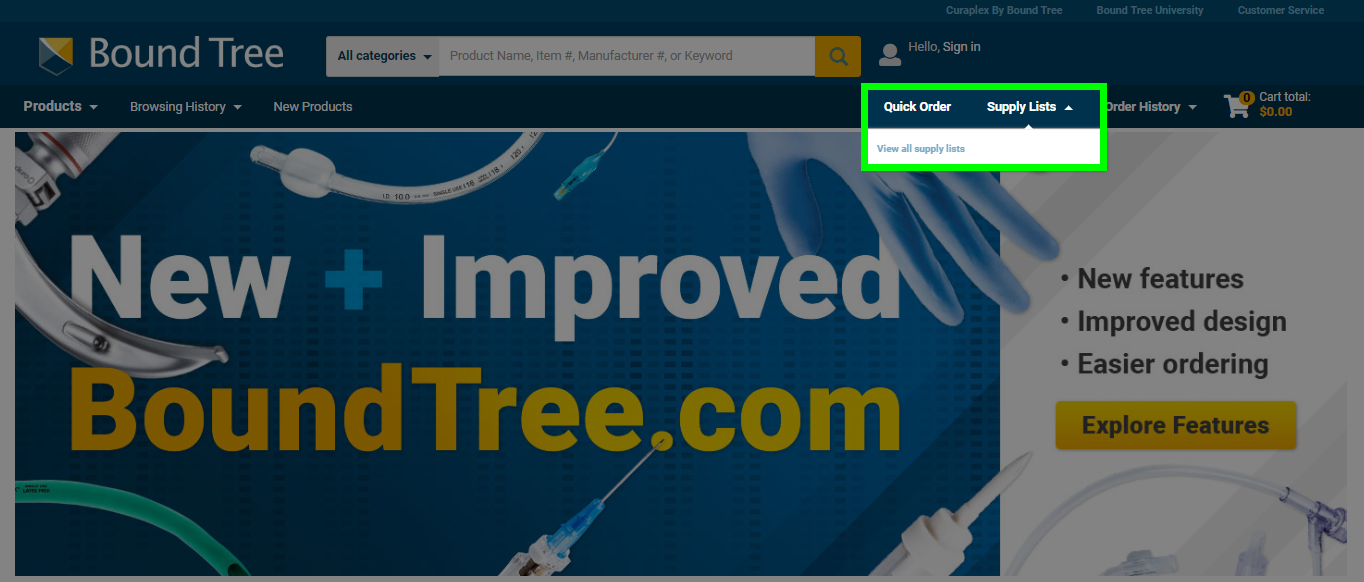
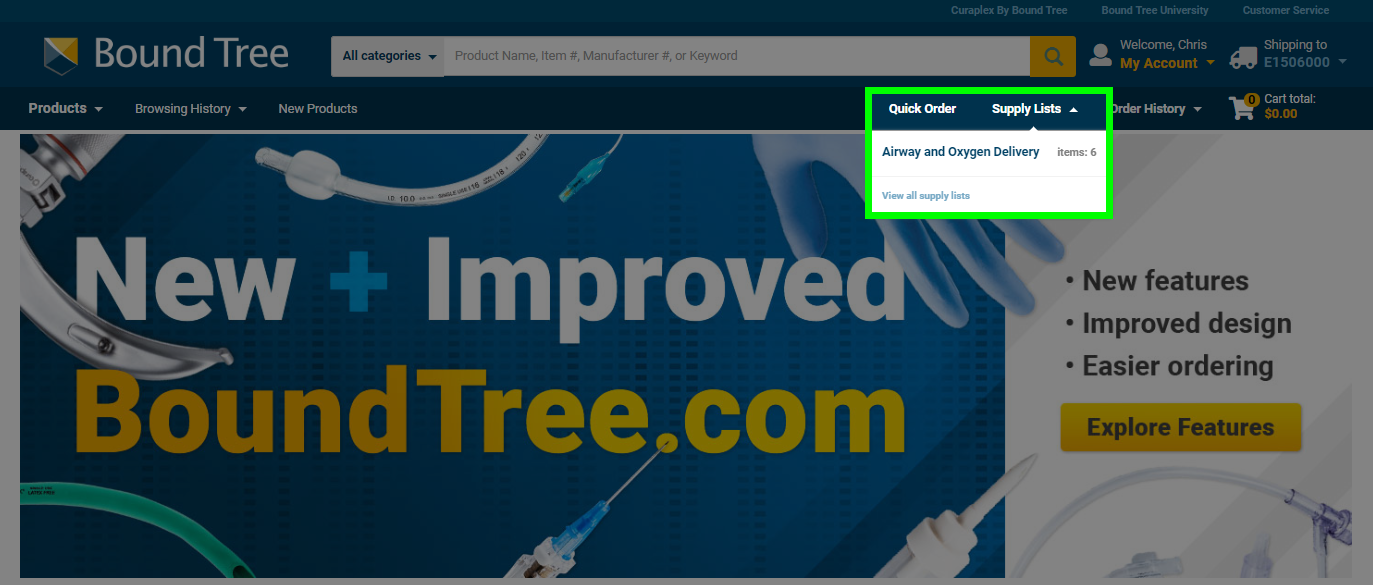
To view your Supply Lists page, click on the "Supply Lists" drop down at the top of the page and then the "View all supply lists" link that appears.
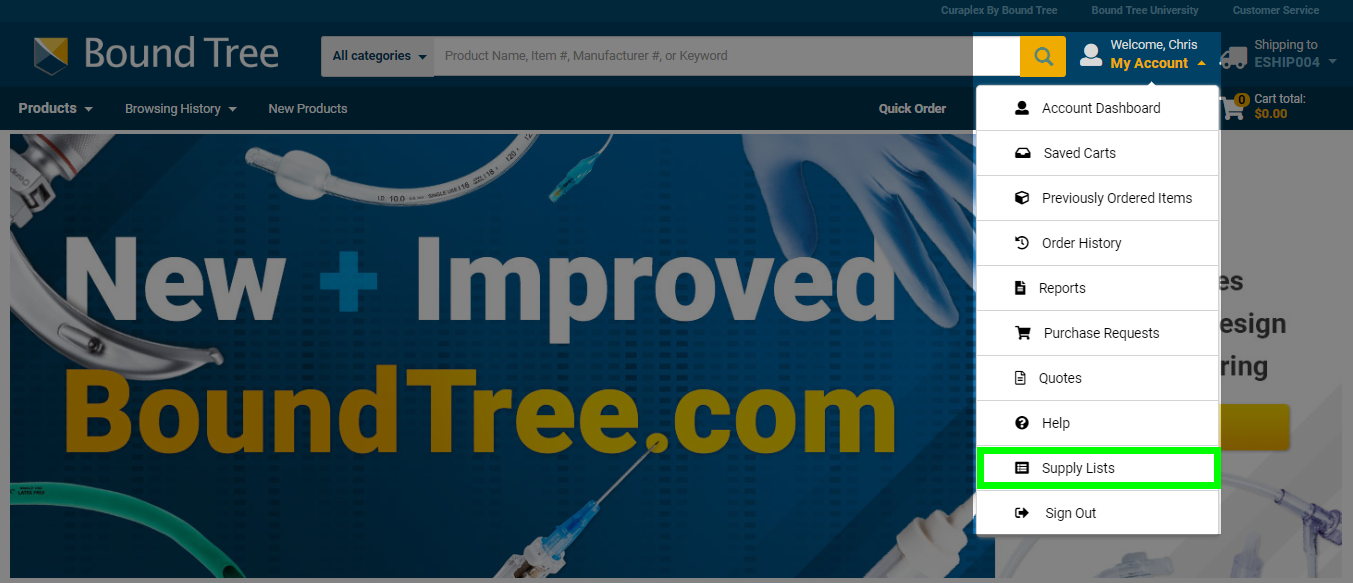
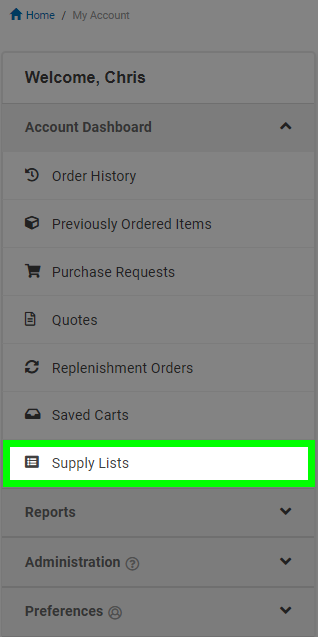
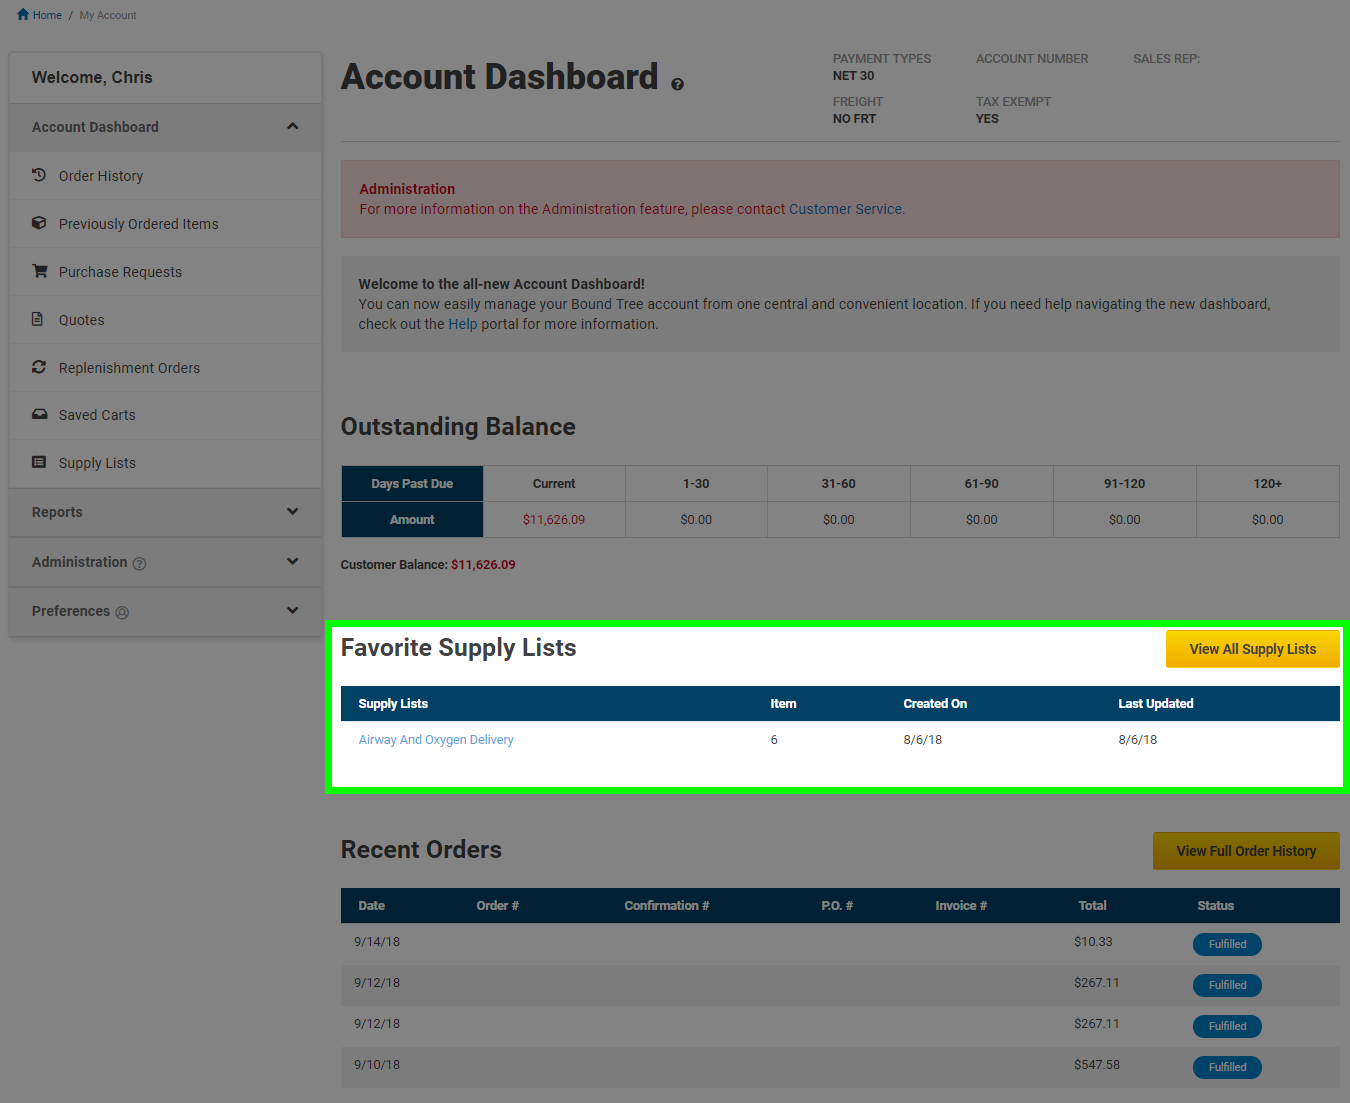
You can also access it through your My Account drop down at the top of the page or through the Account Dashboard. On the Account Dashboard, click on the Supply Lists link on the left side of the page under the Account Dashboard section.
The Supply Lists page allows you to set supply list(s) as a favorite for quick access. These favorites will appear under the the "Supply Lists" drop down at the top of the page.
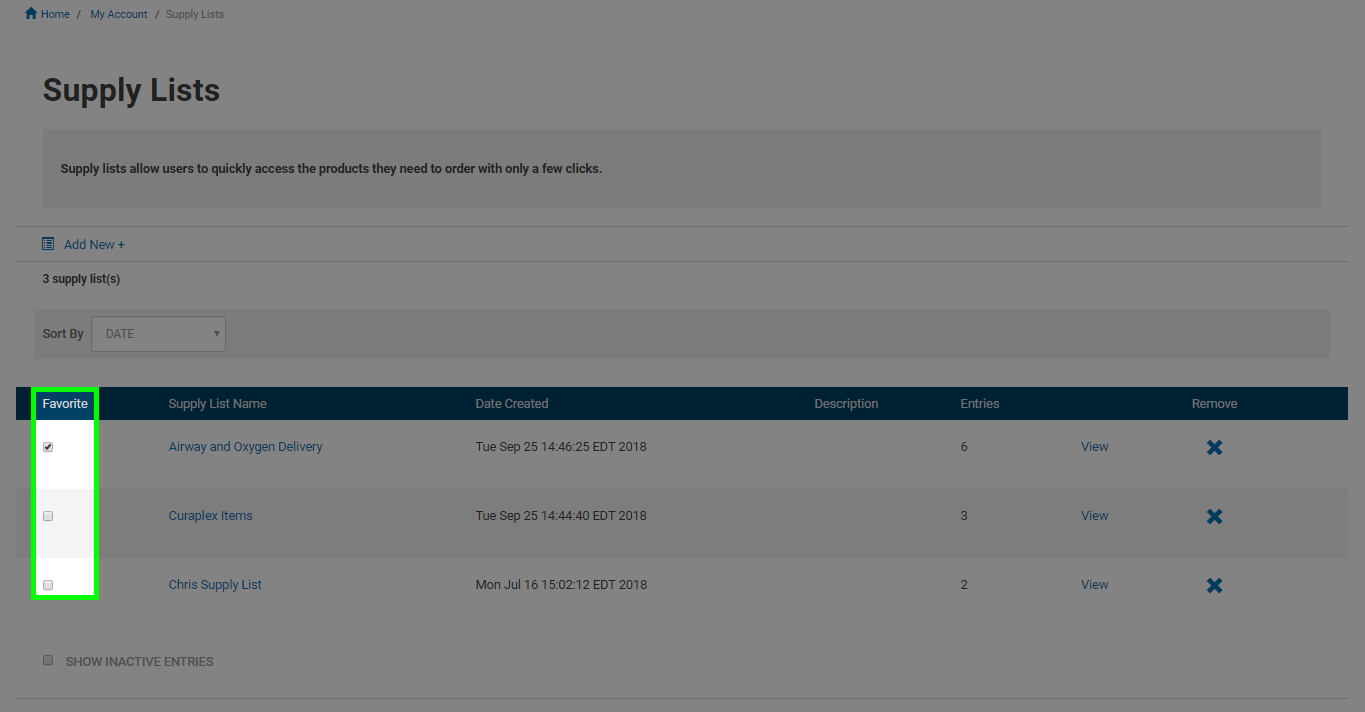
Go to your Supply Lists page by clicking on the "Supply Lists" drop down at the top of the page and then the "View all supply lists" link that appears. You can also access it through your Account Dashboard.
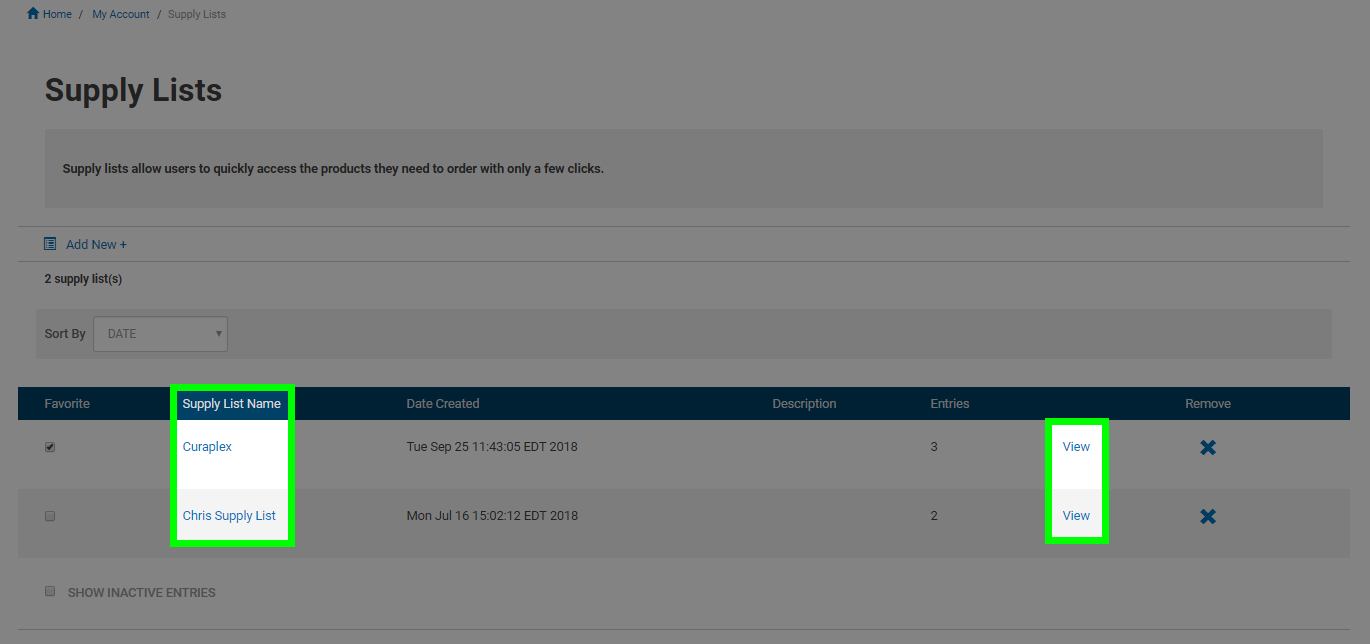
Your Supply List(s) will appear sorted by the date created by default. Check the box of the Supply List(s) you want to favorite. This can also be done from the supply list details page.
Any Supply List(s) that you favorite will then be added to your "Supply Lists" drop down at the top of the page.
You can also view your favorite Supply List(s) through your Account Dashboard page.
Supply Lists can be easily shared with any other users in your account. Shared lists cannot be edited or deleted by the users they are shared with. Only the user that creates them can make changes to them.
To share a Supply List go to your Supply Lists page by clicking on the "Supply Lists" drop down at the top of the page and then the "View all supply lists" link that appears. You can also access it through your Account Dashboard.
Your active Supply Lists will be listed on this page for access. Click on either the name of the Supply List or the "View" link to enter the details page.
Click on the "Show Sharing Data" box to open a list of all the other users in your Bound Tree account.

You can search by username for users to share your Supply List with or find them in the table. Click the + button in the "Add" column to share your list with that user.

The list of users that your Supply List is shared with will appear under the "Users Who Share This List" section of the page. You can click the X button in the "Remove" column to remove access to your list.

Edit your existing Supply Lists to add or remove products from them. Any changes made to a shared Supply List will apply to the shared copy as well allowing you to easily maintain them for users on your account.
To edit a Supply List go to your Supply Lists page by clicking on the "Supply Lists" drop down at the top of the page and then the "View all supply lists" link that appears. You can also access it through your Account Dashboard.
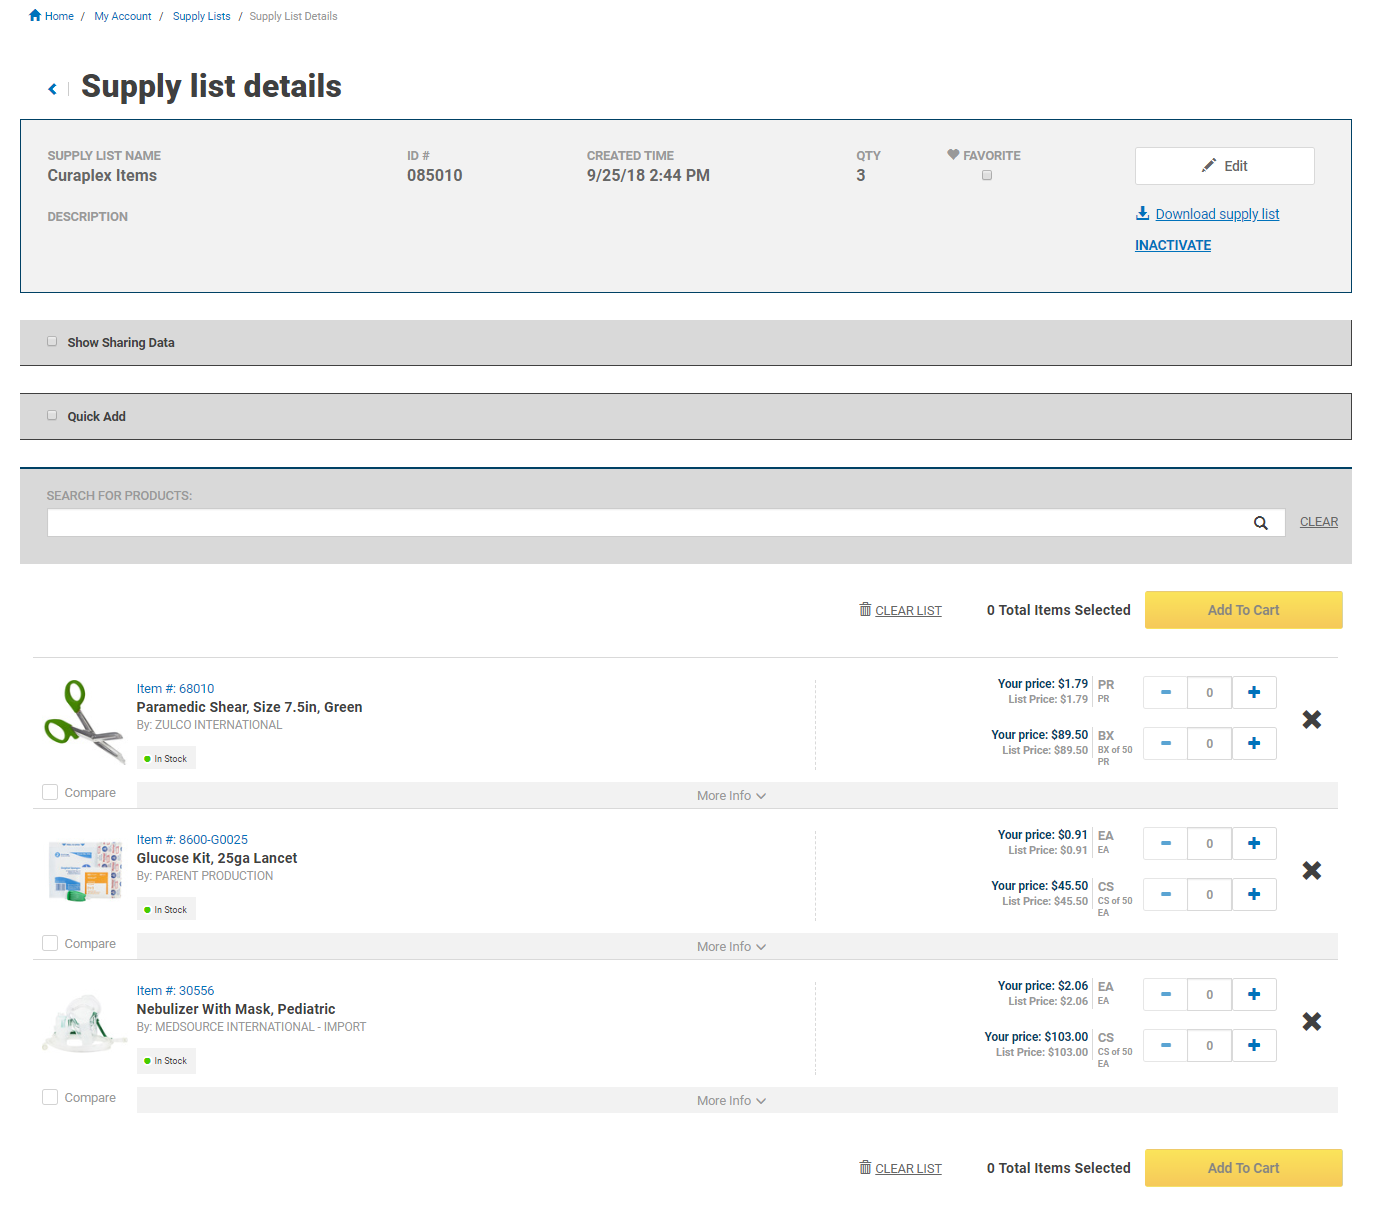
Select an existing Supply List by clicking on the name of the Supply List or the "View" link to enter the details page.
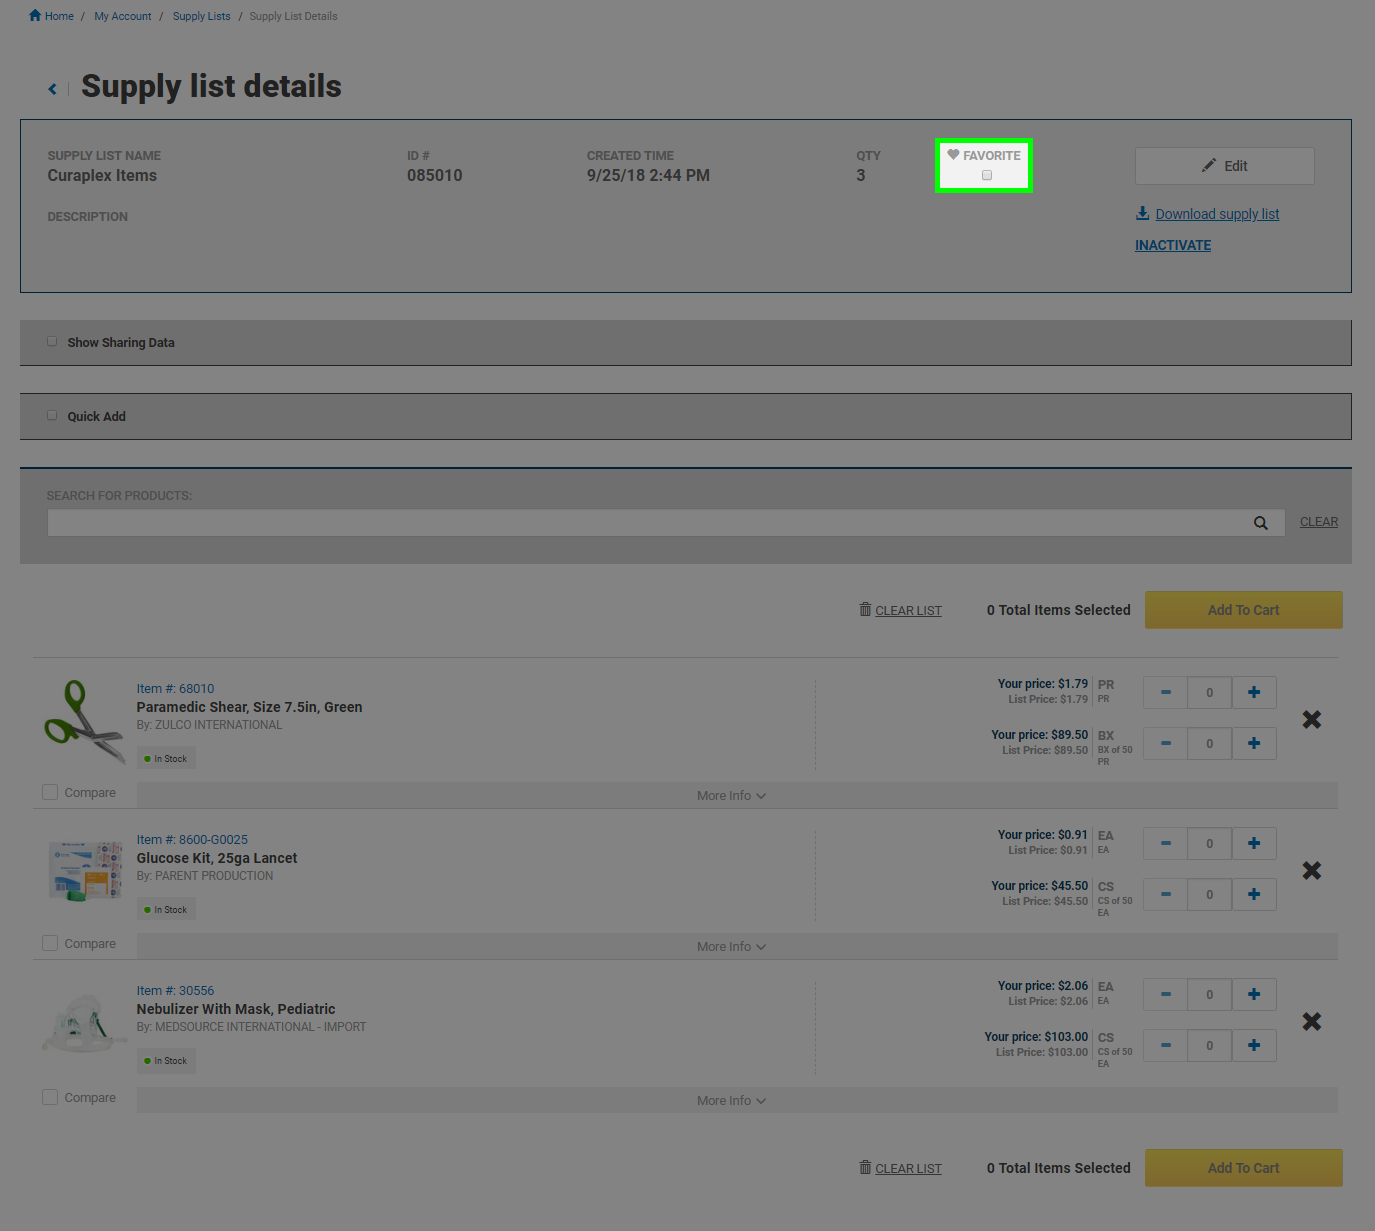
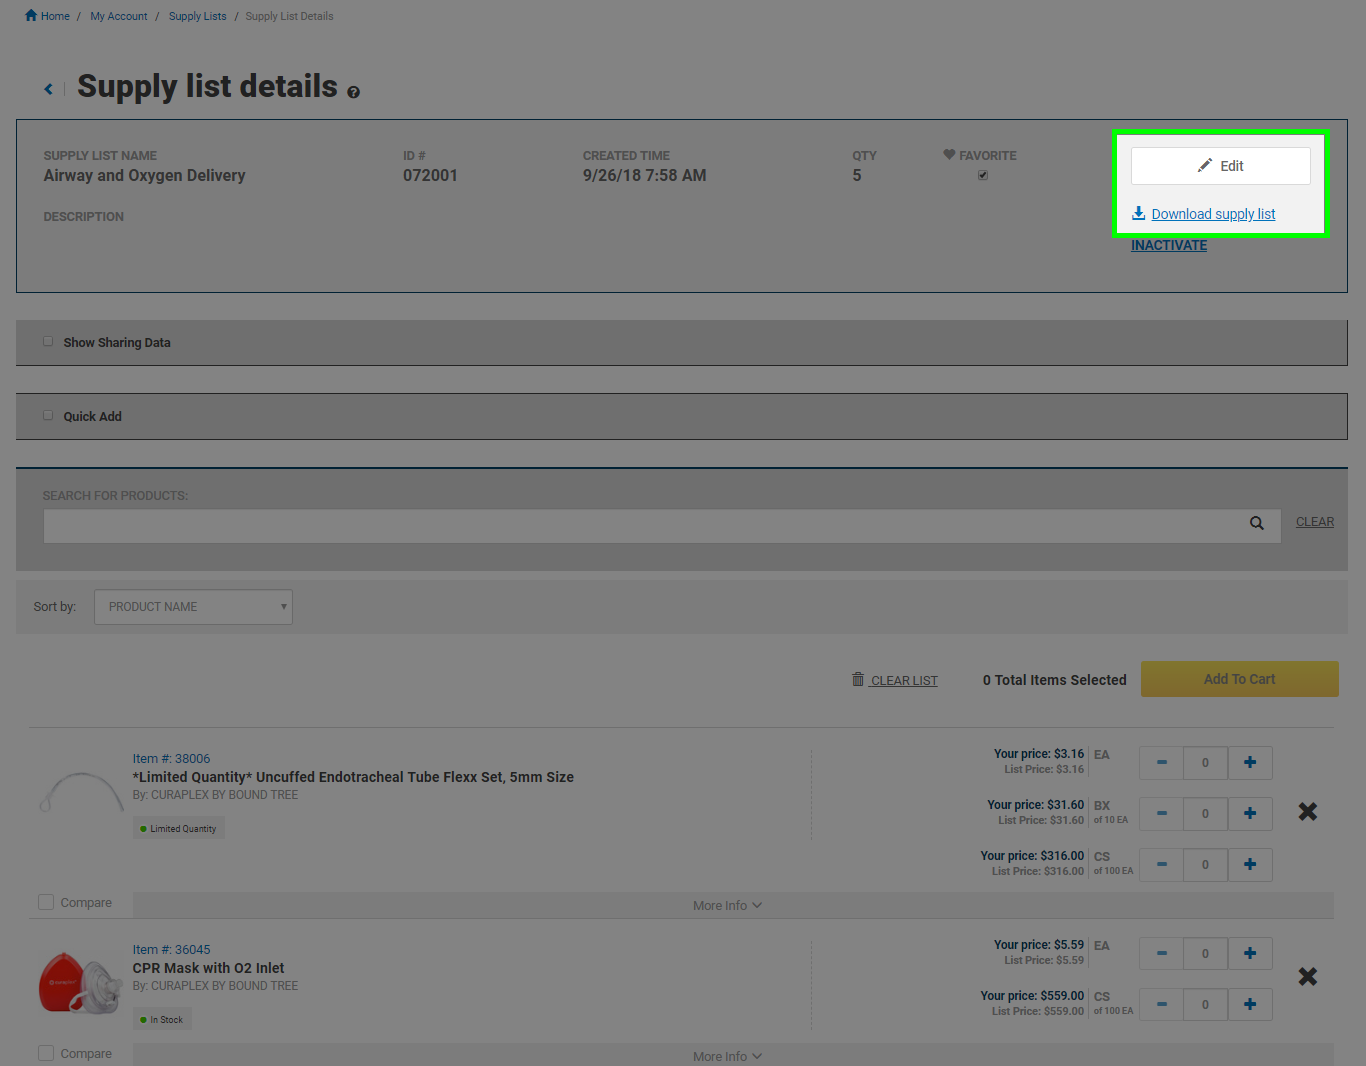
Click the " Edit" button to change the name or description of the Supply List or the " Download supply list" link to download the Supply List as an Excel sheet.
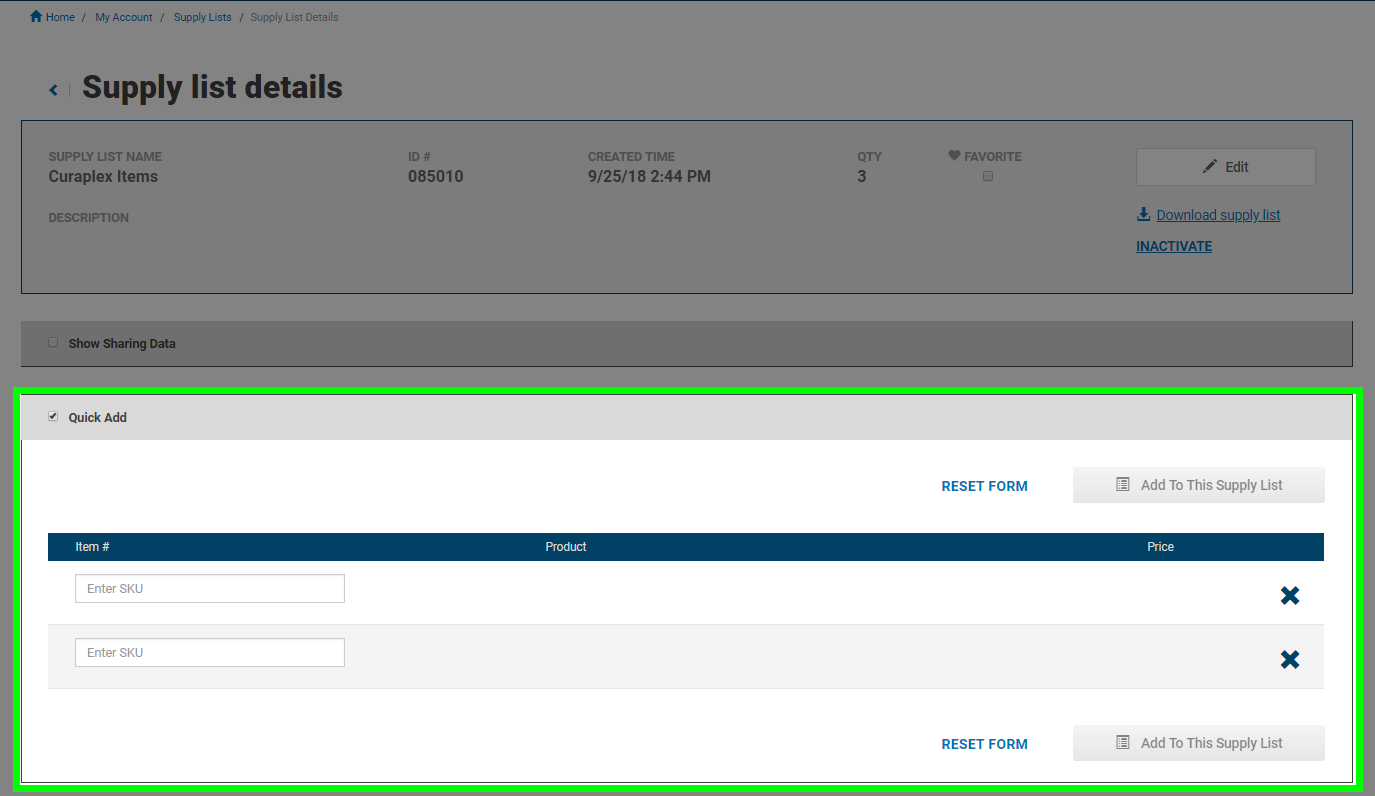
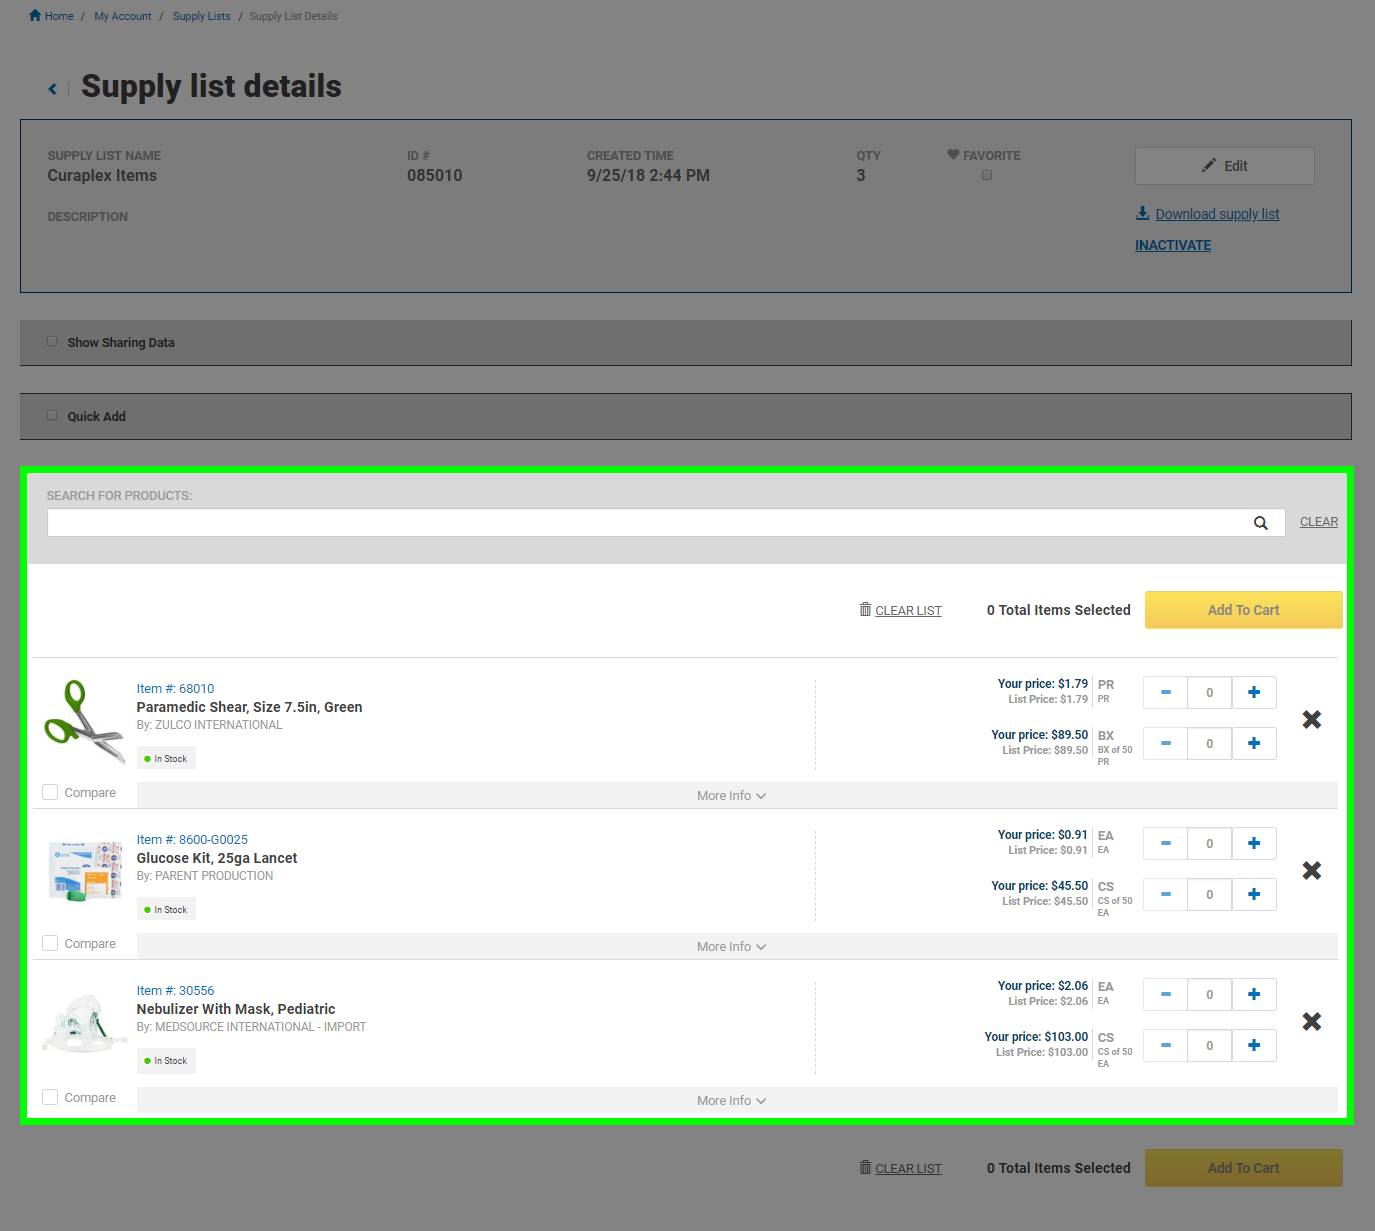
You can add products to your Supply List from a Quick Add section on the "Supply list details" page. Click on the "Quick Add" box on the page, enter the item number(s) that you would like to add, and press the "Add To This Supply List" button. The page will refresh and the item will now be available in your Supply List.
Products in your Supply List will be listed below the Quick Add section of the page. Here you can add items to your Shopping Cart, remove individual products from your Supply List, or clear the entire list using the "Clear List" link.
To import a Supply List go to your Supply Lists page by clicking on the "Supply Lists" drop down at the top of the page and then the "View all supply lists" link that appears. You can also access it through your Account Dashboard.
From the Supply Lists page, click the "Add New +" link. Type in a name for the Supply List in the pop up and then click the "Create New Supply List" button. You can upload an existing list of products if you have it in an Excel file (.xlsx format). The first column must contain item numbers only.
After pressing the "Create New Supply List" button, you will be taken to your new Supply List page. From here, you can add additional products, share it out with other users in your account, and set it as a favorite.
Supply Lists that are no longer needed can be set as inactive. They can be reactivated at a later time to begin using them again.
To inactivate a Supply List go to your Supply Lists page by clicking on the "Supply Lists" drop down at the top of the page and then the "View all supply lists" link that appears. You can also access it through your Account Dashboard.
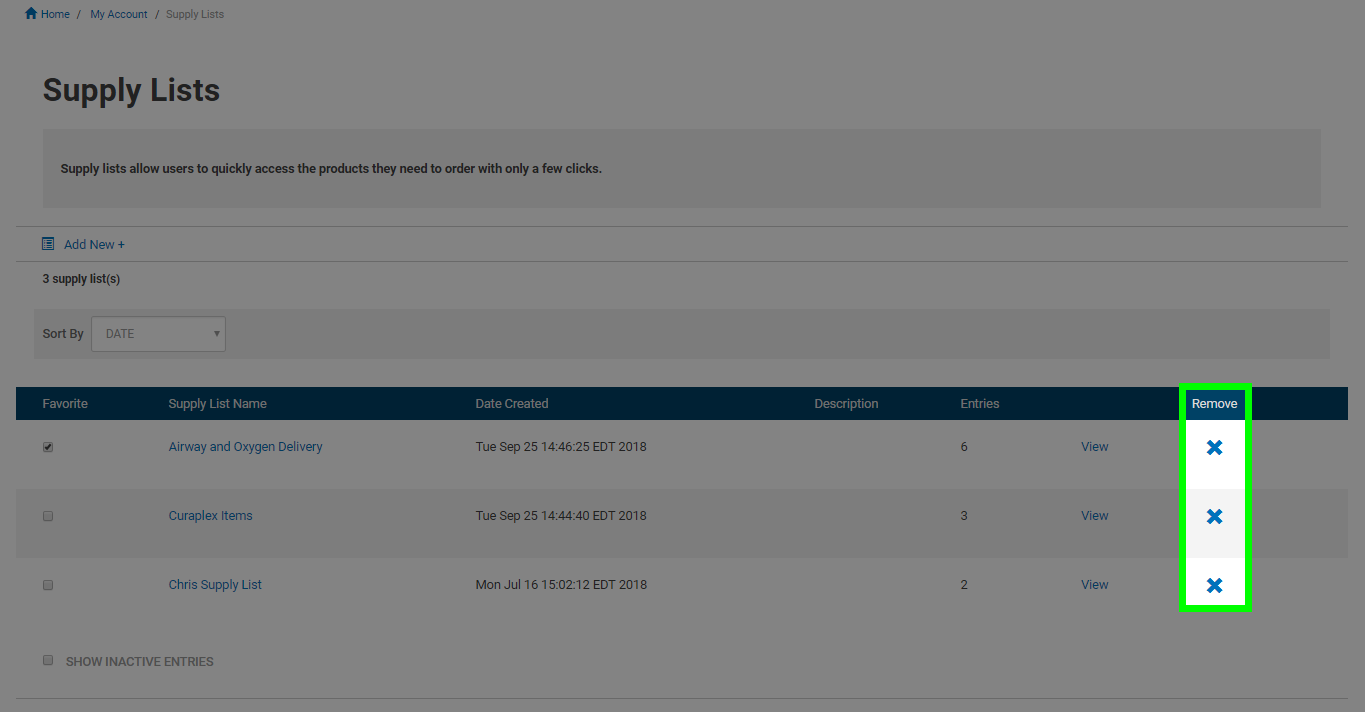
The Supply List can be inactivated by clicking the X button under the "Remove" column on the Supply Lists page.
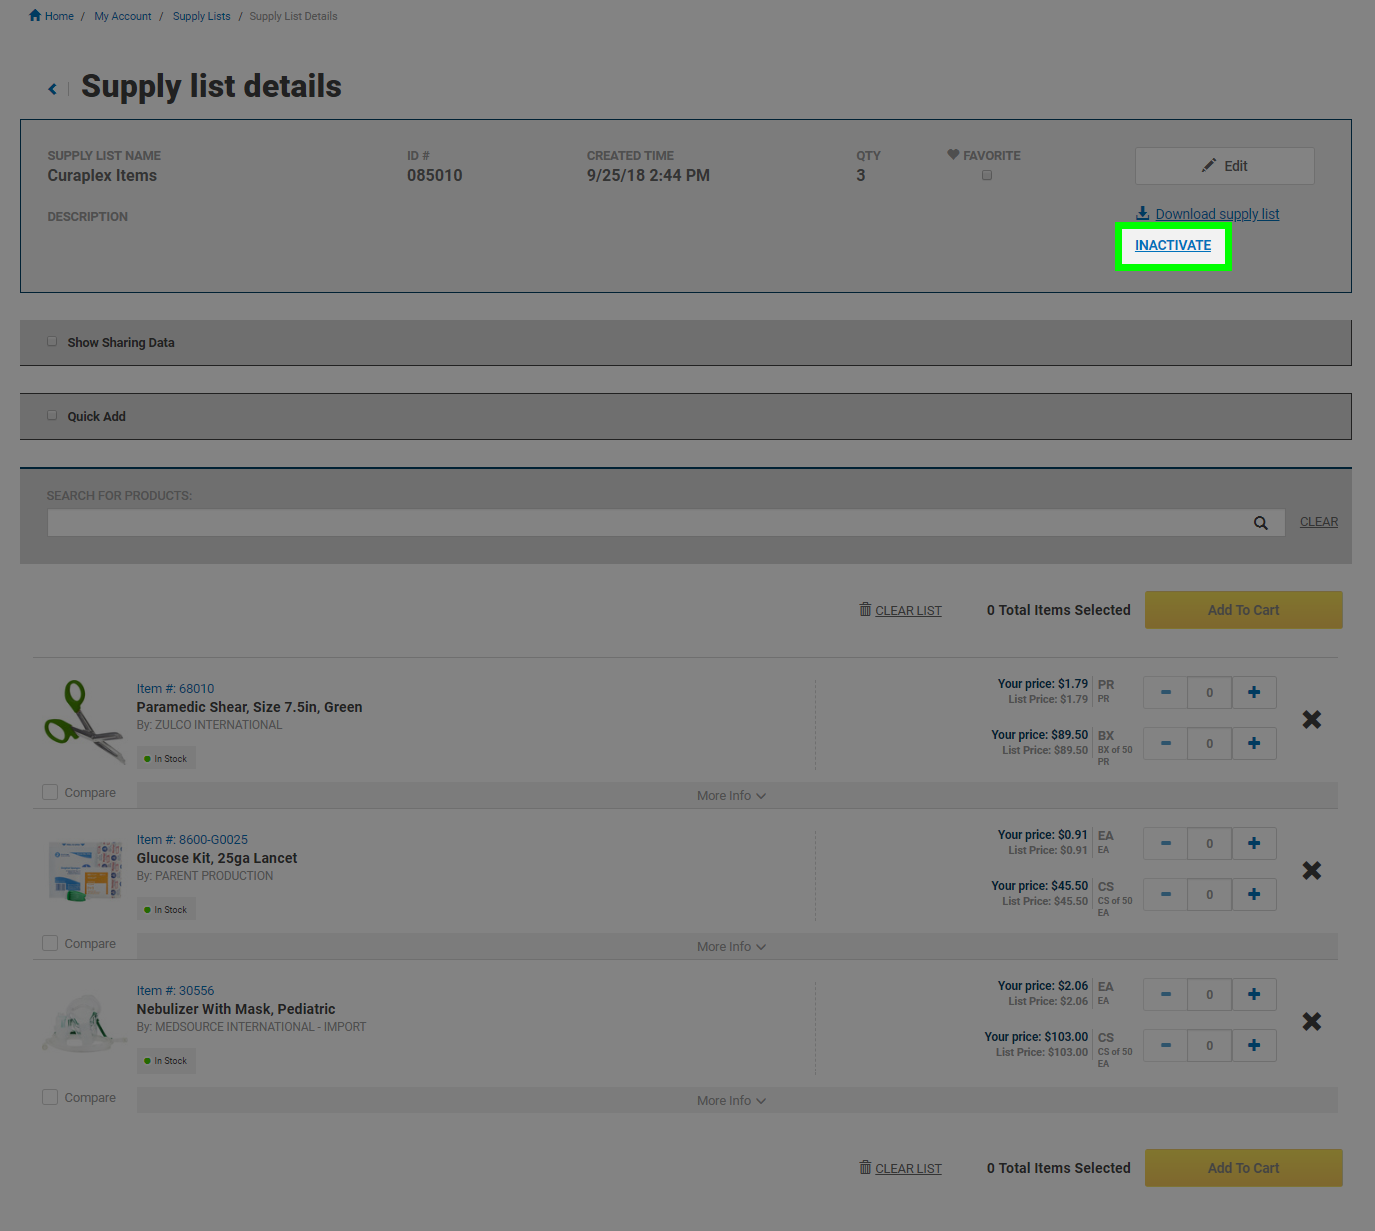
Select an existing Supply List by clicking on the name of the Supply List or the "View" link to enter the details page where you can inactivate it as well.
The "INACTIVATE" link on the "Supply list details" page will also remove the Supply List from your active list but not delete it. A shared Supply List that is inactivated will no longer be usable by any users that it is shared with.
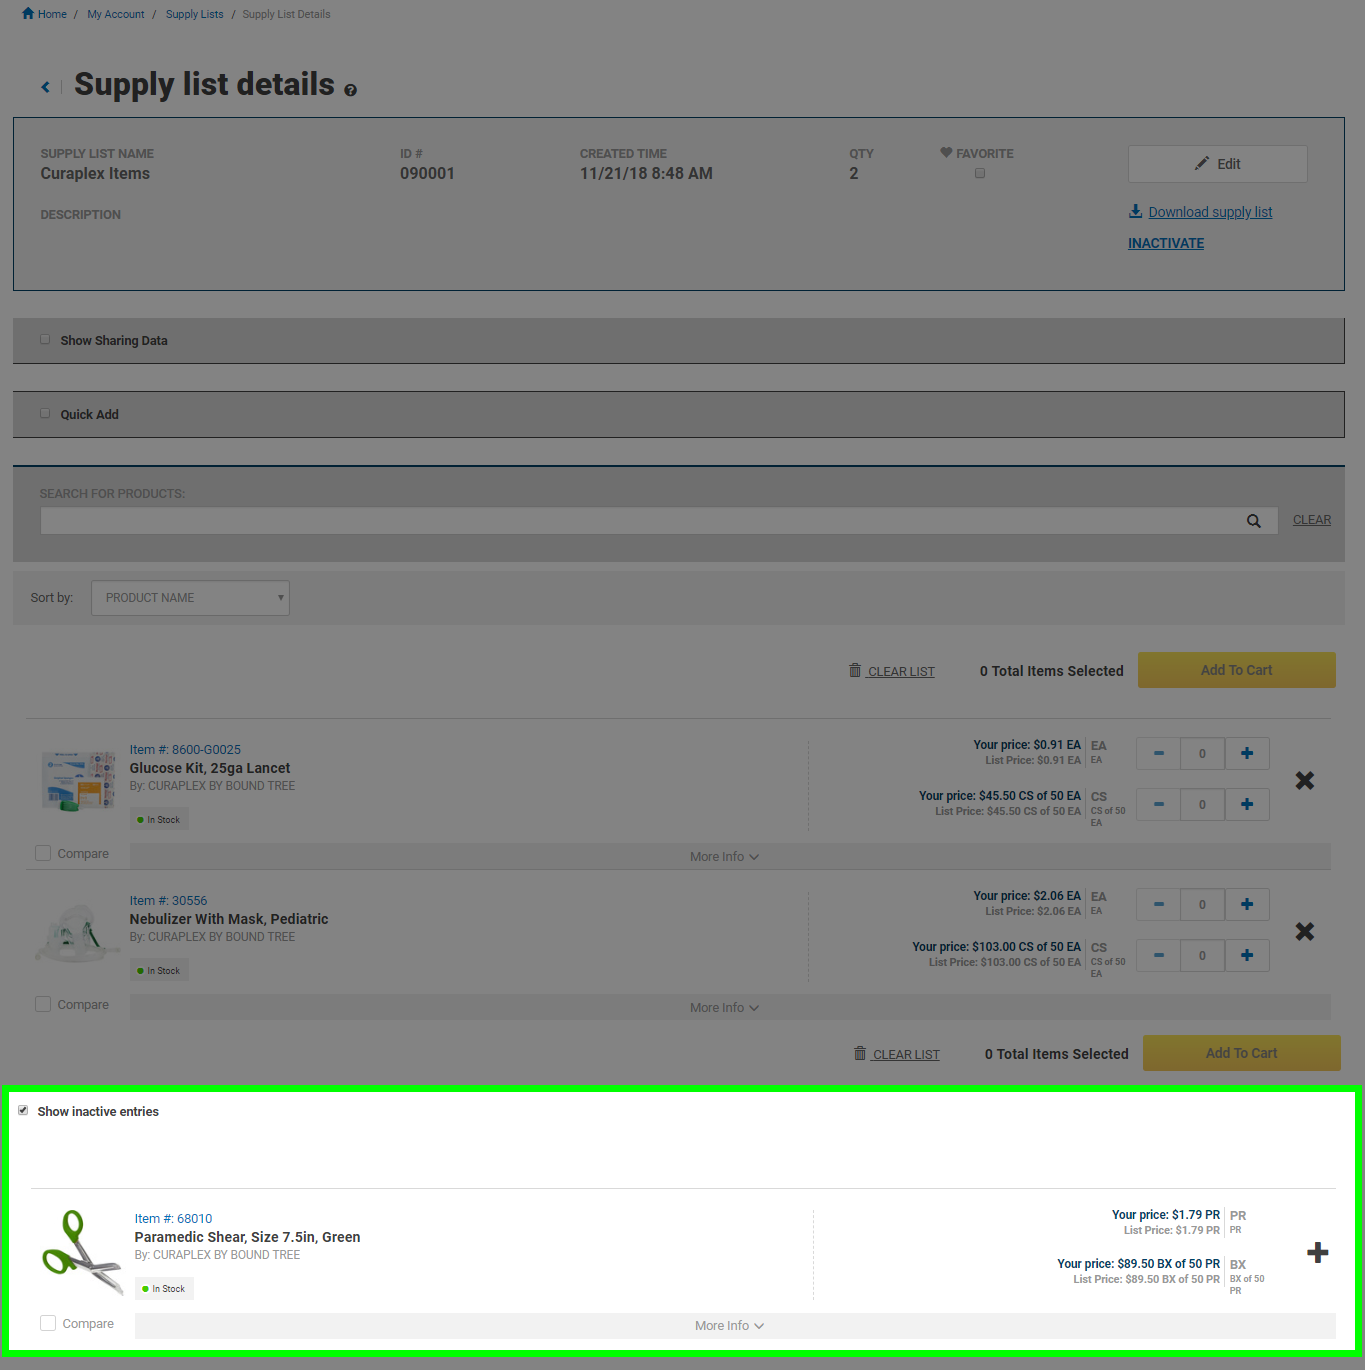
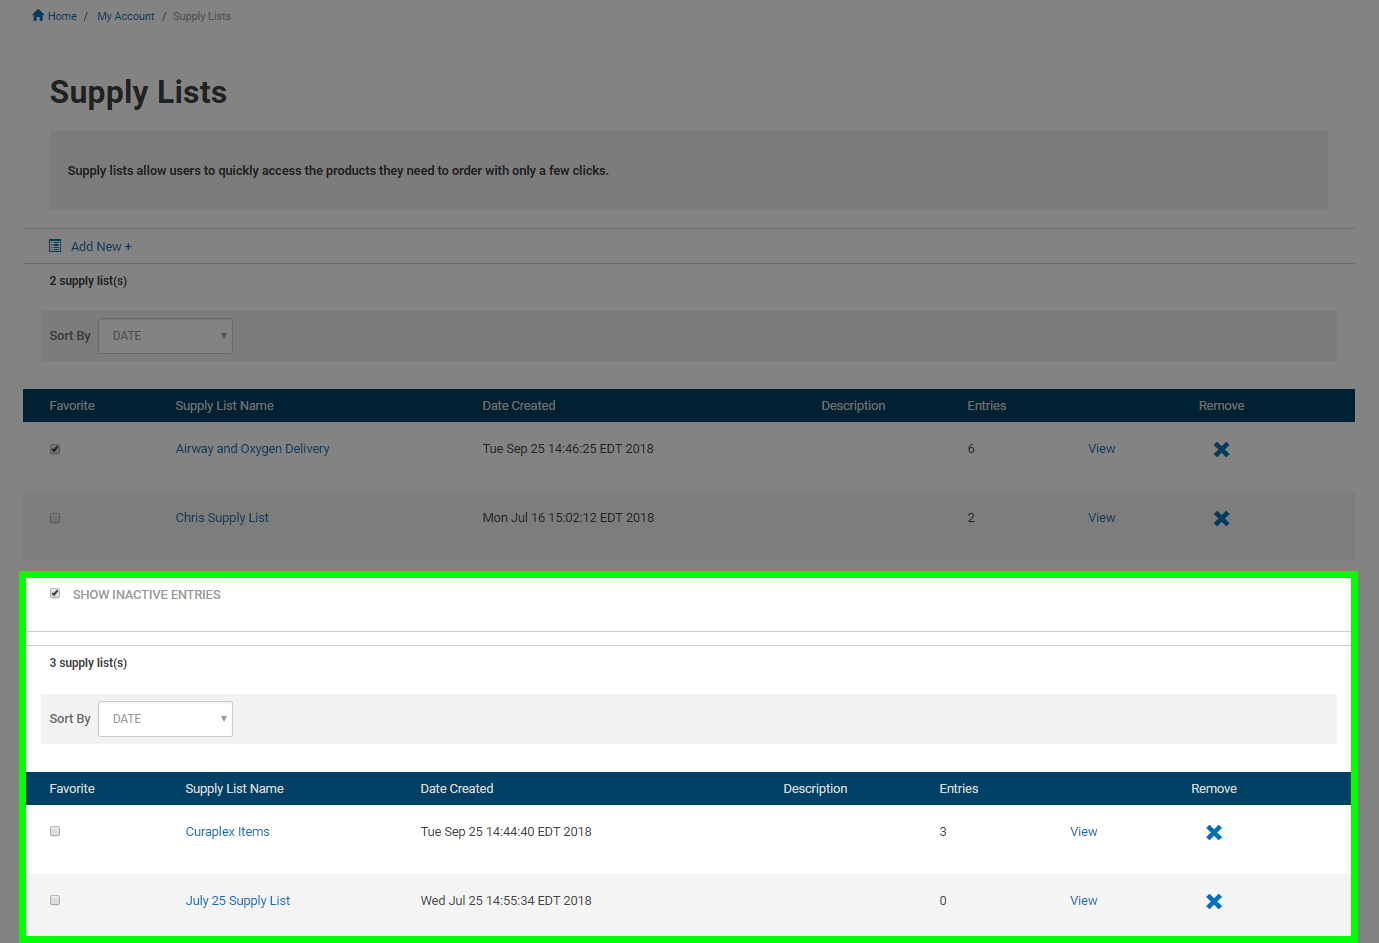
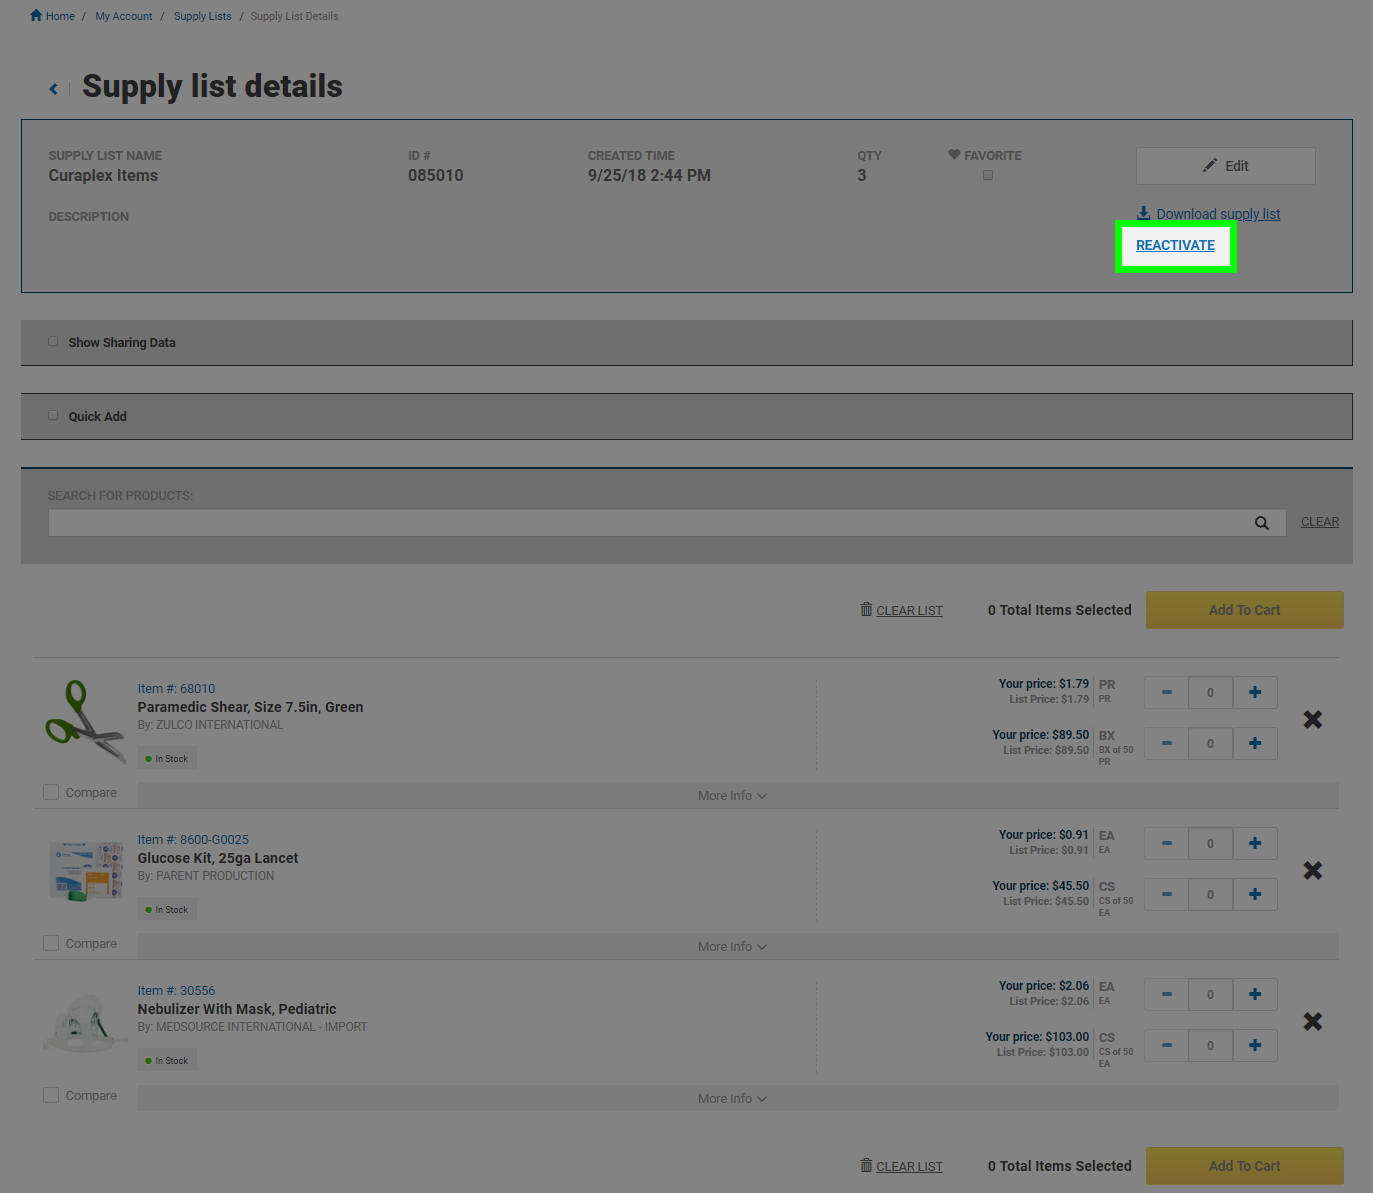
To reactivate a Supply List, click the "Show Inactive Entries" box on the "Supply list details" page. Click the "X" button under the "Remove" column and the Supply List will be reactivated. You can also reactivate a Supply List from in the "Supply list details" page.
Products in Supply Lists that are no longer needed can be set as inactive. They can be reactivated at a later time to make them available for ordering again.
To inactivate products in your Supply List go to your Supply Lists page by clicking on the "Supply Lists" drop down at the top of the page and then the "View all supply lists" link that appears. You can also access it through your Account Dashboard.
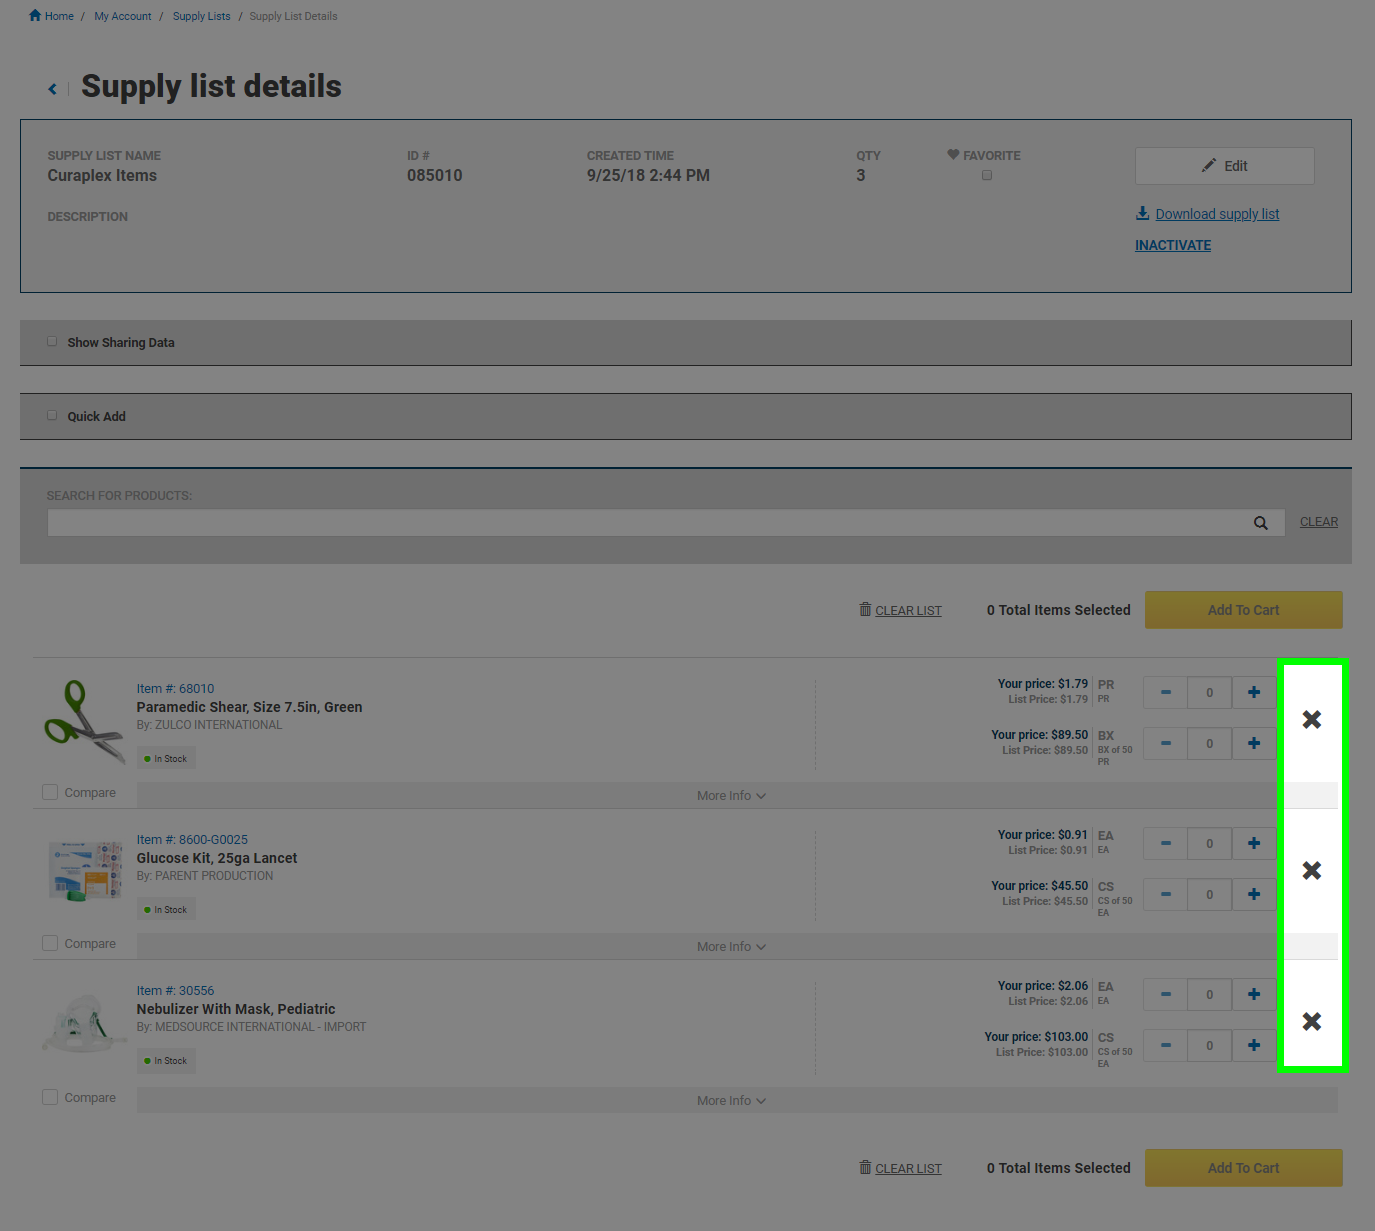
Select an existing Supply List by clicking on the name of the Supply List or the "View" link to enter the details page where you can inactivate the product(s) that are no longer needed on the list.
Click on the X button next to the product you want to remove on the "Supply list details" page. This will remove it from your active products but not delete it.
To reactivate products in a Supply List, click the "Show inactive entries" box on the "Supply list details" page. Click the + button next to the product name and the product will be reactivated.