
Account Customization
Custom Categories allow you create a customized product list for your organization to use. As the administrator of your account, you can create the category names you want and populate them with the items you choose. This gives your organization control over what items can be ordered by users on your account. Currently in development, ask your dedicated Bound Tree Account Manager about this feature to enable it on your account when it is ready.
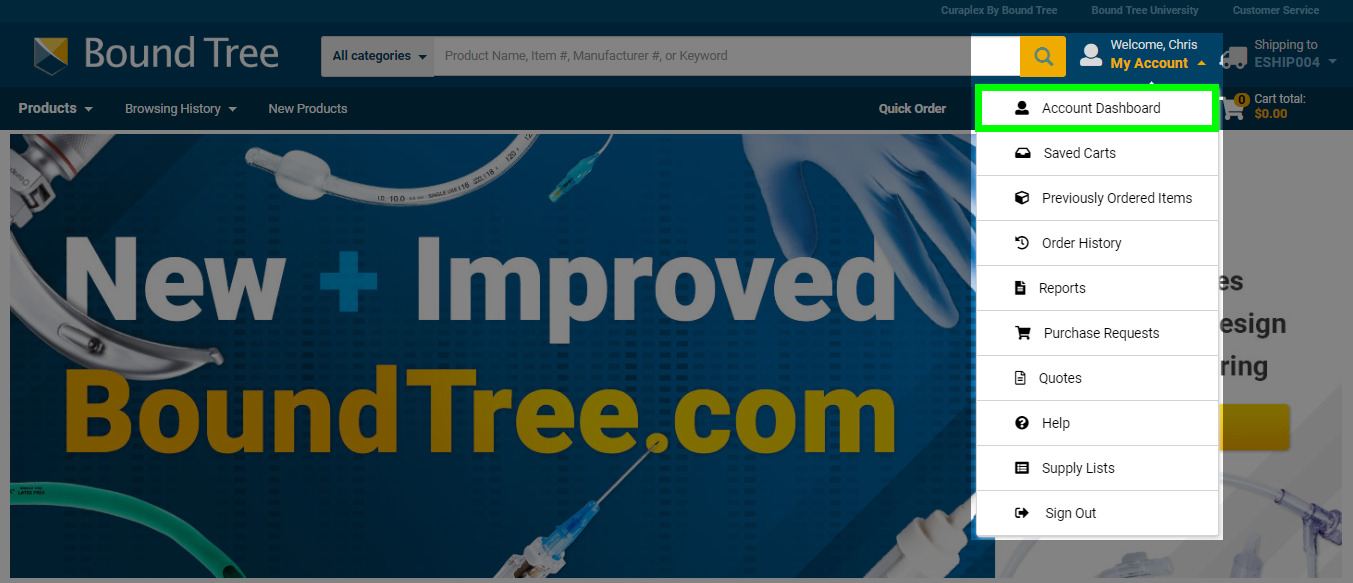
When Custom Categories are enabled for your account, you will be able to manage them by logging in to a username with the "Admin" user group assigned to it. To start, click on the My Account drop down at the top of the page when signed in and select the "Account Dashboard" link.
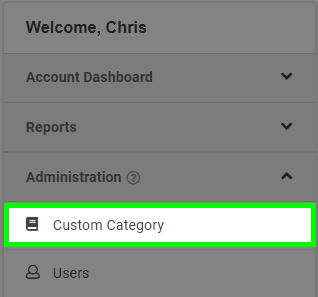
Select the "Custom Category " link from the menu on the left under Administration.
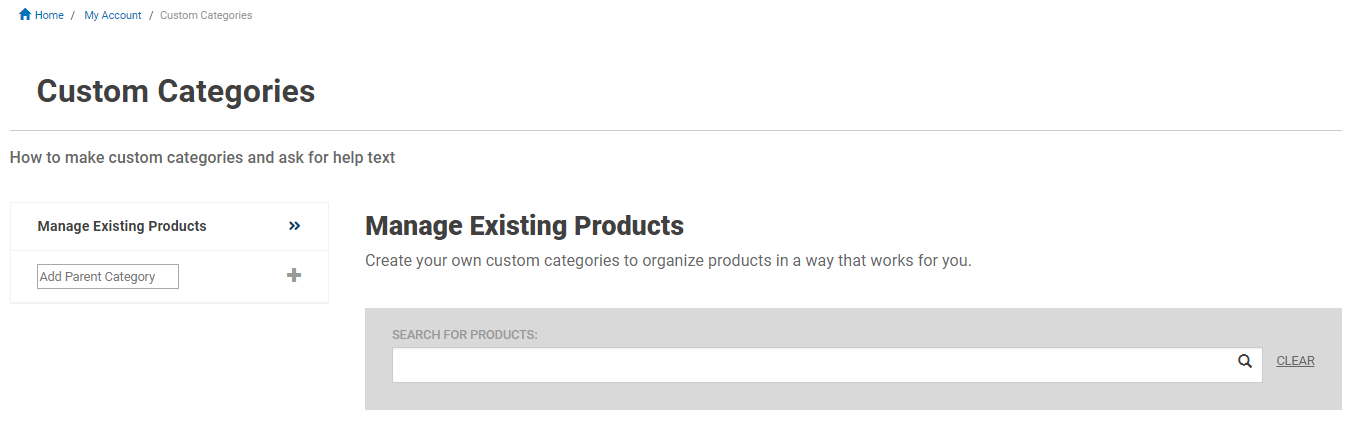
The Custom Categories page allows you to create your categories, add items to your categories, and manage products you already have in your product list.
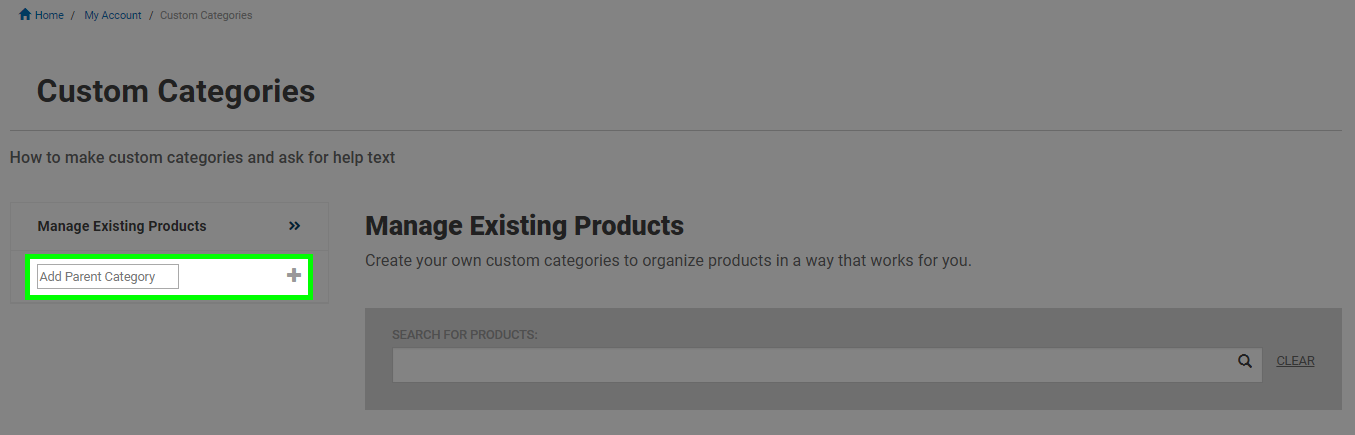
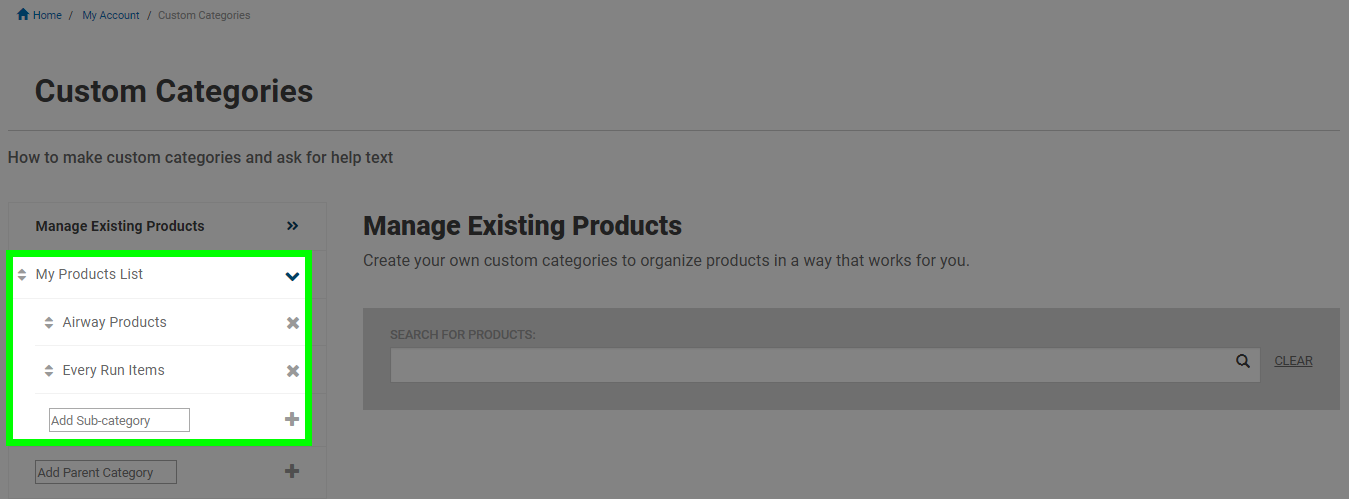
On the left hand side of the page is the category list. Here you will create any parent and subcategories for your account's product list. Enter the first parent category in the "Add Parent Category" box and press the + icon next to it when you are done. Products are added at the subcategory level so the parent category is used for display and organization purposes only.
Next, add a subcategory that you will be populating with products. You can create as many subcategories as you would like, and use existing Bound Tree category names or create your own naming convention.
To rename a category, click on it to load it and then click the name a second time to allow for changes. Press the enter key on your keyboard when you are finished to save your changes.
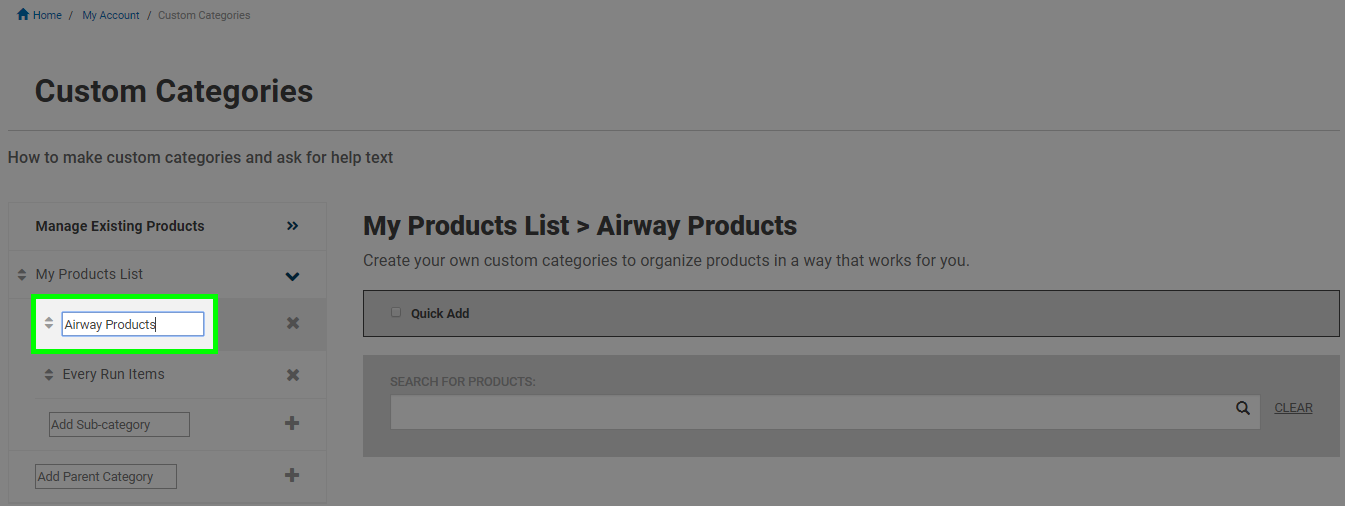
Click on the name of the subcategory to begin adding products to it. The "Quick Add" box will open when checked and allow you to enter the desired item numbers.
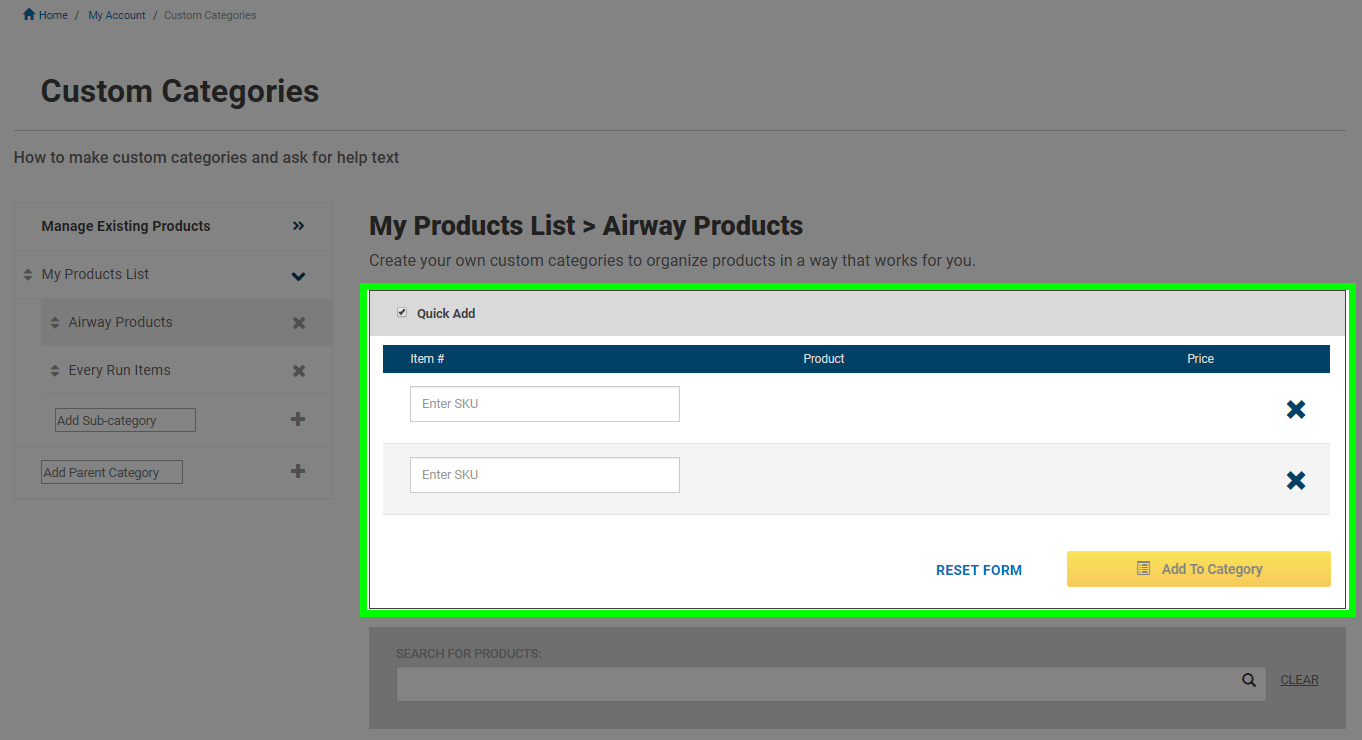
Enter the item numbers for the products you want in the category and then press the tab key on your keyboard or click on the next available "Enter SKU" box. The item will load on the page for you to view. Press the " Add to Category" button when you are done entering item numbers and ready to add them to your custom category.
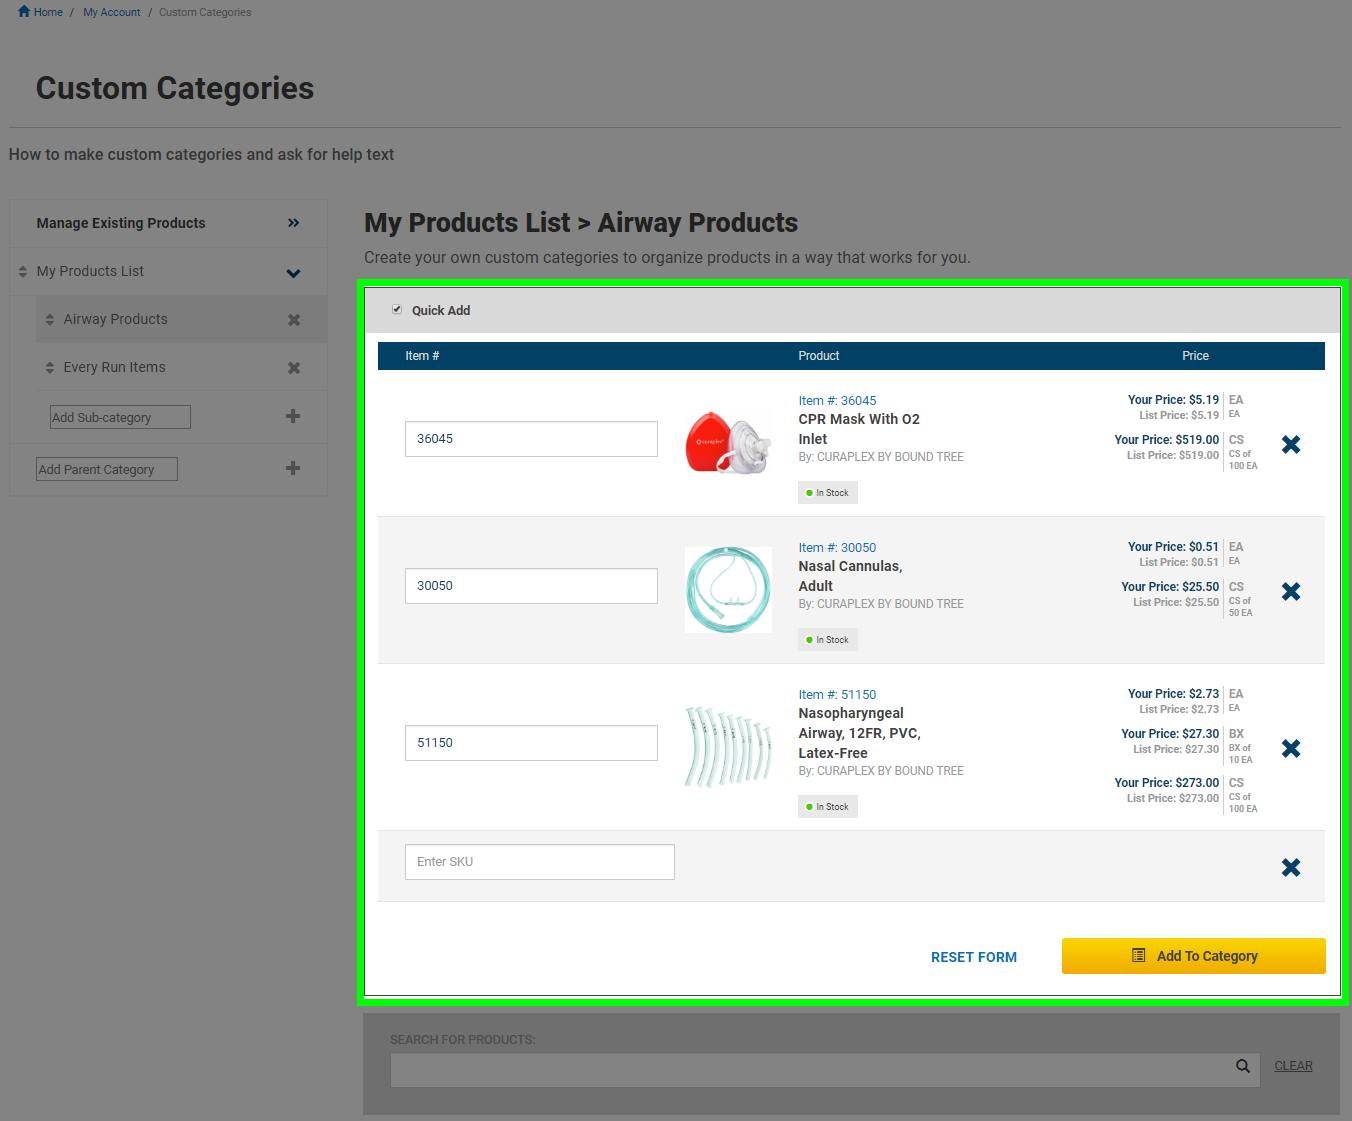
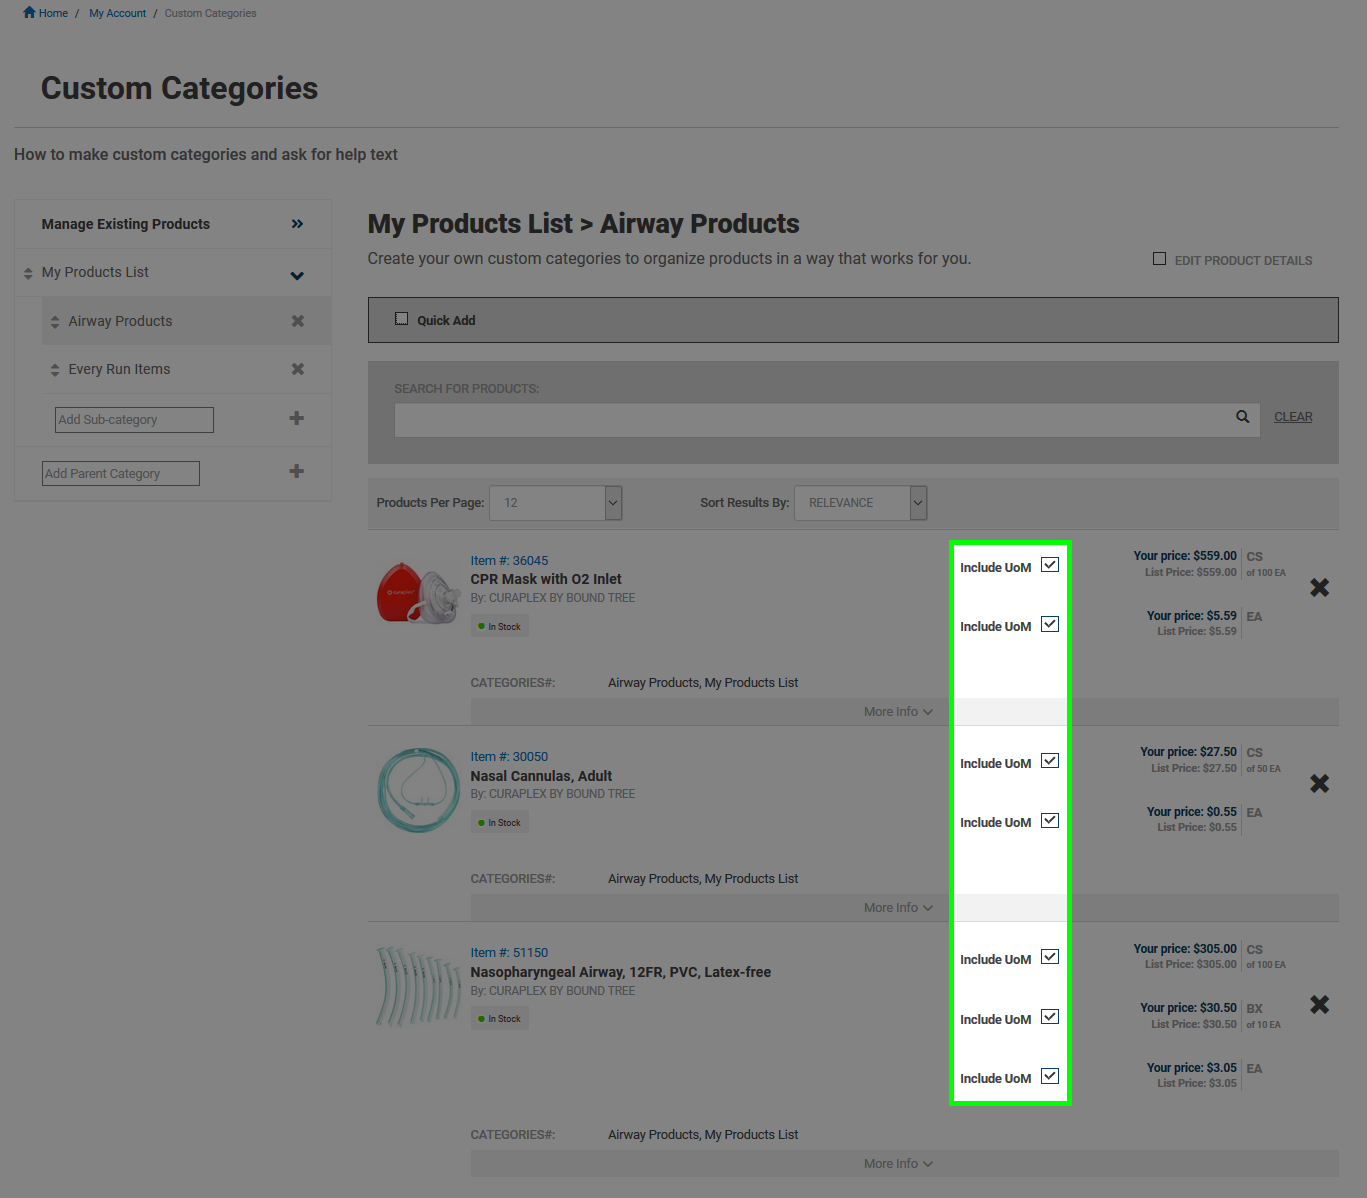
The items will be added to the selected category. If you want to remove a unit of measure on an item, simply uncheck the box next to it for the product and it will no longer be available.
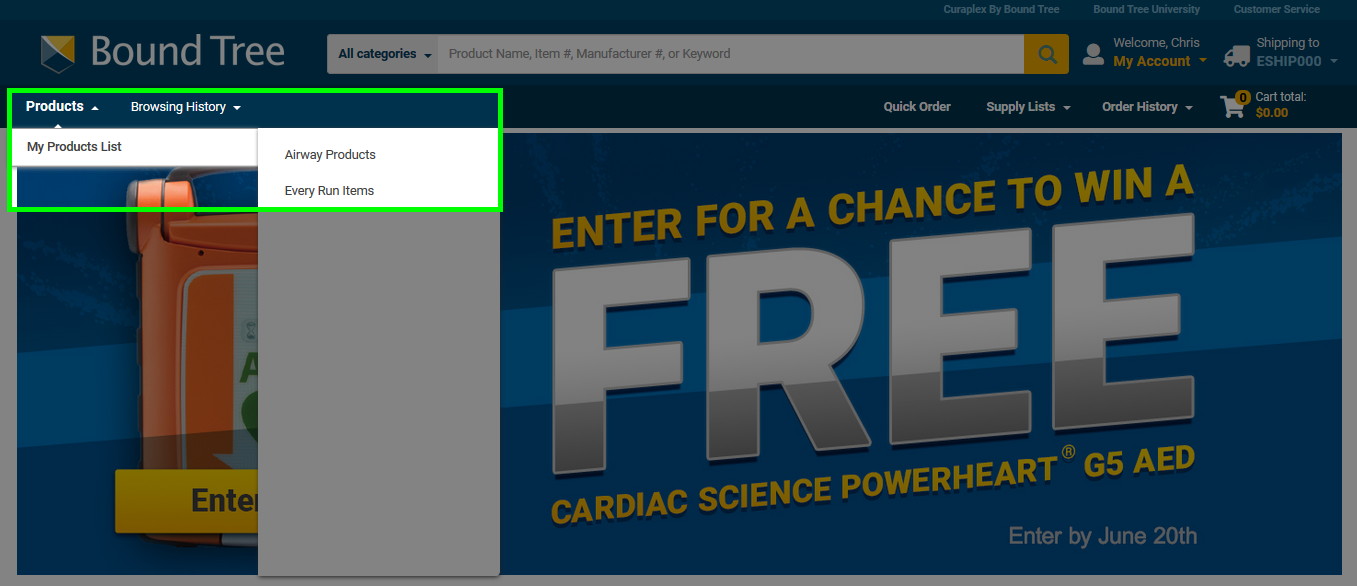
Your users will now see the categories and products that you have set up when they log in instead of the usual Bound Tree categories.
If you need any assistance with managing your Custom Categories, please contact Customer Service and one of our representatives can assist you.
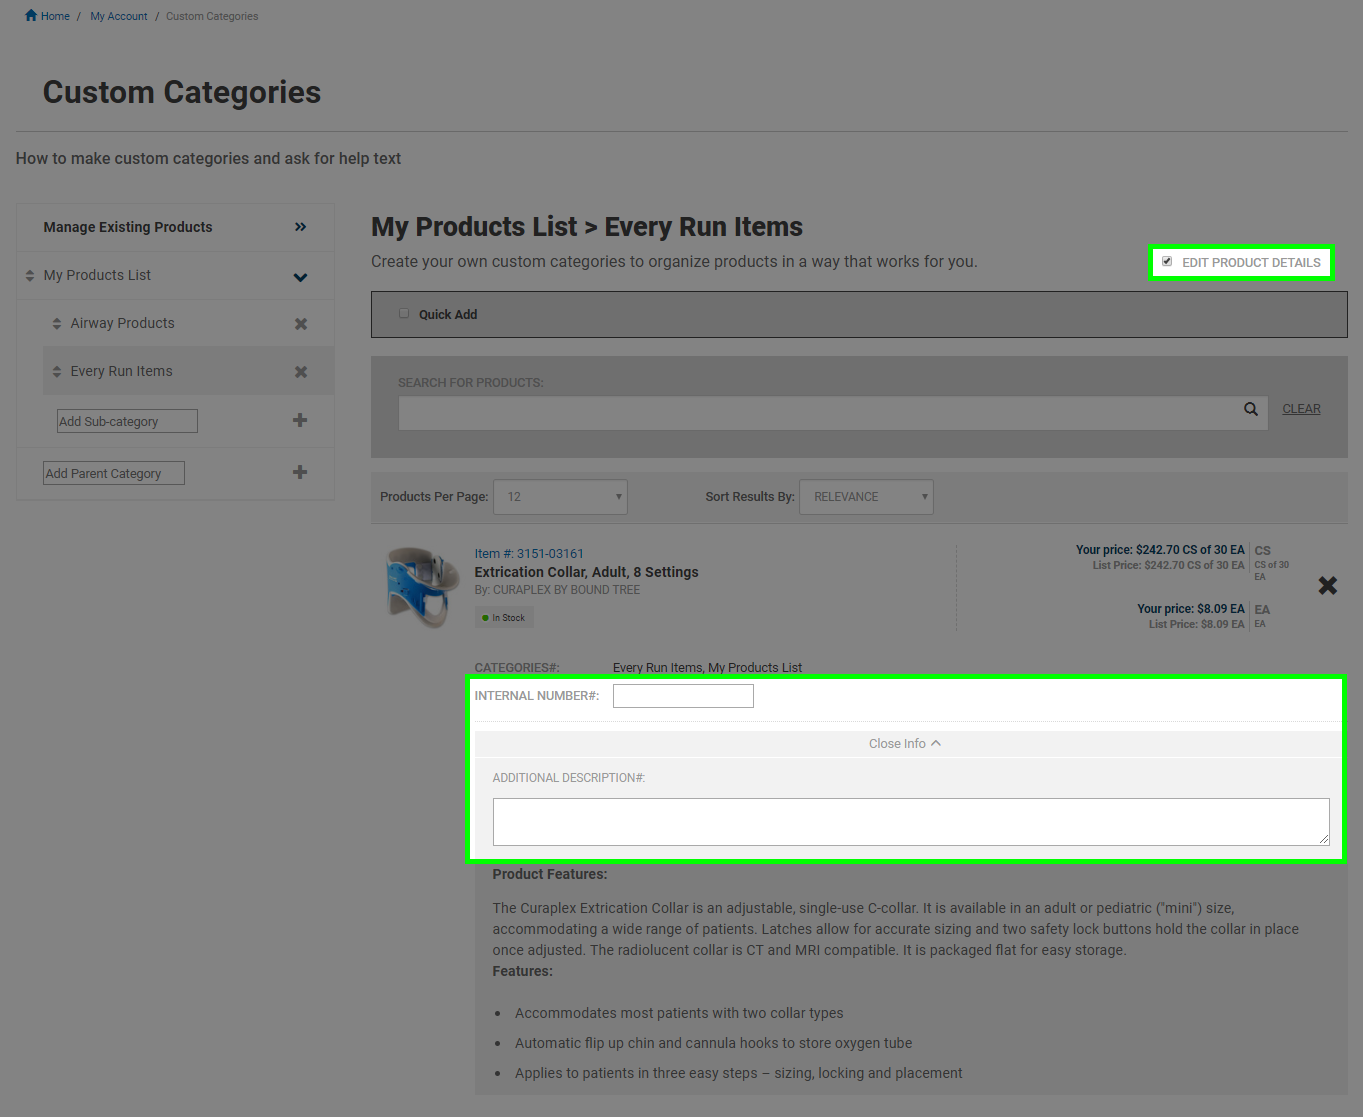
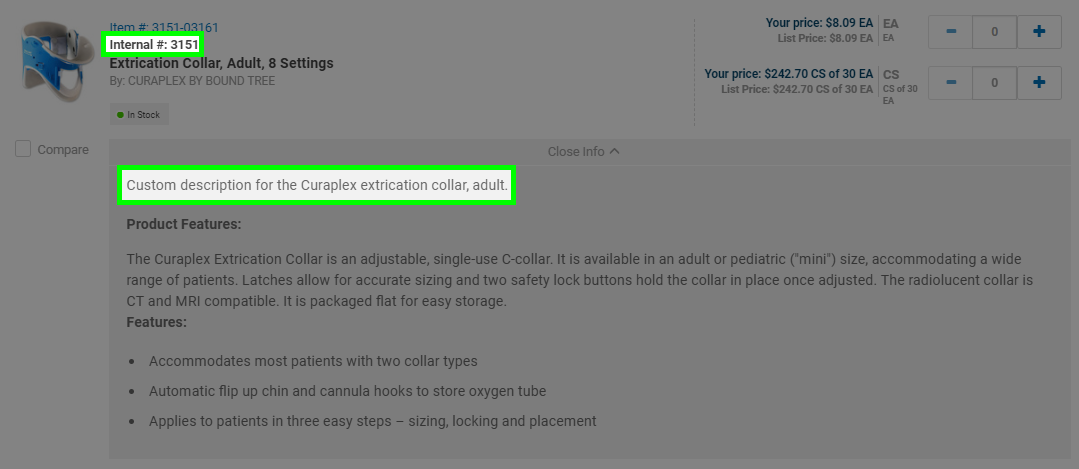
Assign an internal item number or additional description to products in your Custom Category to help your organization manage the products you regularly buy. Both the internal numbers and additional description you create are searchable on the website allowing you to easily find items based on your own unique internal numbers and descriptions. This feature is only available with use of the Custom Category functionality. Currently in development, ask your dedicated Bound Tree Account Manager about this feature to enable it on your account when it is ready.
When Internal Item Numbers and Custom Categories are enabled for your account, you will be able to manage them by logging in to a username with the "Admin" user group assigned to it. To start, click on the My Account drop down at the top of the page when signed in and select the "Account Dashboard" link.
Select the "Custom Category " link from the menu on the left under Administration. The Custom Category page will open.
If you need any assistance with managing your Custom Categories, please contact Customer Service and one of our representatives can assist you.
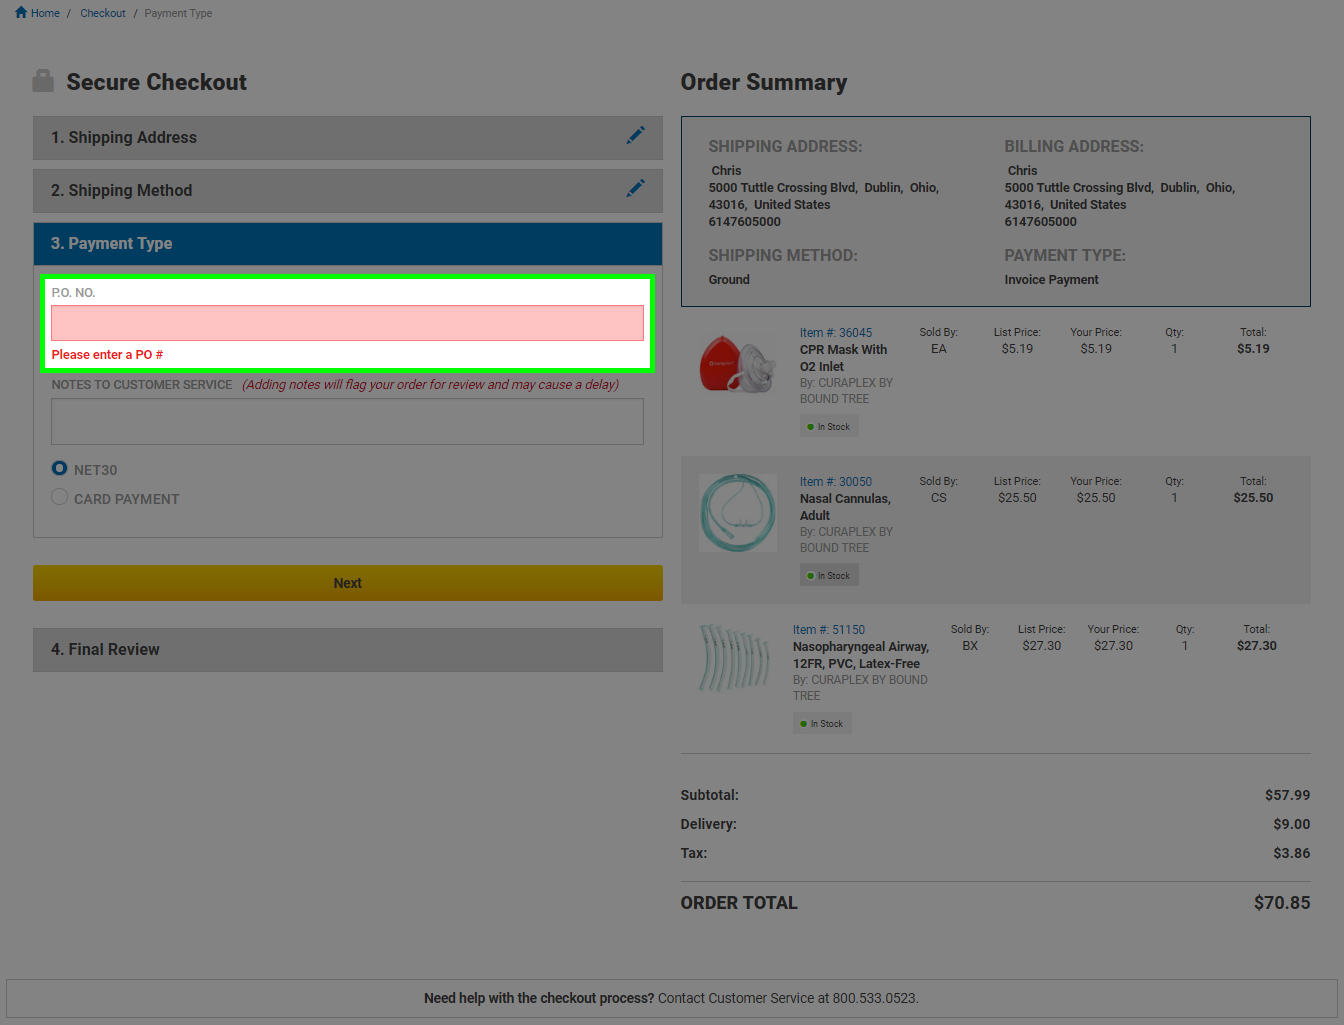
Enable this feature on your account to require purchase orders numbers to be entered whenever a user places an order. The "P.O. NO." field in checkout becomes a required field with an error message appearing when users try to proceed through checkout without entering a purchase order number.
Ask your dedicated Bound Tree Account Manager or contact Customer Service and one of our representatives can assist you with getting this feature enabled on your account.
Purchase Requests allow your organization control over who can place orders. Users on your account in the "Shopper" user group have their checkout ability removed. They can instead submit Purchase Requests to approvers on the account to have the order placed.
Advanced Purchase Requests take this control a step further and allow your organization to assign specific approvers on the account to the shoppers. This is different from the more basic purchase request flow that allows the shopper to choose their approver from all of the accounts available users with the "Purchase Approver" permission. With this feature, you can also set up multiple approvers for a shopper so that anyone of them can go in and approve the request when it has been submitted.
Add or remove users to your account, change permissions, and enable or disable your account registration access to prevent new users from linking to your organizations account. The Users section of the Account Dashboard gives you control over your account. This functionality is only available to users with the "Admin" user group on the account.
To start, click on the My Account drop down at the top of the page when signed in and select the "Account Dashboard" link.
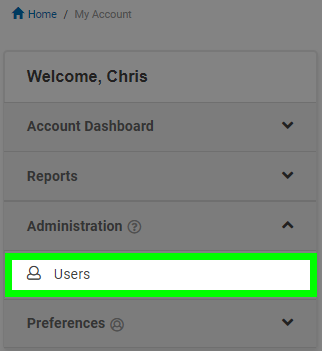
Select the "Users" link from the menu on the left under Administration.
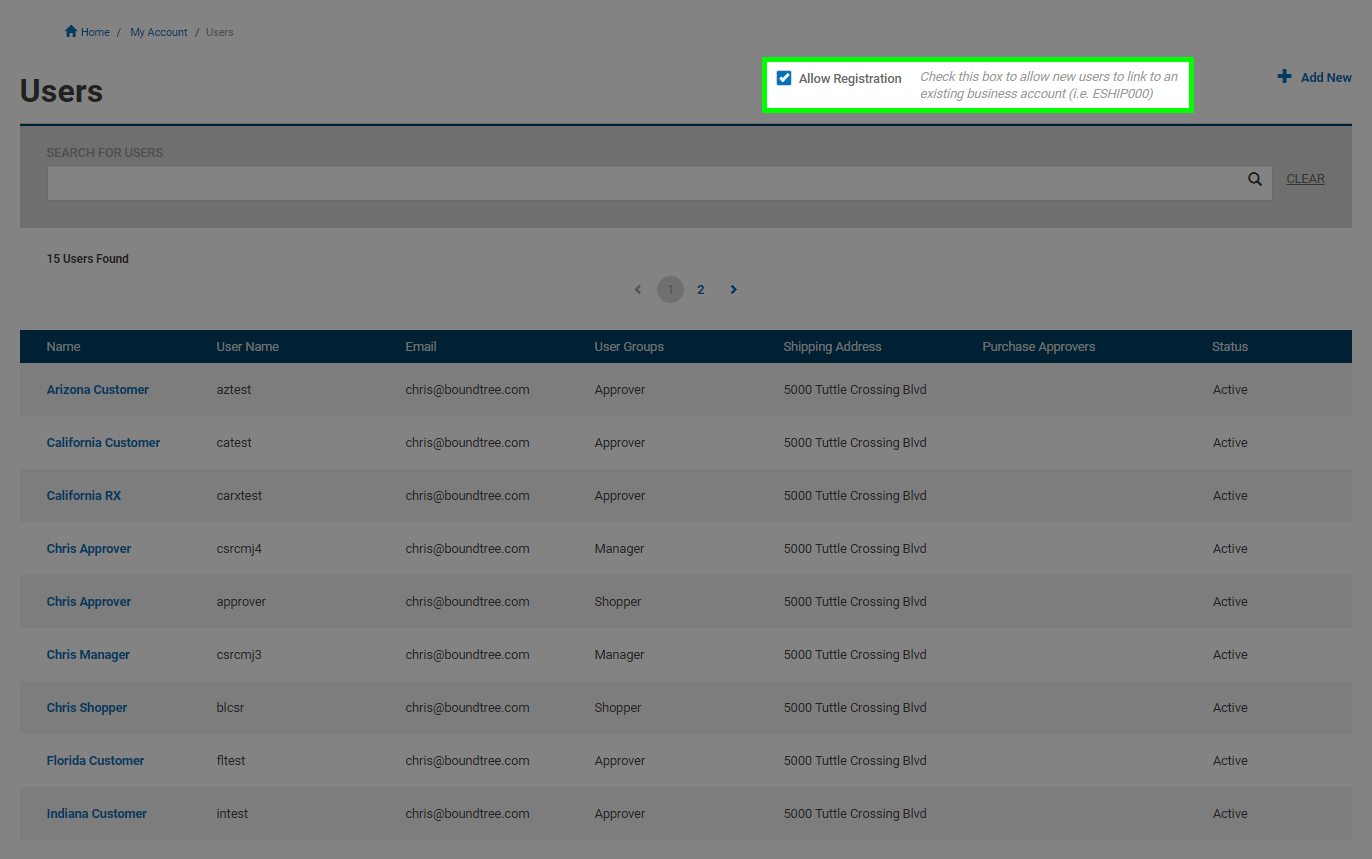
Uncheck the "Allow Registration" check box to prevent new users from linking to your account during the new account registration process. This is enabled by default so that new users can link to your account by typing in the account number and billing zip code.
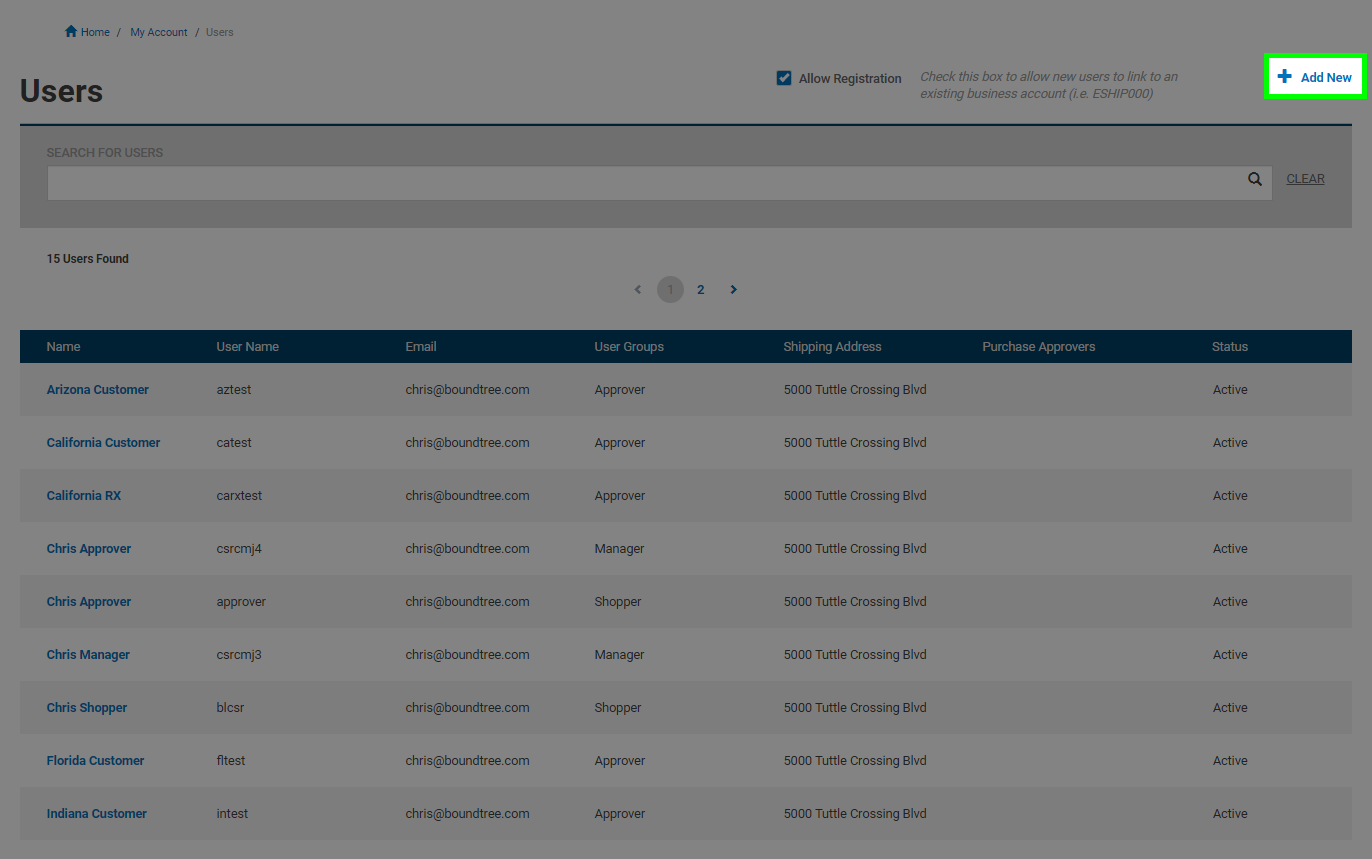
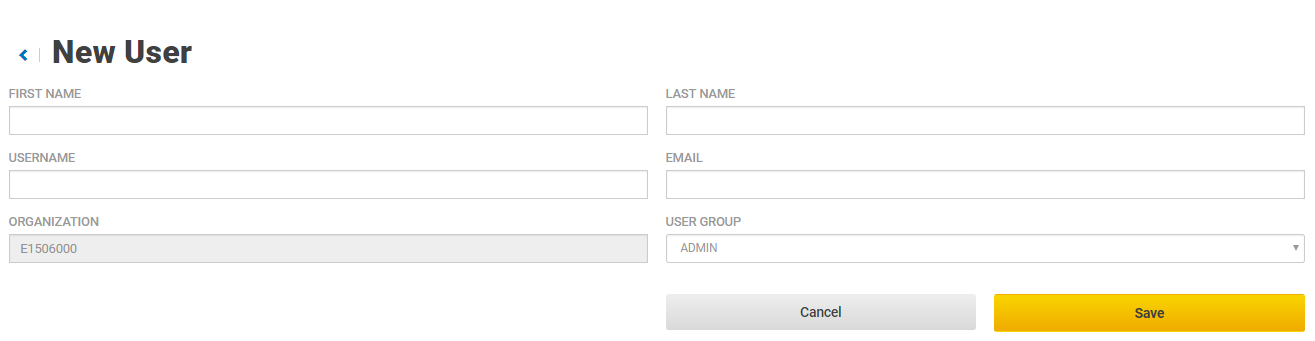
Click the "Add New" link on the page and fill out the form on the New User page. Enter a name, username, and email address for the new user. Then choose a User Group to make them a member of:
The "Admin" user group can place orders, be set up as an approver for Purchase Requests, and has access to the Users section of the "Account Dashboard"
Users with the "Purchase Approvers" user group can place orders and be set as approvers for Purchase Requests, but can't do any user management
Finally, the "Shopper" user group has their checkout ability removed and must submit Purchase Requests to an approver
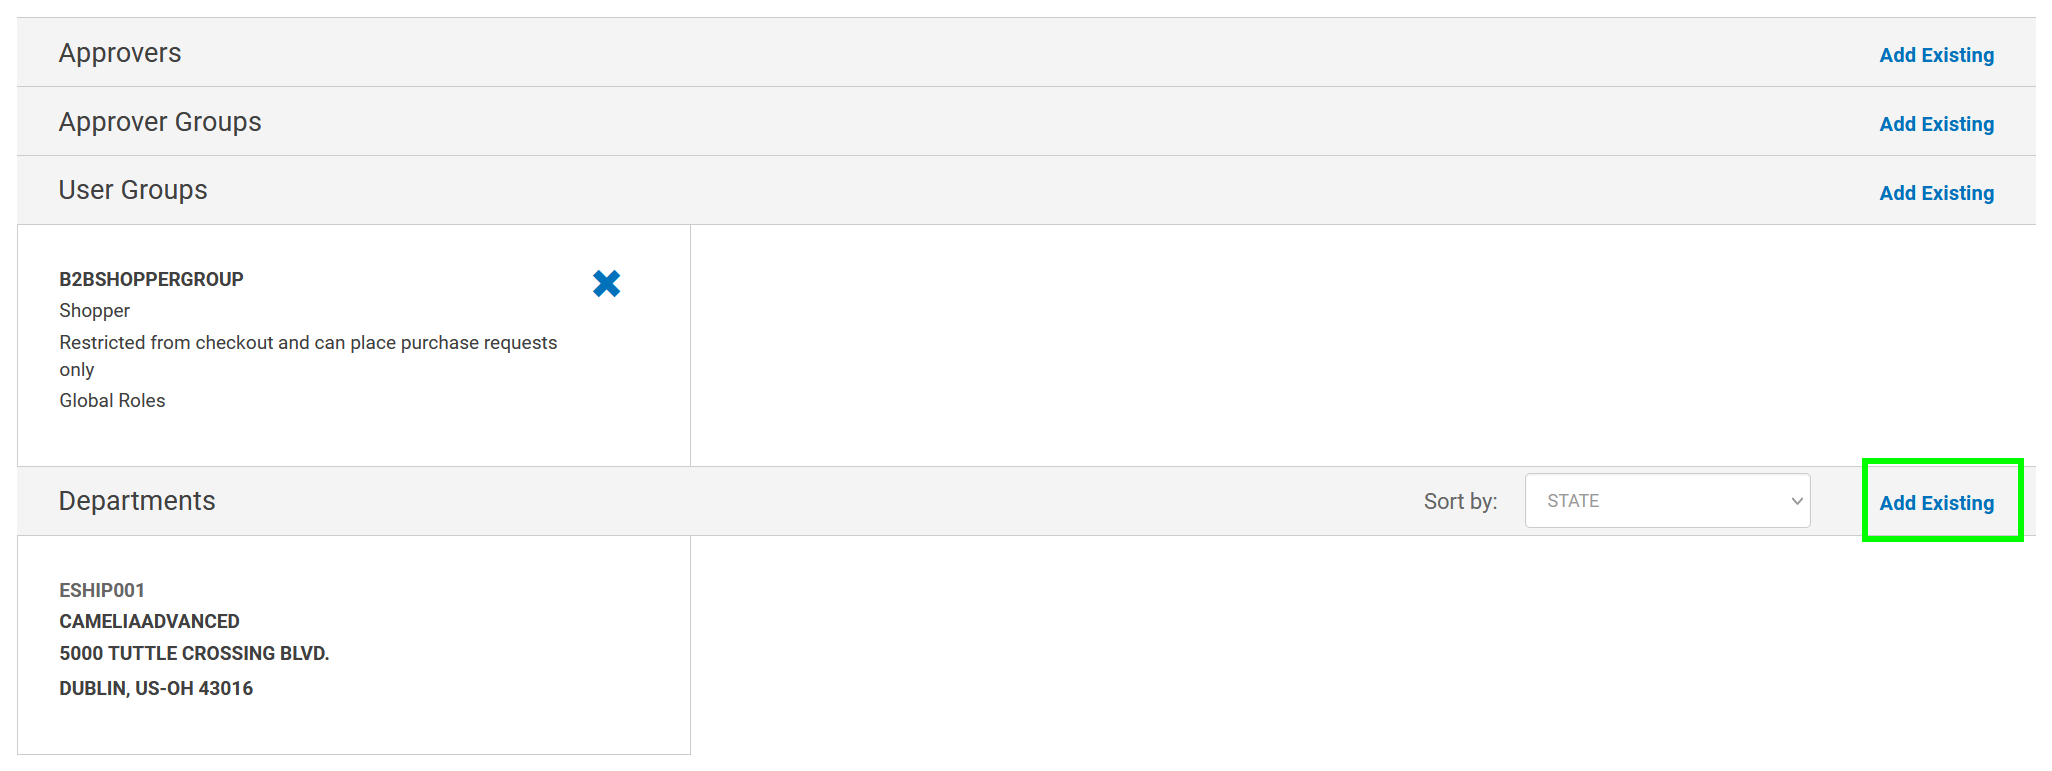
Next you will need to set up all the SHIPTOs for the user. Shoppers will need access to every SHIPTO location for which they will be submitting purchase requests. "Purchase Approvers" will need access to every SHIPTO location for which they will be placing orders as well as locations for which they will be approving orders. Click on the "Add Existing" link next to Departments to set up all the SHIPTOs for this user. Highlight all SHIPTOs the new user needs to access and click "Done". Note: this step is not necessary for Admin users because they have access to all SHIPTOs.
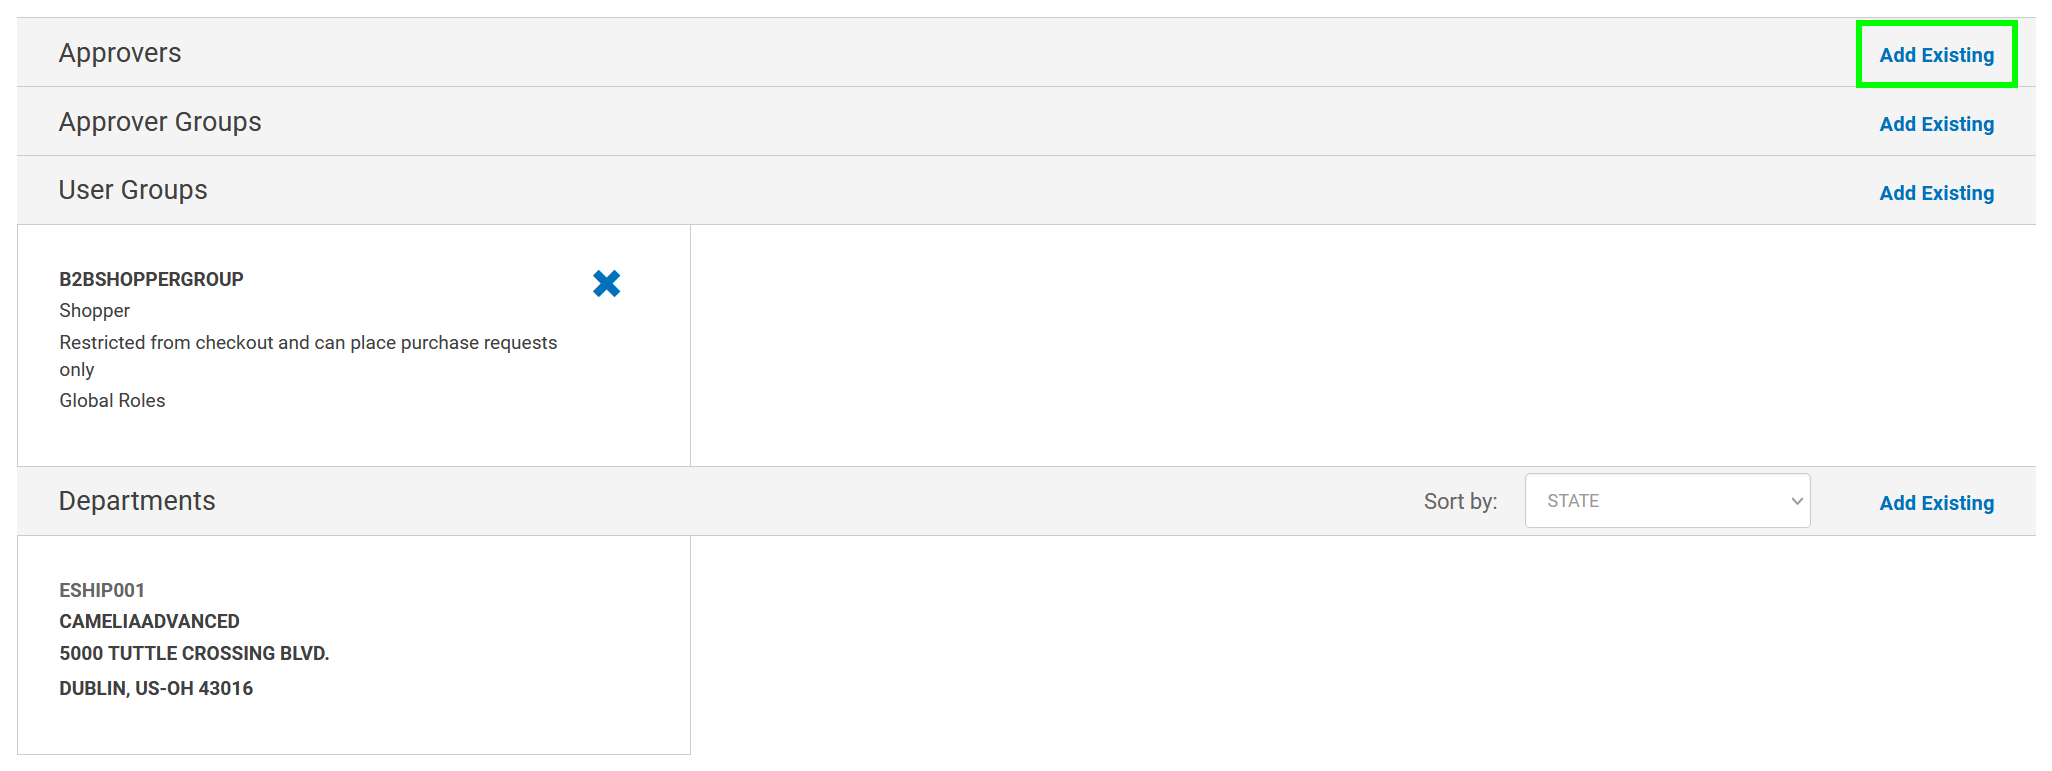
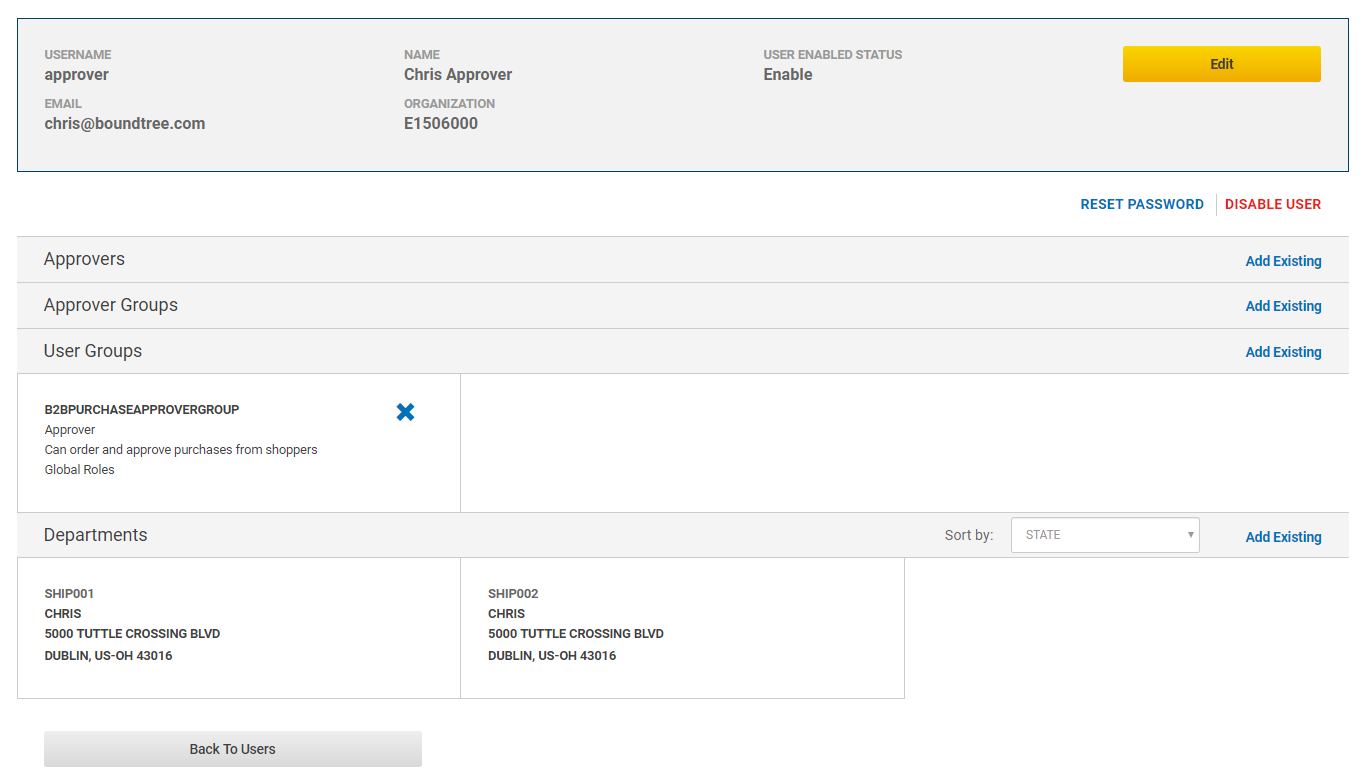
The last step is to set up a purchase request approver if your new user is a "Shopper". Users set up as "Shoppers" must have an assigned approver or they will not be able to check out. Click the "Add Existing" link next to "Approvers".
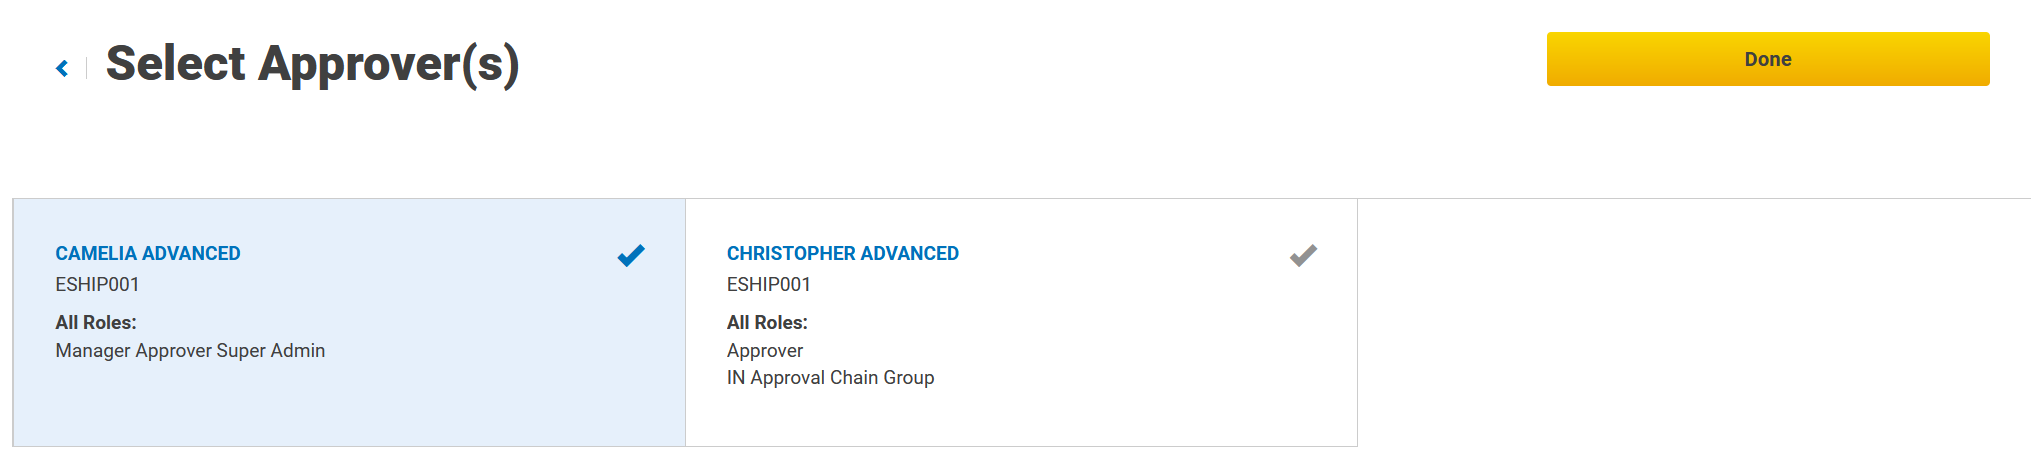
Highlight the name of the approver for this new user and click "Done".
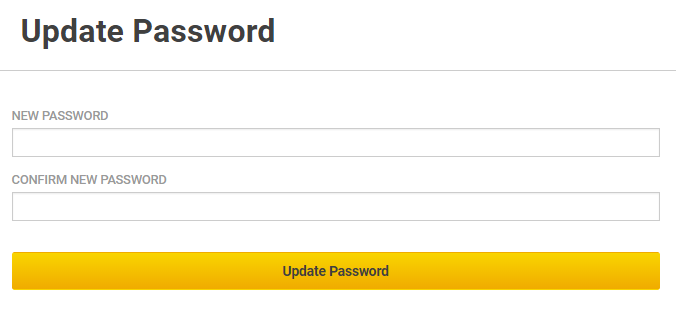
Finally, click on the username you created and click the "Reset Password" link to set up the initial password for the user. We recommend having that user change their password after they first sign in. You can manage the user group a user is set up with on this main page by clicking the "Add Existing" option on the User Groups section. You can also choose which Shipping Addresses they have access to. If the user is no longer needed, click the "Disable User" link to prevent the user from signing in.
If you need any assistance with managing your users, please contact Customer Service and one of our representatives can assist you.
Quotas & Par Levels settings allows you to set monthly purchase limits and expected usage by product and assigned department.
Quotas are a quantity budget that allows organizations to cap the number of products user accounts can purchase in a certain time frame. Par levels allow organizations to set what quantity level their organization must keep in stock at all times. Par level does not influence functionality on the site and is simply a location for the organizations to document their desired quantity level for their users.
As the administrator of your account, you can create and set quota and par levels by class (department allocated). This gives your organization control over the number of items that can be ordered by the department(s) on your account. Ask your dedicated Bound Tree Account Manager about this feature to enable it on your account.
Note: Quota classes are dependent on custom catalogs. In order to set up a quota class you must set up at least one custom catalog. When you create a quota class all the items from your custom catalog(s) will be automatically loaded.
To start, click on the My Account drop down at the top of the page when signed in and select the "Account Dashboard" link.

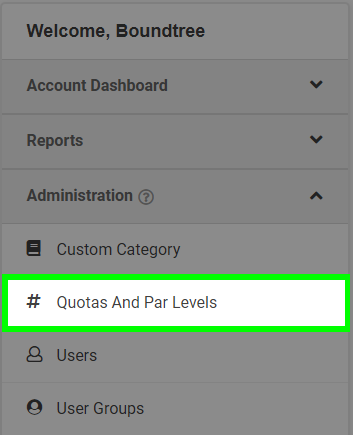
Select the "Quotas and Par Levels" link from the menu on the left under Administration.
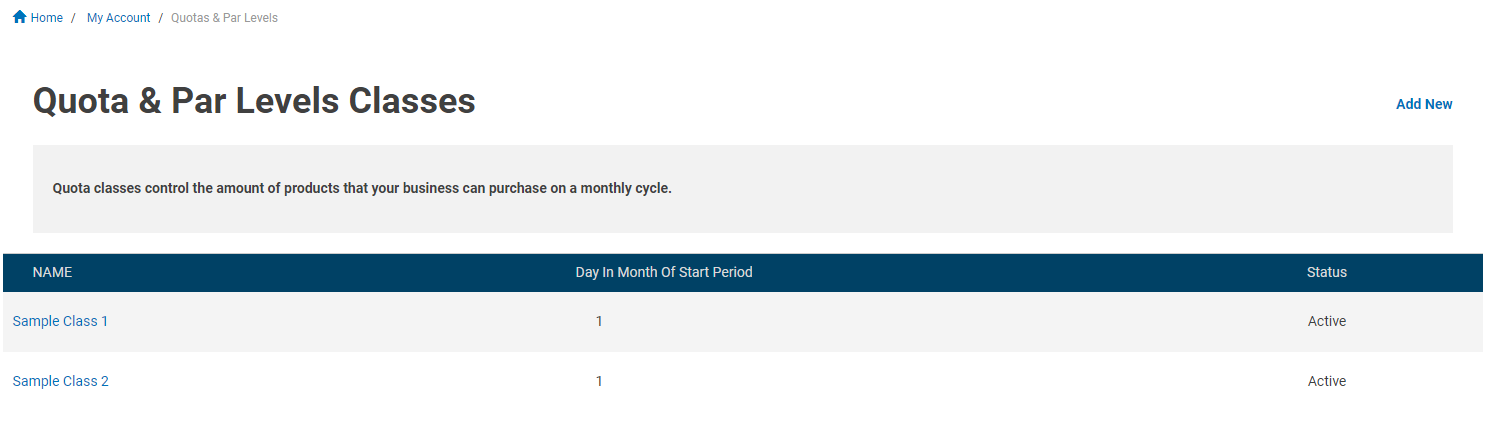
The Quota and Par Levels Classes page allows you to create new quotas and par classes, assign quota and par levels, and manage existing quota and par levels that you’ve already set.
Example: Adding a Quotas and Par Levels Class
1. From the Quotas & Par Levels Classes page, select the “Add New” button in the upper right.

2. On the next page, enter a class name and a day of the month to restart the monthly quota window. Click "Save."

3. Upon a successful save you will be taken to the Quota & Par Levels Details page.

Example: Adding Departments to a Quotas and Par Levels Class
1. To add Departments in which to set quota and par levels, select a Quotas and Par Levels class.

2. click the "Add Existing" button in the Assigned to Departments section.

3. In the following "Select Unit(s)" page, click the checkmark to the upper right of the departments you'd like to add. Click the "Done" button to finalize adding the departments.

4. The departments will now be associated with the class.
Example: Updating Products from a Quotas and Par Levels Class
-
1. To update products from a par level class, select a Quotas and Par Levels class.

-
2. Within the Quota and Par Level Details page, you can find the products with quota and par levels toward the bottom of the page. Adjustments can be made by altering the values and selecting "Update Quota & Par Levels" button.

If you need any assistance with managing your Quotas & Par Levels, please contact Customer Service and one of our representatives can assist you.